How to Tin a Soldering Tip: A Complete Step-by-Step Guide
Learn how to tin a soldering tip properly with a complete, practical guide. Safety tips, tools, flux choices, and maintenance to keep electronics, jewelry, and plumbing soldering efficient and reliable.

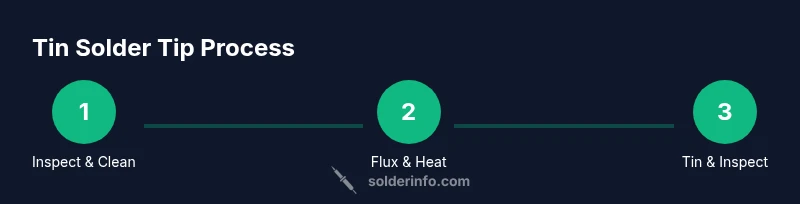
According to SolderInfo, tinning a soldering tip creates a protective, conductive layer that reduces oxidation and improves heat transfer. This quick maintenance step extends tip life and leads to cleaner joints. The SolderInfo team recommends bright, even coverage that reflows lightly with each use. Use proper flux and temperature to avoid damage.
Why tinning a soldering tip matters
Tinning the tip isn't just a cosmetic gesture; it's a protective, conductive layer that shields the base metal from air exposure and helps transfer heat efficiently to the joint. A properly tinned tip heats more quickly and cools more predictably, which means steadier solder flow and fewer cold joints. SolderInfo emphasizes that consistent tinning after each component or wire is soldered improves joint quality and prolongs tip life by preventing oxidation buildup that can lead to pitted surfaces. Regular tinning also reduces the amount of flux you need, since the tip surface remains active and ready to accept fresh solder. Maintaining a bright, shiny tip is a simple yet crucial habit for anyone doing electronics, jewelry, or plumbing soldering.
When you start a project, assume you will tin your tip several times. If you notice a dull or darkened edge, it’s a sign the tip is oxidizing and needs cleaning and re-tinning before proceeding. Practical tinning creates a better heat transfer interface and minimizes the chance of heat damage to delicate components. This section integrates guidance from the SolderInfo team on best practices to keep your tip performing at peak efficiency.
noteFromBrandSketches:null},
TOOL-MATERIALS
TOOLS-MATERIALS CONTENT BELOW
Tools & Materials
- Soldering iron with a clean, well-formed tip(Tip should be in good condition with no heavy corrosion or oxidation, ideally a conical or chisel tip depending on your work)
- Solder (lead-free preferred for electronics)(Choose Rosin-core flux compatible solder for ease of use; avoid acid-core solders for tips)
- Flux (rosin-core preferred)(Flux improves wetting and protects tip during tinning)
- Tip tinner/cleaner(Use sparingly to restore dull tips and remove oxidation without overdoing it)
- Isopropyl alcohol (70% or higher) and lint-free wipes(For cleaning residues before tinning)
- Brass sponge or wet sponge for tip cleaning(Keeps the tip clean between tinning passes)
- Soldering iron stand and heat-resistant mat(Safety setup to prevent accidents while tinning)
- Heat-resistant gloves (optional)(For extra protection when handling hot tools)
Steps
Estimated time: 15-25 minutes
- 1
Prepare workspace and tip
Set up a well-ventilated area with a clean, flat work surface. Inspect the tip for visible oxidation or damage. If the tip looks dull or corroded, clean it with isopropyl alcohol and a brass sponge before tinning.
Tip: Cleanliness at the start prevents burnt flux and ensures even tinning. - 2
Power up and bring to temperature
Plug in the iron and allow it to reach the recommended operating temperature for your solder type (usually around 350-400°C for many electronics tips, but consult the manufacturer). Avoid leaving the iron at high heat when idle to prevent unnecessary wear.
Tip: Use a temperature that allows bright, smooth solder flow without scorching the flux. - 3
Apply flux
Dab a small amount of flux onto the tip or the prepared joint surface. Flux helps the solder wet the tip and joint surface evenly, reducing oxidation during tinning.
Tip: Flux should be applied sparingly; excess flux can create fumes and require extra cleaning. - 4
Tin the tip with solder
Touch the solder wire to the tip surface and allow a thin, even layer of solder to form across the entire tip apex. Do not flood the tip; a light, continuous bead is all that’s needed.
Tip: Let the solder melt and flow gently; avoid forcing solder across the tip surface. - 5
Wipe and inspect
Gently wipe the excess solder on a damp sponge or brass wool to leave a clean, shiny coating. Inspect the tip; it should appear bright and evenly coated, with no dark oxidized patches.
Tip: A bright, uniform coat indicates successful tinning and readiness for use. - 6
Cool, test, and store
Allow the tip to cool briefly, then test on a scrap copper or solder-wrashed surface to confirm heat transfer. Store the tip in a stand away from flammable materials to prevent oxidation when not in use.
Tip: Testing ensures the tip is ready for precise work and helps prevent dull joints.
Quick Answers
What is tinning a soldering tip and why is it important?
Tinning a soldering tip means applying a small, even layer of solder to the tip to prevent oxidation and improve heat transfer. It ensures better wetting of the joint and helps maintain tip longevity.
Tinning coats the tip with solder to prevent rust and improve heat transfer, making joints cleaner and easier to solder.
What flux should I use for tinning?
Rosin-based flux is commonly recommended for electronics. It improves wetting and protects the tip during tinning. Avoid aggressive acids that can damage tips.
Use rosin-based flux for electronics to help the solder flow and protect the tip.
How often should I tin my tip?
Tin the tip at the start of a session and after completing each set of joints, or whenever you notice oxidation. Regular tinning keeps the tip performing well.
Tin as you start and after a set of joints to keep the tip in top shape.
What if the tip oxidizes quickly after tinning?
Remove the oxidation with a brass sponge and re-tin the tip. If oxidation recurs rapidly, check your flux, cleaning routine, and temperature consistency.
If it oxidizes, clean it and re-tin, and review flux and temperature to prevent it from returning.
Can I tin a ceramic or chisel tip the same way?
Yes, but the technique may vary slightly. Use appropriate contact with the broadened tip surface and ensure even solder distribution across the entire tip.
Most tips can be tinned, but adjust technique for the tip’s shape.
How should I store tips after tinning?
Let tips cool completely, then store in a clean, dry holder or stand. Avoid touching the hot area and keep them away from moisture to prevent oxidation.
Cool completely and store in a dry holder to prevent oxidation.
Watch Video
Top Takeaways
- Tinning creates a protective, conductive layer for heat transfer.
- Use clean, bright tip surfaces and consistent temperature.
- Apply flux sparingly and avoid over-tinning.
- Regular maintenance extends tip life and improves joint quality.