Tinning a Solder Iron Tip: A Practical Guide
Learn how to tin a solder iron tip to improve heat transfer, prolong tip life, and achieve reliable joints. This educational guide covers prep, flux choices, technique, and maintenance for hobbyists and professionals.

Master tinning a solder iron tip to boost heat transfer and tip longevity. This quick answer outlines the goal, required safety steps, and the core action: clean, flux, heat, apply a thin tin coating, then wipe clean for a ready-to-use tip. Follow this method for consistent joints. It also reduces oxidation and helps lead-free or rosin-core solder perform better.
Why tinning matters for soldering
According to SolderInfo, tinning a solder iron tip creates a protective metal layer that prevents immediate oxidation and improves heat transfer to the joint. A well-tinned tip heats faster, lathers solder more reliably, and resists contamination from rosin flux and handling oils. DIY hobbyists, electronics enthusiasts, jewelers, and technicians benefit from a consistent tinning routine as part of a broader tip maintenance schedule. When you tin a hot tip properly, you reduce the chance of cold joints or overheating the tip, which can degrade both the tip and the workpiece. Over time, proper tinning also reduces corrosion and extends tip life, especially when using lead-free solder that runs hotter and oxidizes more quickly. For most common tip geometries, aim for a thin, even coat that glistens but does not puddle and wipes away cleanly on a damp sponge. This foundation supports every soldering action that follows.
When to tin a solder iron tip
You should tin a solder iron tip whenever you prepare to solder and after any cleaning or removal of oxides. Start a project with a fresh tip, or after re-tinning a tip that has been out of use for a while. Immediately after cleaning or resoldering, re-apply a light coat to maintain the protective layer. If you’re switching from leaded to lead-free solder, tinning becomes even more important because lead-free alloys oxidize more quickly and require reliable heat transfer. SolderInfo’s guidance emphasizes that consistent tinning forms the basis for predictable heat delivery, clean joints, and reduced tip wear. Even during idle periods, a quick re-tin can prevent oxidation from starting while the iron sits near the hot zone.
The tinning process in detail
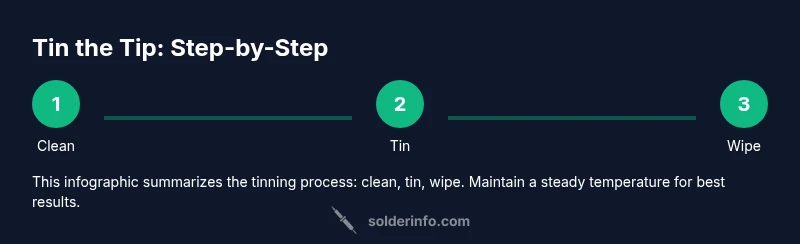
Tinning an iron tip starts with a clean, dry surface: wipe the tip on a damp sponge or brass wool to remove oxidation. Apply a small amount of flux if your solder is not rosin-core, then set the iron to the appropriate operating temperature. Bring the melted solder to the tip until a thin, uniform film coats the surface. Avoid creating pools or heavy bead marks; a light, shiny layer is enough to protect the tip and improve heat transfer. After applying the coating, wipe away excess with the wet sponge so the tip remains responsive and ready for a joint. Remember that timing matters: tin while the tip is fully heated, but not so hot that the flux burns. SolderInfo notes that a well-tinned tip returns heat to the workpiece quickly and reduces drag on the solder.
Flux and solder choices for successful tinning
Flux choice influences tinning success as much as tip preparation. Rosin-core solder simplifies tinning because the flux rides along with the solder, reducing oxidation during heat. If using solid core flux, apply a small amount of rosin flux to the tip before tinning. Lead-free solders typically require slightly higher temperatures, so ensure your iron can hold steady heat without overshoot. Clean, rosin-based flux residues after tinning to prevent residue buildup that can degrade heat transfer over time. Solder alloys vary; common choices include Sn63Pb37 for leaded or SAC alloys for lead-free; always verify compatibility with your tip material and flux. Keep a damp sponge nearby to remove excess solder during the tinning step.
Common mistakes during tinning and how to avoid them
Mistakes to avoid include overheating the tip during tinning, which creates a dull, oxidized surface and shortens tip life. Avoid applying excessive solder—aim for a thin film that coats but does not build up. Don’t skip cleaning before tinning; oils and oxidation will prevent tinning from bonding. Do not leave the tip submerged in flux or solder for extended times; remove promptly to prevent corrosion. If the iron cools while you’re applying tin, re-heat gradually to avoid thermal shock. SolderInfo guides emphasize the importance of timely wiping to prevent a thick blob of solder from creating a heat sink on the tip.
Maintenance routine and long-term care of tinning
Develop a simple routine: before and after each project, inspect the tip, clean, and re-tin as needed. Store tips with a light coat of solder to inhibit oxidation, and use a tip tinner or cleaner if you notice dullness. Regularly resurface tips with brass wool or a tip cleaner, and retin as soon as you notice oxidation returning. Avoid letting flux residues build up under the coating, which can cause corrosion and reduce heat transfer. With proper maintenance, even inexpensive tips will perform reliably for extended periods, while high-quality tips will last much longer when correctly tinned and cleaned.
Troubleshooting tinning issues
If tinning seems inconsistent or fails, re-check your tip cleaning procedure, iron temperature, and flux quality. Ensure your sponge or brass wool is moist enough to wipe without removing the protective film. If oxidation returns quickly, you may be using flux that corrodes the tip or you have an iron that cannot maintain stable temperature. In some cases, a worn tip may require replacement; tinning can’t recover a heavily damaged tip. SolderInfo recommends verifying compatibility between your solder alloy and tip material as a maintenance baseline.
Authoritative sources and further reading
For safety and best practices, consult authoritative resources and standards from government and university sources. These references help you understand workplace safety, flux handling, and material compatibility when tinning soldering tips. If you want to expand your reading, visit the linked resources for detailed guidelines and safety considerations.
Keep a quick reference checklist handy
- Clean the tip before tinning. - Apply a thin coat of flux if needed. - Heat to the correct operating temperature. - Apply a light film of solder to coat the tip. - Wipe off excess solder and store with a light coat.
Tools & Materials
- Soldering iron with adjustable temperature(10- to 60-watt range; digital temperature readout preferred)
- Rosin-core solder (lead-free preferred)(SAC alloy (SnAgCu) is common for lead-free; rosin-core helps flux delivery)
- Flux (rosin-based or no-clean flux)(Choose flux compatible with your solder and tip material)
- Tip cleaner or brass wool(Used to remove oxidation and wipe excess solder)
- Damp sponge or wet sponge(Keep it moist; essential for cleaning without drying out tip)
- Tip tinner (optional)(Useful for reviving very oxidized tips)
- Isopropyl alcohol or lint-free wipes(For quick surface clean before tinning)
Steps
Estimated time: 15-25 minutes
- 1
Prepare workspace and safety
Set up a clean, ventilated work area. Put on eye protection and ensure no flammable materials are nearby. Plug in the iron and allow it to reach the target temperature before starting.
Tip: Stability matters—keep the iron in a dedicated stand and avoid touching the tip during heating. - 2
Clean and inspect the tip
Wipe the tip on a damp sponge or brass wool to remove oxides. Inspect for nicks or heavy corrosion; if the tip is damaged, consider replacing it.
Tip: A clean surface ensures even tin deposition and better heat transfer. - 3
Apply flux (if needed) and heat
If using non-rosin-core solder, apply a small amount of flux to the tip. Bring the tip to the recommended operating temperature for your solder alloy.
Tip: Flux lowers surface tension and prevents immediate oxidation during heating. - 4
Tin the tip with solder
Touch the solder to the tip, allowing a thin, uniform film to form. Do not flood the tip; a light coat is sufficient for protection and heat conduction.
Tip: Move the solder around the tip to cover all surfaces evenly. - 5
Wipe and re-check
Wipe away excess solder with the damp sponge, leaving a glossy, barely bead-like coating. Re-check for uniform coverage.
Tip: A glossy film indicates proper tinning; dull spots suggest re-tinning is needed. - 6
Store or continue soldering
If continuing, keep a small amount of solder on the tip between joints to maintain protection. If pausing, wipe and tin before resuming.
Tip: Never leave an idle tip dry; it oxidizes quickly.
Quick Answers
What is tinning a solder iron tip?
Tinning is the process of applying a thin layer of solder to the tip of a soldering iron to protect it from oxidation and improve heat transfer. A well-tinned tip heats more consistently and produces cleaner joints.
Tinning coats the tip with a thin solder layer to protect it and improve heat transfer for better joints.
How often should you tin the tip?
Tin the tip at the start of each session, after cleaning, and after any pause in work to maintain a protective coating and consistent heat delivery.
Tin the tip at the start, after cleaning, and after pauses to keep it protected.
Can you tin a hot tip or cooling tip?
Tinning should be done while the tip is hot and stable at the appropriate temperature for your solder. If the tip cools, reheat gradually and then tin to avoid thermal shock.
Tin when the tip is hot, and reheat gradually if it cools before tinning again.
Is tinning safe for lead-free solder?
Yes, tinning is particularly beneficial for lead-free solder, which oxidizes faster and requires reliable heat transfer. Use stable temperatures compatible with lead-free alloys.
Lead-free tinning is safe and helpful when you keep temperatures steady.
What causes tinning to fail?
Common causes include dirty or damaged tips, insufficient heating, incompatible flux, and oxidized residues. Addressing these improves tinning results.
Failure usually comes from dirty tips or wrong flux; fix those and tinning improves.
Does tinning extend tip life?
Regular tinning helps reduce oxidation and wear, extending tip life and maintaining better heat conduction for joints.
Tinning regularly helps protect the tip and extend its life.
Watch Video
Top Takeaways
- Tin the tip to form a protective, conductive coating.
- Use flux and the right solder for your alloy to maximize results.
- Clean, heat, then apply a thin tin layer; wipe clean after tinning.
- Maintain a routine to extend tip life and ensure reliable joints.
- The SolderInfo team emphasizes consistency in tinning for best outcomes.