When to Tin a Soldering Iron: A Practical Guide
Learn when to tin a soldering iron, why it matters for heat transfer and tip life, and a safe, step-by-step method to tin tips for reliable joints. Includes tips, safety, and maintenance for hobbyists and professionals.

By the end of this quick answer, you’ll know exactly when to tin your soldering iron, why it improves heat transfer and tip life, and the core actions to tin the tip safely. You’ll also learn how to choose flux and solder, identify good surface prep, and use a proper cleaning routine. This short preview sets the stage for the detailed steps that follow.
What tinning a soldering iron actually does
Tinning the soldering iron means applying a thin layer of solder with flux to the tip and keeping it warm enough to form a protective, conductive coating. This coating shields the copper core from rapid oxidation, which would impede heat transfer and create cold joints. According to SolderInfo, a properly tinned tip promotes consistent heat delivery and extends tip life by reducing wear and corrosion. Skipping tinning can leave the tip oxidized, making heat transfer inefficient and increasing the risk of poor-quality joints.
Why tinning matters for heat transfer and tip longevity
A tin film on the tip lowers the energy barrier between the iron and the solder, allowing heat to flow more smoothly into the workpiece. When the coating is even, you get faster heat recovery after a sudden temperature drop and more consistent solder flow, which reduces the chance of blobby joints or cold joints. This is especially important in electronics soldering, jewelry work, and plumbing where predictable heat is essential. Proper tinning also simplifies tip cleaning and reduces the time needed to reheat after a pause in work.
When to tin your iron: timing and scenarios
Tin your iron before you start any work session, after cleaning, and after any extended idle period. If you replace a tip, tin it before resuming work. For most hobbyists, a quick tin at the start of a project and another light touch before finishing is sufficient. If you notice a dull, gray oxide on the tip during use, pause to clean and re-tin before continuing. Regular tinning aligns with a routine maintenance mindset and extends tool life.
Materials and compatibility: flux, solder, and tip prep
Choose flux appropriate for your solder type. Rosin-core flux is common for electronics, while water-soluble flux can be used for heavier joints. Use compatible solder alloy—lead-free for most electronics, or leaded when allowed by project standards. Keep a clean, dry tip and a damp sponge or brass wool for cleaning between tinning cycles. Avoid oxidized solder or aged flux; fresh materials help the tin film form correctly.
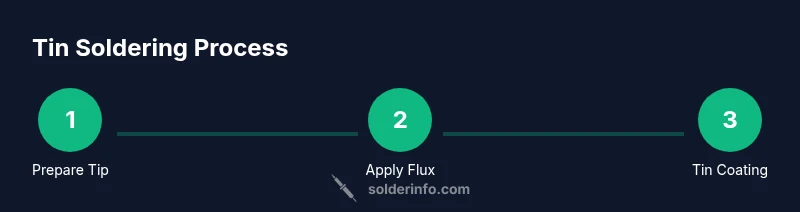
A concise, high-level tinning method
- Warm the iron to operating temperature. 2) Clean the tip with a damp sponge or brass wool until bright. 3) Apply a thin coat of flux to the tip. 4) Touch a small amount of solder to the tip and let it melt and coat the surface. 5) Remove heat and wipe away excess solder with a clean pad so you leave a uniform film. 6) Return the tip to the iron and verify a bright, even finish when you resume work.
Common mistakes and how to avoid them
Common errors include overheating the tip, using too much solder, or not cleaning before tinning. Overheating can burn flux and oxidize the tip faster, while too much solder can create a thick layer that hinders heat transfer. Always clean the tip first, use a small amount of flux, and apply a thin, even layer of solder. If flux is expired or contaminated, replace it before tinning.
Maintenance: how to re-tin and store tips
Re-tin as needed whenever you notice the tip dulling or oxidation returning. Use a small amount of flux and a fresh solder bead to re-form the protective film. After use, wipe the tip clean, and store the iron with the tip covered or re-tinned to protect against oxidation. Regular maintenance reduces the frequency of deep cleaning and tip replacements.
Safety considerations and best practices
Always work in a well-ventilated area to avoid flux fumes inhalation. Wear safety glasses to protect against hot solder splashes. Keep liquids away from the work area to prevent thermal shocks. Use a heat-resistant mat and a proper stand to avoid accidental contact with hot metal. If you’re unsure about flux expiration, test a small amount on a scrap joint first.
Quick reference: signs of proper tinning and next steps
A properly tinned tip shows a bright, uniform metallic film and a clean surface before you begin soldering. If the coating appears patchy or dull, re-clean and re-tin. Before starting a new joint, wipe the tip, re-tin lightly, and check that the iron returns to temperature quickly after a brief contact with solder.
Tools & Materials
- Soldering iron(Preferably with adjustable temperature control)
- Solder (lead-free rosin-core)(0.5–1.0 mm diameter is typical)
- Flux (rosin-core or liquid)(Choose flux appropriate for the solder alloy)
- Tip cleaner (brass sponge or copper wool)(Keep this handy for quick tip cleanup)
- Damp sponge or brass wool for cleaning(Moist sponge helps remove oxides without cooling the tip too much)
- Heat-resistant mat or work surface(Protect the bench from hot tips)
- Safety glasses(Eye protection during flux handling and soldering)
- Isopropyl alcohol (optional)(For cleaning flux residues after tinning)
Steps
Estimated time: 8-12 minutes
- 1
Power up and prep the tip
Turn the iron on and set to operating temperature. Let it reach target heat, then prepare the work area. A stable, clean environment helps you tin more consistently.
Tip: Always start with a clean, dry tip to avoid trapping oxidation. - 2
Clean the tip
Gently wipe the tip on a damp sponge or brass wool until the surface is bright and free of oxidation. This ensures the tin forms an even layer.
Tip: Avoid aggressive scrubbing that can damage the tip feathering. - 3
Apply flux
Apply a thin film of flux to the tip. Flux lowers surface tension and helps the solder spread evenly across the tip during tinning.
Tip: Too much flux can cause spattering; a light film is enough. - 4
Apply solder to the tip
Touch the solder wire to the heated tip and allow a small bead to form. The heat should melt the solder without overheating the iron.
Tip: Let the solder flow onto the tip, not the other way around. - 5
Form a thin, even film
Move the iron tip slightly to spread the solder into a uniform, shiny coating. Do not over-saturate; you want a protective film, not a blob.
Tip: If the film appears dull or crumbly, re-clean and tin again. - 6
Cool and inspect
Remove heat and let the tip cool briefly. Inspect for a smooth, bright film. If it’s uneven, repeat the cleaning and tinning steps.
Tip: A proper tinning reduces oxidation during subsequent soldering.
Quick Answers
What is tinning a soldering iron?
Tinning is the process of applying a thin, protective layer of solder (usually with flux) to the tip to prevent oxidation and improve heat transfer for cleaner joints.
Tinning coats the tip with solder to stop oxidation and help heat transfer.
Why is tinning important for beginners?
For beginners, tinning provides a reliable heat path to the workpiece and makes joints more predictable, reducing cold joints and tip wear.
Tinning helps beginners get consistent heat and better joints.
What flux should I use for tinning?
Rosin-core flux is standard for electronics; water-soluble flux can be used for heavier joints. Match flux to solder and material.
Rosin-core flux is common for electronics; pick flux that matches your solder.
How often should I tin the tip?
Tin the tip before use and after cleaning or long breaks in work. Regular tinning helps preserve the tip.
Tin before you start and after you clean or pause.
Can I tin oxidized tips?
First clean any heavy oxidation, then re-tin. If oxidation returns quickly, check storage and cleaning routine.
Clean first, then re-tin; if oxidation returns, adjust care.
Watch Video
Top Takeaways
- Tinning improves heat transfer and tip life
- Clean, flux, then tin with a thin, even film
- Avoid overheating and over-soldering the tip
- Maintain with regular re-tinning after use