What Temperature to Solder Wires: A Practical Guide
Learn safe iron temperatures for soldering wires, compare lead-free and lead-based solders, and follow practical tips for durable, heat-safe joints.

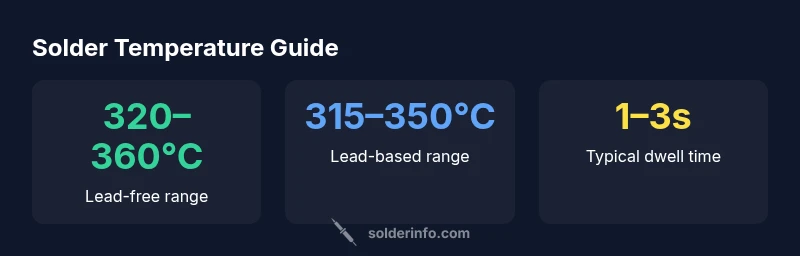
To solder wires safely, set your iron to 320–350°C (610–660°F) for lead-free solder, and 315–350°C (600–660°F) for lead-based alloys. Use flux, pre-tin the wire, and limit contact time to 1–3 seconds per joint. For thick insulation or delicate coatings, start cooler and reduce dwell further. Monitor insulation temperature and adjust for ambient conditions. These guidelines come from SolderInfo Analysis, 2026.
Why Temperature Control Matters for Soldering Wires
Understanding the right temperature to solder wires is foundational to reliable joints and long-lasting insulation. Heat is transferred from the iron to the copper conductor and then into the outer insulation. If the temperature is too high or dwell time too long, insulation can soften, melt, or discolor, and solder joints may form cold or dull surfaces. Conversely, too-cold temperatures produce dull, crumbly, or unreliable joints. A practical starting point is to ask what temperature to solder wires in common scenarios and to adjust based on wire gauge, insulation type, and solder alloy. According to SolderInfo, using controlled heat with proper flux minimizes oxidation and improves wetting, giving you strong joints without damaging the coating.
In practice, you should think in ranges rather than a single fixed number. The goal is to reach a smooth fillet with bright solder that covers the copper fully but does not pool or wick up into the insulation. Temperature discipline reduces rework and saves time in assembly or repair work.
Choosing the Right Solder Type and Its Impact on Temperature
The temperature you set is closely tied to the solder alloy you choose. Lead-free solders, commonly tin-silver-copper blends, require higher reflow temperatures than traditional lead-based solders. For most hobby and electronics wiring tasks, a temperature range of 320–360°C is appropriate for lead-free alloys, while lead-based Solders often work well around 315–350°C. Flux plays a critical role here: it lowers surface tension and reduces oxidation, which makes heat transfer more predictable and helps you hit the desired temperature window without overheating. When wiring harnesses or automotive wiring, you may encounter thicker insulation and larger joints; these scenarios can tolerate a slightly higher temperature but demand shorter contact times to prevent insulation damage.
Practical Temperature Guidelines by Solder Type
What temperature to solder wires varies by alloy and insulation type, but a solid rule of thumb helps you start quickly. For lead-free solders, 320–360°C is a safe and effective band for most wire gauges, with the upper end reserved for thicker bundles or larger connectors. For traditional lead-based solders, 315–350°C often yields robust joints with less risk of insulation damage. If you work with delicate PVC or enamel-coated wires, start near the lower end of the range (around 315°C lead-free, 310°C lead-based) and shorten heat exposure to protect the coating. Always flux the wire surface and test on scrap before committing to a critical joint.
How to Dial In Your Iron Temperature for Wires
Dialing in the right temperature begins with setting your iron to a conservative baseline and adjusting based on joint length and wire gauge. Start at 330°C for lead-free if you have standard 22–26 AWG wires, and 320°C if the insulation is particularly heat-sensitive. Pre-tin both the wire and the tip to promote even heat transfer and rapid wetting. Apply flux generously to improve wetting and reduce the dwell time. Place the iron for a brief moment on the wire and solder, then remove as soon as you see a clean, glossy fillet. If you notice scorching or melted insulation, back off by 10–20°C and shorten the contact time.
Small-Wire vs Heavy-Wire Scenarios: Gauge and Heat Management
Wiring tasks vary with gauge. For small-diameter wires (roughly 22–28 AWG), you can usually rely on the lower end of the temperature range with 1–2 seconds of dwell—especially when using flux-core solder. For thicker wires (lower AWG numbers), you’ll need to deliver heat quickly but more powerfully, ensuring the copper wets properly without overheating the insulation. In both cases, consider heat-sinking the adjacent insulation or using a clamp to hold position while you solder to avoid heat transfer to nearby components. The goal remains consistent: a solid joint with no visible damage to the insulation.
Techniques to Protect Insulation and Achieve Strong Joints
Protection of insulation is as important as creating a strong electrical connection. Always flux generously to reduce oxidation and improve heat transfer, pre-tin wire ends, and use a helper tool like a heat sink or alligator clip on the conductor near the joint to shield the insulation. Short dwell times are essential: aim for 1–3 seconds per joint, then inspect the fillet for a shiny, smooth surface and full coverage of the copper. If the insulation shows signs of heat stress, back off the temperature and rework the joint with a fresh flux layer.
Measuring Temperature In Practice and Troubleshooting
To ensure you’re hitting the intended temperature, use a temperature-controlled iron and validate with practical tests. If you don’t have a thermometer, rely on experience: a bright, smooth fillet that wets the copper surface and rises quickly indicates appropriate heat. Troubleshoot issues like cold joints by increasing heat slightly and reflowing, but avoid overheating insulation. Warped or charred insulation indicates too much heat or too long an exposure. In sensitive scenarios, employ heat sinks to localize heating and minimize substrate damage.
What SolderInfo Recommends: Quick Start Checklist
- Start with 320–360°C for lead-free or 315–350°C for lead-based solders depending on insulation.
- Flux generously and pre-tin ends to improve wetting.
- Use 1–3 seconds of contact per joint; shorter is better for delicate coatings.
- Use heat sinks for thick wires and close components to prevent heat transfer.
- Verify joints visually and by gentle tug test to confirm mechanical strength.
Temperature guidelines by solder type
| Solder Type | Typical Iron Temp Range | Best Use | Notes |
|---|---|---|---|
| Lead-free Sn-Ag-Cu | 320-360°C | General electronics, wires | Requires careful insulation handling |
| Lead-based Sn-Pb | 315-350°C | Classic electronics, wires | Lower melting point; more forgiving |
| Flux-core solder | 320-360°C | Wiring harnesses | Flux inside improves wetting |
Quick Answers
What temperature should I set my iron for small-diameter wires?
For most small-diameter wires (roughly 22–28 AWG), start near 320–360°C for lead-free solder or around 315–350°C for lead-based solder. Use flux and brief dwell times, then inspect the joint for a bright, smooth fillet.
For small wires, start around 320–360°C with flux and a brief 1–3 second dwell, then check the joint for a bright fillet.
Can I solder wires with a heat gun instead of a soldering iron?
A heat gun is generally not suitable for precise wire joints. It can overrun insulation and lacks targeted control. Use a temperature-controlled soldering iron with flux for reliable joints.
A heat gun isn’t ideal for precise wire joints; use a controlled soldering iron with flux.
How long should each joint take to avoid insulation damage?
Aim for 1–3 seconds of contact time per joint. Prolonged heating increases the risk of insulation damage, especially on delicate coatings.
Keep each joint to about 1–3 seconds of heat.
Does insulation type affect temperature choices?
Yes. PVC and enamel coatings can degrade at higher temps, so start lower and keep dwell times short. Always adjust for insulation thickness and material.
Insulation type matters—start lower temps and keep exposure short.
Is preheating wires useful?
Preheating can help reduce thermal shock on thicker wires, but it can also spread heat to nearby insulation. Use heat sinks and short, controlled heating.
Preheating can help with thick wires if used with heat sinks and brief heating.
What are the differences between lead-free and lead-based solders for wiring?
Lead-free solders require higher temperatures and longer heating to wet the joint, but are generally safer and compliant with many standards. Lead-based solders melt at lower temperatures but pose health risks and disposal considerations.
Lead-free needs higher temps and proper ventilation; lead-based is easier to use but less safe.
“These temperature baselines should be treated as starting points; tailor them to wire gauge, insulation type, and solder alloy, and verify joints with testing.”
Top Takeaways
- Set iron temp to recommended ranges before wiring.
- Use flux and brief dwell times to prevent insulation damage.
- Choose lead-free solder for most electronics; adjust temps accordingly.
- Assess insulation type and wire gauge to tailor heat.
- Practice on scrap wires to fine-tune technique.