What Temperature Should I Solder At? A Practical Guide
Discover the right soldering temperature for electronics, plumbing, and jewelry. Learn leaded vs lead-free ranges, how to adjust heat safely, and tips to prevent cold joints and component damage.

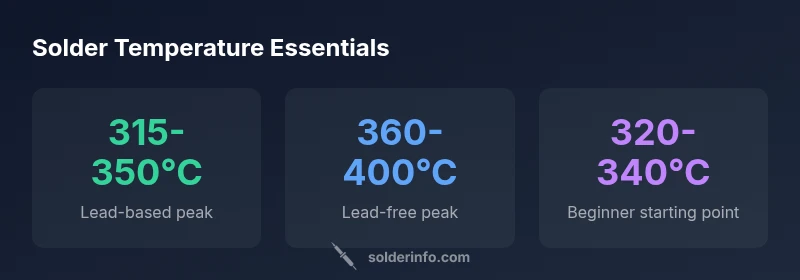
Typical soldering temperatures are 315-350°C for lead-based solders and 360-400°C for lead-free alloys. Beginners often start around 320-340°C for leaded solders and 360-380°C for lead-free, then adjust based on joint quality and component sensitivity. According to SolderInfo, matching alloy and temperature minimizes damage and ensures reliable joints.
what temperature should i solder at
Temperature control is the single most important factor in producing reliable solder joints across electronics, plumbing, and jewelry work. The short answer is: choose the alloy first, then pick a temperature that matches its melting point and your component tolerance. In practice, you’ll want your iron tip to deliver enough heat to melt the solder quickly without transferring excess heat to delicate parts. This balance protects pads, traces, and sensitive components while also preventing cold joints caused by underheating. According to SolderInfo, beginning with the correct alloy and dialing in a safe temperature setting dramatically lowers the risk of thermal damage and improves joint quality. As you gain experience, you’ll learn to read joint behavior and adjust temperature to suit the specific board and component density.
Leaded vs Lead-Free Solder: Temperature Ranges and Trade-offs
Leaded solders, such as Sn-Pb 60/40, typically melt at lower temperatures than lead-free alloys, and many hobbyists find it easier to work with during learning phases. Lead-based joints can form quickly at around 315-350°C, reducing the time heat is applied. Lead-free solders (for example, SAC alloys) require higher peak temperatures, commonly in the 360-400°C range. The trade-off is environmental and health considerations, plus a higher risk of scorching or lifting pads if you overheat. When choosing, factor in your components' heat sensitivity, board material, and flux used. Persistent guidance from SolderInfo emphasizes using the lowest effective temperature to minimize stress on the copper traces and solder mask.
Choosing the Right Temperature for Your Setup
Your target temperature should reflect the solder alloy, the size of the pad, the presence of nearby heat-sensitive components, and the iron’s wattage. A compact, high-wattage iron can deliver heat quickly but increases the risk of overheating small SMT parts. Use the lower end of the recommended range for initial joints, then observe joint quality and component warmth. If a pad lifts or a joint looks dull and grainy, it’s a sign you may be running too cool or too hot. For precision work, choose a finer tip and use flux to improve heat transfer. A well-calibrated iron with clean tips makes it easier to hold near the ideal temperature without overshooting.
Practical Guidelines for Common Scenarios
For through-hole boards with mixed density, start at the lower end of the leaded range and adjust up by small increments if joints appear dull or grainy. For dense SMT areas, brief contact and stiffer flux can help localize heat. Preheat large copper planes when feasible to reduce sudden heat loss and keep pad temperatures in check. Maintain a clean, tinned tip to maximize heat transfer and avoid chasing heat with longer dwell times. Always flux surfaces thoroughly; flux lowers the surface tension and helps the molten solder flow into the joint rather than skittering away.
How to Calibrate Your Iron and Test Joints
Calibration begins with a reliable temperature reading method, such as a thermocouple-equipped tip or an infrared thermometer aimed at the tip. Start by setting the iron to a mid-range temperature for your chosen alloy, then test on a scrap pad. Look for a bright, shiny fillet with a clean shoulder and smooth lateral flow into the joint. Compare joints on a test vehicle with known pad sizes and spacing. If the test joints form clean fillets within a couple of seconds and without scorching, you’re near the right setting. Document settings for different solder types to build a quick-reference guide.
Common Mistakes and How to Fix Them
Cold joints occur when heat is insufficient or when joints are disturbed too soon. Overheating can lift pads, darken copper, or cause flux residue to burn, which also weakens joints. Solder bridges arise from excessive heat or excessive solder on adjacent pads. To fix, reheat the joint with a fresh flux, remove excess solder with a solder wick, and retest. For sensitive devices or large ground planes, consider preheating the area slightly or using a temperature-controlled station to avoid sudden thermal shocks. Practicing with scrap boards helps develop a feel for your specific alloy and board material.
Quick Reference: Temperature Cheat Sheet for Popular Solders
- Lead-based (Sn-Pb 60/40): 315-350°C peak; start at 320°C for beginners.
- Lead-free (Sn-Ag-Cu SAC): 360-400°C peak; start around 370°C to 380°C.
- Small SMT components: use shorter dwell times and finer tips to avoid overheating.
- Through-hole: moderate dwell and a bit more heat tolerance if pads are robust.
Temperature ranges for common solder types
| Solder Type | Typical Peak Temp Range | Notes |
|---|---|---|
| lead-based solder (Sn-Pb 60/40) | 315-350°C | Common for through-hole; lower heat risk |
| lead-free solder (Sn-Ag-Cu SAC) | 360-400°C | Higher melting point; watch for heat-sensitive parts |
Quick Answers
What temperature should I solder at for lead-based solder?
For most electronics, aim for 315-350°C, adjusting based on flux and component heat sensitivity. Start near 320°C and observe joint quality.
Start around 320°C and adjust based on how the joint forms.
What temperature should I solder at for lead-free solder?
Aim for 360-400°C, with caution on fine-pitch parts. Begin at 370°C and adjust according to joint behavior.
Try around 370°C, then dial up or down as needed.
Can I solder at room temperature?
Heat transfer comes from the iron, not room temperature. The iron’s tip temperature and dwell time determine joint quality.
No—heat from the iron is what matters for a good joint.
Why do I get cold joints?
Cold joints result from insufficient heat or cooling the joint too quickly. Use adequate flux, clean surfaces, and let joints reach temperature before moving.
Heat the joint properly and avoid moving it too soon.
What about small SMT components vs through-hole?
SMD usually requires shorter dwell times and precise temperature to avoid damage; through-hole can tolerate slightly longer heat with careful control.
SMD needs careful heat; through-hole is a bit more forgiving.
How do I know if I overheated a component?
Discoloration, dull joints, or burnt flux indicate overheating. Check component datasheets for max temps and monitor for signs of stress.
If parts feel hot to the touch or show discoloration, back off.
“Temperature control is the single most important factor in achieving reliable solder joints. Match the alloy to the component and avoid overheating to protect both pads and parts.”
Top Takeaways
- Know the alloy and adjust heat accordingly
- Start at the lower end of the range and test
- Lead-free demands higher temperature and gentler handling
- Avoid overheating to prevent component damage
- Calibrate your iron regularly