Soldering Temperature Guide: What to Use for Joints
Discover the temperatures, ranges, and best practices for effective soldering across electronics, jewelry, and plumbing. Learn what temp is needed for soldering and how to dial in heat safely with practical guidance from SolderInfo.

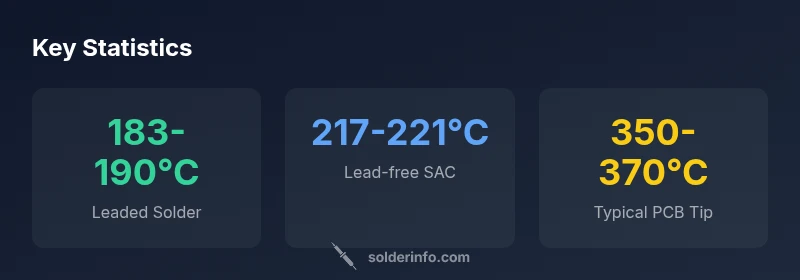
Definition: The temperature you use for soldering depends on the alloy and the material. For electronics: traditional tin–lead solders melt around 183–190°C, while lead-free SAC alloys melt around 217–221°C. In practice, keep the iron tip around 350–370°C for most electronics joints, and adjust downward for delicate components and fine pads. Always flux and avoid prolonged heat exposure.
what temp is needed for soldering: definitions and ranges
In practical soldering, the exact temperature you choose depends on the solder alloy and the workpiece. The phrase what temp is needed for soldering is often asked by beginners. The goal is to reach a temperature that ensures proper wetting and a reliable joint without damaging the substrate or components. When selecting a temperature, consider the solder's melting range, the heat capacity of the pad, and the thermal mass of the assembly. Flux helps lower the heat required to achieve good wetting and reduces the risk of cold joints. For electronics work, start with modest heat and adjust as needed to avoid lifting pads or scorching solder masks. A structured approach, including preheating or using heat sinks on larger copper areas, can help maintain control while you learn.
what temp is needed for soldering: leaded vs lead-free in practice
This section dives into how the two main categories compare in real-world use. Leaded Sn-Pb solders typically melt at 183–190°C, offering forgiving wetting and rapid heat transfer. Lead-free SAC alloys melt higher, around 217–221°C, which means your iron tip may stay hotter for longer and you must manage heat more carefully. The practical takeaway is to select the alloy first, then tune the iron temperature to just above the solder’s melting range. Using flux reduces the required heat and improves joint quality, which is especially important when dealing with high-density boards or small pads. Always test your setup on scrap pieces before attempting a critical joint, and document which alloy and temperature work best for your typical projects.
material-specific guidelines: copper, aluminum, and steel
Different substrate materials conduct heat differently, which changes the effective temperature you should apply. Copper traces and copper pads disperse heat quickly, so you may need slightly higher tip temperatures or shorter contact times to avoid cold joints. Aluminum, commonly used in some hobby projects, requires even more careful heat management due to oxide layers that resist wetting; flux choice is crucial here. Steel components can tolerate higher temperatures but may require shorter dwell times to prevent distortion. In jewelry, you may use even lower temperatures with specific low-melting alloys to avoid damaging stones or settings. The bottom line is that material family and joint geometry drive the exact temperature, not a fixed number across all cases.
electronics work: PCB joints, flux strategy, and pad care
On a PCB, temperature control is essential to prevent pad lifting, delamination, or damage to nearby components. Start with a clean, properly tinned tip and apply flux to improve wetting. Use short, controlled contacts rather than sustained heat; move the iron quickly from pad to pad to minimize heat exposure. For dense boards, consider using heat sinks or preheating techniques to distribute heat more evenly. In most electronics scenarios, aim for a tip temperature in the mid-range (320–370°C) with brief contact times and verify joints with a magnifier. The objective is a shiny, concave fillet with good wetting and no visible gaps.
jewelry soldering: precision heat control for delicate metals
Jewelry soldering prioritizes heat control to protect gemstones and heat-sensitive metals. Low-melting alloys are common, and fluxes tailored for jewelry help avoid oxidation and flux residue that can mar finishes. Temperature should be kept in a range that achieves a clean joint without melting the base metal or gold/silver settings. Practice on test pieces to refine your technique, especially around delicate joints. A small, narrow tip and a steady hand make the critical difference in jewelry work.
plumbing soldering: typical temps and considerations
Plumbing soldering often uses copper fittings and requires higher heat than electronics, but you must still avoid overheating nearby plastics or seals. Flux plays a dual role here: cleaning and improving wetting. Ensure ventilation because flux fumes and flame heat are factors. For basic copper piping with standard lead-free solders, temperatures in the mid-range are typical, but always follow local codes for lead-containing materials and flux choices. Practice on scrap pipe corners to calibrate your technique before working on a live installation.
tools, flux, and calibration: how to dial in temps
A reliable soldering setup begins with a clean, tinned tip and quality flux. Calibrate your iron by testing on scrap pieces, then adjust the temperature to the minimum that reliably wets the joint. Use a silicone mat or heat-resistant workstation, and consider heat sinks for larger pads or heavier copper pours. If you find dull or gray joints, you may be overheating or using too much heat; back off slightly and re-tin the tip. Keeping a log of successful temperature settings for different alloys and pads will speed up future projects.
common mistakes and troubleshooting: fast fixes for better joints
Common errors include overheating leading to pad lift or scorching solder mask, underheating causing cold joints, and neglecting flux protection. Cleanliness is essential: remove old residue, oxidized copper, and old flux before attempting a repair. Always re-tin the tip, re-flux the joint, and reflow with controlled heat. For stubborn joints, try a smaller tip, adjust the flux type, and use a brief, purposeful touch rather than prolonged heat exposure.
practical workflow: step-by-step electronics example
- Inspect the joint and clean the pad. 2) Apply flux to the pad and the lead. 3) Place the component and touch the tip to the joint briefly. 4) Monitor wetting; the solder should flow to form a shiny fillet. 5) Remove heat and allow to cool 1-2 seconds before moving to the next joint. 6) Inspect with a loupe and rework as needed. 7) Document which alloy and temperature worked best for future reference.
Temperature ranges for common solders
| Solder Type | Typical Temp Range | Notes | Best For |
|---|---|---|---|
| Tin-Lead (Sn-Pb) | 183-190°C | Low-melting; easy wetting; forgiving heat control | Electronics with older boards |
| Lead-free SAC305 | 217-221°C | Higher melting point; requires good heat control | Modern RoHS electronics |
| Silver-bearing alloy | 221-235°C | Excellent wetting; higher cost; good for critical joints | Precision electronics, high-reliability assemblies |
| Flux-core solder (rosin-core) | 183-221°C | Flux improves wetting; ensure flux compatibility | General purpose |
Quick Answers
What temperature should I use for electronics soldering?
For most electronics work, begin with a soldering iron in the range of 320-370°C depending on the alloy. Use leaded Sn-Pb for practice (183-190°C melting range) and shift to lead-free SAC (217-221°C) as needed. Flux improves wetting and reduces heat input.
Typically between 320 and 370 degrees Celsius, depending on the alloy, with flux helping wetting and heat control.
Is lead-free solder hotter than leaded?
Lead-free SAC alloys require higher temperatures to melt than traditional tin–lead solders. Expect a higher tip temperature range to compensate, but always avoid overheating sensitive parts.
Yes, lead-free solders generally require higher temperatures than leaded ones, but adjust carefully to protect components.
How can I tell if my iron is too hot?
Signs of excess heat include burnt flux residue, melted insulation, or lifted pads. If joints look dull or have not wetted properly, back off heat, re-flux, and reflow with care.
Look for burnt residue and dull joints; back off heat and reflow as needed.
Can flux be reused, or should I use fresh flux every time?
Flux can be reused if clean and uncontaminated, but dirty flux reduces wetting and may cause failure. Use fresh flux for critical joints and maintain a clean workspace.
Flux should be clean; reuse is possible only if it’s uncontaminated.
What about jewelry soldering vs electronics?
Jewelry soldering often uses lower-melting alloys and careful heat control to protect gemstones and settings. Electronics require strict heat management to prevent PCB damage; choose alloys and flux with those constraints in mind.
Jewelry needs precise heat control to protect stones; electronics focus on avoiding PCB damage.
“Temperature control is the backbone of successful soldering. Start with a clean, fluxed joint and apply heat only as long as needed to wet the metal.”
Top Takeaways
- Know the alloy first, then set temperature
- Flux improves wetting and reduces heat demand
- Keep the iron tip clean and tinned
- Avoid prolonged heat to protect pads and components
- Practice on scraps to dial in your settings