Temperature to Melt Solder: Key Melting Point Guide
Learn the melting temperatures for common solder alloys, how to set heat safely, and best practices for reliable joints. A practical guide from SolderInfo on temperature to melt solder, alloy choice, flux, and technique.

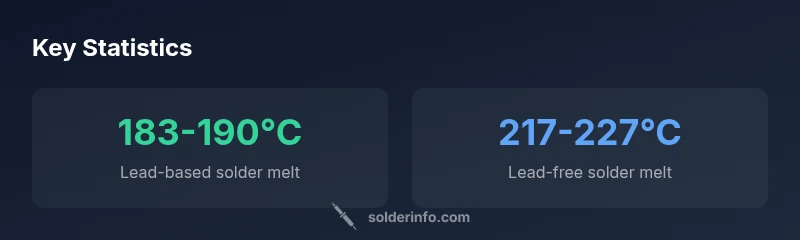
Lead-based Sn-Pb solders typically melt around 183-190°C, while lead-free variants commonly melt at 217-227°C. The temperature to melt solder depends on alloy composition and flux. For electronics work, choose a solder with a melt range above your planned heat and use flux to improve wetting. This guidance comes from SolderInfo Analysis, 2026.
Understanding melting point vs melting range
The temperature to melt solder is not a single fixed value; it depends on alloy composition and flux chemistry. Solder alloys transition from solid to liquid over a temperature window, often referred to as the melting range. For practical purposes, the observed melt begins at the lower end of that range and becomes fully liquid near the upper end. According to SolderInfo Team, awareness of this range helps hobbyists manage heat exposure to sensitive components while avoiding cold joints. In electronics, the target is to heat the joint quickly to the correct melt window and remove heat as soon as the solder flows, ensuring a reliable bond without overheating neighboring parts. This foundational understanding is essential for anyone working with the temperature to melt solder, whether soldering electronics, jewelry, or plumbing applications.
Solder alloys and their melting points
Every solder alloy has its own melting behavior. The traditional tin–lead (Sn-Pb) formulations such as 60/40 or 63/37 melt near 183–190°C, which makes them forgiving for many applications. Lead-free alloys based on tin–silver–copper (SAC) typically melt higher, around 217–227°C, reflecting stricter RoHS requirements and different interfacial properties. There are low-temperature blends (for special cases) that melt at lower temperatures but may introduce trade-offs in joint strength or mechanical properties. When planning a build, consult the data sheet for the exact range and flux compatibility, and consider the ambient temperature and draft conditions in your workspace. SolderInfo’s guidance emphasizes checking manufacturer specifications and performing validation tests on representative boards.
Choosing the right temperature for your project
Start by identifying the alloy melt range. For Sn-Pb, a common working temperature is in the 320–350°C region for the iron tip, while lead-free SAC often requires 350–370°C to achieve reliable wetting on typical FR-4 boards. The goal is to reach a temperature just above the alloy’s melting range so the solder flows smoothly but not so hot that it damages pads or traces. If you’re working with temperature-sensitive components, reduce dwell time, use heat sinks, and consider preheating larger boards to distribute heat more evenly. Flux plays a critical role by reducing surface tension and aiding capillary action, allowing you to achieve proper wetting at slightly lower temps. This approach aligns with best practices outlined by SolderInfo Team for maintaining precision in the temperature to melt solder process.
Techniques to manage heat and prevent cold joints
Preparation matters. Clean surfaces, properly tinned copper, and fresh flux minimize the amount of heat you need. Apply solder to the heated tip or paste, not directly to the pad, and maintain a steady, deliberate contact angle until the solder flows. For delicate assemblies, use a heat sink or preheat steps to prevent thermal runaway. If joints appear dull or grainy, rework with fresh flux and a slightly higher but controlled temperature. Practice on scrap boards to calibrate your eye and touch; small differences in pad size, copper weight, and component lead length can shift the ideal heat window. The goal is to be precise and repeatable in the temperature to melt solder process.
Troubleshooting temperature-related issues
Common symptoms of incorrect heat include cold joints (dull, crumbly), solder blobs, or lifted pads. Causes range from insufficient tip temperature, dirty tips, or flux degradation. Remedies include cleaning and tinning the tip, ensuring flux is fresh, and confirming the iron can hold a stable temperature within the melt window. When using lead-free solders, expect a higher melt range and adjust the iron accordingly. Always re-check connected components and avoid leaving the joint under heat for longer than necessary. These practical steps help diagnose temperature-related problems and improve joint reliability.
Safety considerations and best practices around heat and fumes
Ventilation is essential; solder smoke contains fumes that can irritate the eyes and lungs. Wear safety glasses, work in a well-ventilated area, and store flux and cleaning solvents properly. Keep the soldering iron on a stand when not in use and avoid contact with flammable materials. Use ESD-safe practices for sensitive electronics and unplug the iron before changing tips. By following heat-control practices, you can reduce board damage and ensure safer, more reliable soldering results.
Solder melting ranges vs recommended iron temperatures
| Alloy | Melting Range (°C) | Typical Iron Temperature (°C) | Notes |
|---|---|---|---|
| Sn-Pb 60/40 | 183-190 | 320-350 | Common electronics solder |
| Sn-Pb 63/37 | 183-190 | 320-350 | Widely used historically |
| Sn-Ag-Cu (lead-free) | 217-227 | 350-370 | RoHS-compliant |
| Sn-Cu (low-temp) | 227-240 | 340-360 | Alternative for certain uses |
Quick Answers
What is the difference between melting point and melting range in solders?
The melting point is a single temperature where the alloy becomes liquid; most solders melt over a range due to composition and impurities. In practice, you operate within the melt window to achieve reliable wetting.
The melting point is a single temperature, but solder melts over a range. Work within that window for best results.
Why do lead-free solders require higher temperatures than traditional Sn-Pb solders?
Lead-free alloys typically have higher melting ranges due to their tin-silver-copper composition, which affects wetting and flow. This requires adjustments in iron temperature and dwell time to avoid cold joints.
Lead-free solders melt at higher temperatures because of their alloy composition.
Should components be preheated before soldering?
Preheating can help distribute heat more evenly and protect sensitive components. Use small preheat where possible and avoid overheating the board. Flux and tip choice also influence how you set the heat.
Preheating helps, especially on larger boards; use small preheat and appropriate flux.
How does flux affect the required temperature?
Flux lowers surface tension and improves wetting, meaning you can achieve a good joint at slightly lower temperatures. Fresh flux is critical for consistent results.
Flux helps solder flow better, so you can use a bit less heat.
What should I do if a joint looks dull or grainy?
Dull or grainy joints indicate insufficient wetting or too little heat. Rework with fresh flux, clean surfaces, and adjust the iron temperature upward in controlled steps while monitoring the joint.
If a joint looks dull, try cleaning, reflowing with fresh flux, and adjusting heat.
“Mastery of soldering begins with understanding the exact melting behavior of your alloy; match heat to the melt window and rely on flux for reliable joints.”
Top Takeaways
- Identify the melt range for your solder alloy
- Use flux to improve wetting and reduce heat need
- Keep iron temperature slightly above the melt range
- Lead-free alloys require higher temperatures than Sn-Pb
- Practice with scraps to tune your process