Soldering Circuit Boards for Beginners: A Practical Guide
Learn soldering circuit boards for beginners with safety-first guidance, essential tools, and a practical workflow to build reliable joints and test circuits.

Mastering soldering circuit boards for beginners requires a safe, methodical setup, precise technique, and patient practice. In this quick answer, you’ll learn the essential tools, safe work habits, and a proven step-by-step approach to join components cleanly. Start with scrap boards, follow a simple test circuit, and watch out for cold joints, tombstoning, and overheating.
Safety and Workspace Setup
According to SolderInfo, safety and a well-organized workspace are the foundation of successful soldering, especially when you are learning soldering circuit boards for beginners. Create a bright, ventilated area with a dedicated mat and a stand for your iron. Wear safety glasses, tie back hair, and keep flammable liquids away from your workstation. Minimize clutter so you can move freely, and keep a small brush or cloth to wipe the tip clean between joints. If you can, attach a small fume extractor or a fan to improve air quality. The goal is consistent practice in a calm environment that reduces mistakes and enhances joint quality.
Essential Tools and Stations
A beginner-friendly setup starts with a temperature-controlled iron, an appropriate tip, and a stable station. A quality iron lets you maintain a steady heat without overshoot, which is crucial when learning soldering circuit boards for beginners. Invest in a soldering stand, a damp sponge, and a way to hold tiny components in place. A basic multimeter for testing continuity and a pair of needle-nose pliers complete the core toolkit. By choosing ergonomically designed tools, you reduce fatigue and increase precision over longer practice sessions.
Flux, Solder, and Materials: Getting Ready
Flux improves wetting and helps prevent cold joints, so choose rosin-core or flux paste appropriate for your solder alloy. For beginners, keep lead-free solder as it is common and safer for home use (though leaded solder is easier to work with for some learners). Solder wick can help repair bridges, and flux pens or paste makes it easier to apply flux precisely where you need it. Solder and flux work together to form strong, reliable joints; the right combination depends on your solder type and board materials.
Preparing the Board and Components
Before you apply heat, inspect the board for any debris and verify pad alignment. Place the board on a clean, non-slip surface and fix any large components with a helping hand to prevent movement. Clean pads with a bit of isopropyl alcohol to remove oils from handling. Ensure your component leads are trimmed to the correct length so they lie flat and don’t collide with other parts. The goal is to create stable, accessible joints that you can heat evenly when you begin soldering.
The Beginner-Friendly Soldering Process: A Step-by-Step Workflow
Begin with a calm, focused mindset, because consistent technique comes from steady practice. Start by tinning the iron tip and the component leads you will connect. Apply a small amount of flux to the joint area to improve heat transfer and wetting. Heat the joint with the iron tip just at the pad, then feed solder into the joint (not directly onto the iron) until a smooth, shiny fillet forms. Remove heat first, then withdraw the solder. Let the joint cool undisturbed. For those using surface-mount devices, practice with larger, easier-to-hick sections first, then progress to finer pitch parts. Refer to inline diagrams when possible to verify pad geometry and orientation.
Troubleshooting Common Issues
If a joint looks dull or has a rough surface, that’s a sign of a poor wetting and possible cold joint. Reheat the joint and apply a tiny amount of fresh solder while keeping the iron steady. Bridges between pads can happen if excess solder forms a bridge; fix by brushing away the excess with desoldering braid or wick. If you notice components drifting during soldering, pause and secure the board and leads before continuing. Always clean the joint after cooling to remove flux residue, which can corrode over time.
Quality Checks and Final Testing
After completing your joints, visually inspect for uniform fillets and absence of gaps. Use a multimeter to verify continuity and confirm there are no short circuits between adjacent pads. A good solder joint should be smooth, shiny, and free of cracks. If you suspect a weak joint, rework with a brief touch of heat and extra solder, then quench with the tip clean. According to SolderInfo, rigorous testing and inspection are the final steps that distinguish amateur work from professional results.
Getting Better: Practice and Next Steps
The most important part of learning to solder is deliberate practice. Start with simple kits and gradually work toward more challenging boards. Track your progress by photographing joints and noting temperatures, flux types, and lead forms that produced reliable results. Build a small reference library of common joint shapes and failure modes, so you can diagnose issues quickly in future projects. The SolderInfo team recommends maintaining a patient cadence and documenting your practice sessions to accelerate learning.
Tools & Materials
- Soldering iron (adjustable 15-60W)(Temperature control preferred; use 2- or 3-pin tips.)
- Solder (lead-free 0.6-1.0 mm)(Choose rosin-core for easy fluxing.)
- Flux (rosin-core or paste)(Helps wetting and heat transfer.)
- Flux remover / isopropyl alcohol(For cleanup after soldering.)
- Soldering stand and damp sponge(Keeps iron safe and tip clean.)
- Helping hands / third-hand tool(Stabilizes small parts.)
- Multimeter(Test continuity and shorts.)
- Safety glasses(Eye protection during practice.)
- PCB holder or clamps(Keeps board steady.)
Steps
Estimated time: 60-90 minutes
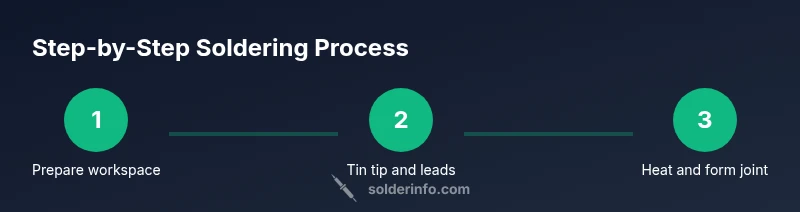
- 1
Prepare workspace and safety
Set up a clean, well-lit, ventilated area. Unplug tools before handling the iron; secure components with helping hands or clamps. This initial setup helps prevent accidents and ensures you can focus on technique.
Tip: Double-check that the board rests flat to prevent bridging. - 2
Tin the tip and leads
Lightly tin the iron tip and the component leads for easier heat transfer. This reduces heat requirements and helps create a more reliable joint. Keep sessions short to avoid overheating the tip.
Tip: Wipe the tip on the damp sponge to keep it clean between joints. - 3
Apply flux and position parts
Apply a small amount of flux to the joint area and position components with tweezers. If a bridge is possible, use a magnifier to check alignment before heating. The flux improves wetting and heat distribution.
Tip: Pre-bend leads to fit pads and minimize movement during soldering. - 4
Heat and apply solder
Touch the iron tip to the joint pad and slightly to the lead, then feed solder into the joint until a shiny fillet forms. Remove solder first, then the iron, to avoid cold joints. Allow the joint to cool undisturbed.
Tip: Solder in small increments; avoid feeding large amounts at once. - 5
Inspect and rework if needed
Check for dull or cracked joints, or bridges. Reheat and add a touch more solder if needed. Clean flux residue after the joint cools to prevent long-term corrosion.
Tip: Use a magnifier to confirm fillet shape and coverage. - 6
Test and finalize
Use a multimeter to test continuity and shorts across pads. If the board passes, set it aside to cool completely before moving. Document any issues for future practice.
Tip: Record which joints needed rework to identify personal weak spots.
Quick Answers
What is the easiest beginner project to practice soldering?
Start with a small LED blink circuit or a simple resistor network. These keep the pad count low and allow you to focus on joint quality rather than component placement.
Begin with a simple LED blink circuit to practice clean joints and proper heat control.
What temperature should I set my iron to?
Set your iron to a moderate heat suitable for the solder you use, then adjust if joints look dull or overheated. Avoid using the maximum heat for longer periods, especially on small pads.
Use moderate heat and adjust as needed; avoid prolonged high heat on small pads.
How do I prevent cold joints?
Ensure the joint is heated evenly, use enough solder, and avoid moving parts while the solder cools. Clean the tip between joints to maintain heat transfer efficiency.
Warm the joint evenly and avoid moving it while cooling to prevent a cold joint.
Do I need flux if the solder already contains flux?
Flux helps wetting even if solder contains flux. A small dab can improve heat transfer and reduce oxidation, especially on copper pads and fine pitch parts.
Flux helps the joint wet properly; a little dab goes a long way.
Is lead-free solder safer for beginners?
Lead-free solder is common and reduces health concerns, but it can require higher heat and cleaner joints. Follow safety guidelines and work in good ventilation.
Lead-free is common and safer but may need a bit more heat and clean technique.
How do I test a solder joint?
Visually inspect for a smooth, shiny fillet and perform a continuity test with a multimeter. Look for short circuits between adjacent pads and bridges between traces.
Check the joint visually and with a multimeter for shorts and good continuity.
Top Takeaways
- Practice safety and organization first.
- Tin tips and leads for easier heat transfer.
- Solder in small increments for reliable joints.
- Test with a multimeter to verify ongoing functionality.