How Solder Boards Work: A Practical Guide for Beginners
Learn how soldering boards work with practical, step-by-step guidance. Explore solder types, flux, heat transfer, safety, and troubleshooting for hobbyists and professionals seeking durable, reliable board soldering.

By understanding how solder, flux, and heat interact, you can reliably join PCB components. Solder bridges metal surfaces, flux cleans oxides to improve wetting, and the soldering iron provides controlled heat to form strong joints without overheating. This guide explains the process, materials, and best practices for safe, durable board soldering.
How the concept of how to solder boards work unfolds in practice
Understanding how to solder boards work begins with a few core ideas: the solder alloy must melt and flow to create a metallurgical bond, flux is used to remove oxides on metal surfaces and improve wetting, and heat must be delivered precisely to the joint without overheating surrounding areas. When these conditions align, the molten solder will wet both pad and lead, forming a reliable electrical connection with good mechanical strength. For hobbyists and professionals, the goal is not just a bright shiny blob but a durable joint that remains conductive under thermal and mechanical stress. According to SolderInfo, a clear mental model of these interactions helps you trouble-shoot issues when joints look dull, bridges form between pads, or joints cold-start. This page translates that model into actionable steps you can apply on a daily basis in electronics assembly and repair.
Heat, wetting, and joint formation
Heat transfer is at the heart of any solder joint. When the iron touches both the pad and component lead, heat must be sufficient to melt the solder without damaging the surrounding copper, solder mask, or components. Wetting describes how well the liquid solder spreads across the metal surface; good wetting ensures a strong mechanical and electrical bond. Flux plays a critical role by cleaning the surfaces and reducing surface tension so solder can flow evenly. In practice, you want a clean, tinned iron tip, properly fluxed surfaces, and a properly heated joint where the solder flows smoothly toward the pad and away from the component lead, forming a compact, shiny joint.
Flux and solder types: choosing what's right
Flux and solder come in several varieties designed for different situations. Rosin-based flux is common for electronics and is compatible with lead-free and leaded solders; water-soluble flux offers easy cleaning but requires thorough removal. Lead-free solders (such as tin-silver-copper blends) are standard in consumer electronics to meet environmental regulations, while leaded solders are still used in some specialized contexts. The flux you choose should match the solder alloy and the cleaning method you plan to use after soldering. A well-chosen flux not only helps wetting but also minimizes the risk of corrosion or residue that could affect long-term reliability.
Preparing the PCB and components
Preparation is the foundation of a successful soldering job. Start with a clean board: remove oils, fingerprints, and oxidation from pads using isopropyl alcohol or a dedicated cleaner. Inspect for damaged traces or lifted pads and repair if needed before attempting to solder. Place components with the correct polarity and orientation, using holders or tweezers to keep parts steady. Apply a small amount of flux to the pads or use flux-cored solder, depending on your preference and the flux type. With the board stabilized and components oriented, you’re ready to begin heating and joining the parts.
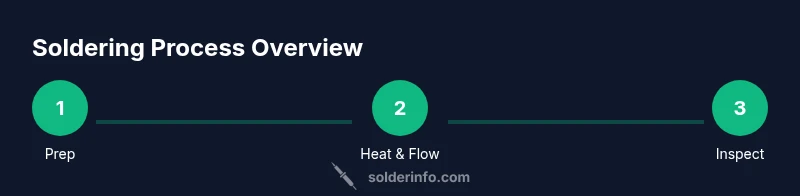
The soldering process: a step-by-step overview
The soldering process combines preparation, heat application, and inspection. Start by tinning the tip of the iron and preparing flux. Then align the component lead with the pad and apply heat to the joint, not the solder spool. Feed solder into the joint once it reaches the proper temperature, allowing capillary action to draw the solder between pad and lead. Remove heat as soon as the joint forms a smooth, shiny mound, then let it cool undisturbed. Repeat for each joint, keeping the iron tip clean and re-tinning as needed. After finishing, clean any flux residue according to the flux type used. This approach minimizes defects and increases the likelihood of reliable performance over the device’s lifetime.
Common defects and how to prevent them
Several common soldering defects can compromise board reliability. Cold joints appear dull or crumbly and result from cooling too quickly or applying insufficient heat. Bridges occur when excess solder connects adjacent pads, often caused by dragging the tip or over-tipping. Tombstoning happens when a small component stands on one end due to uneven heating or poor placement. Practice, good flux, clean surfaces, and precise heat control reduce these issues. If defects occur, desoldering and rework with proper flux and fresh solder is often the simplest fix, followed by reflow testing.
Inspection, testing, and reliability
Post-solder inspection includes visual checks for shiny, smooth joints with no excessive solder. Use a multimeter to verify continuity and resistance handlers, and perform a quick functional test if appropriate. Look for uniform fillets that meet the pad geometry and ensure there are no cold joints or bridging. For high-reliability boards, thermal cycling and vibration testing can reveal latent defects. Documentation of test results and a record of flux usage can improve repeatability across production runs and help you build a robust soldering practice.
Safety, ventilation, and workspace setup
Soldering produces fumes that can irritate the eyes and lungs, so good ventilation is essential. Work in a well-ventilated area, use a fume extractor when possible, and wear safety glasses. Keep a clean, organized workspace to prevent accidents and misplacements. Grounding measures, such as ESD straps, protect sensitive ICs and components. Finally, store lead-free and leaded materials separately and dispose of waste according to local regulations. Following these safety practices safeguards your health and protects the boards you’re assembling.
Practical tips for learners and pros
Whether you’re just starting out or working on complex boards, practice makes perfect. Start with simple through-hole boards on scrap copper and build up to surface-mount components as you gain confidence. Use a steady hand and keep movements deliberate, pausing to inspect joints frequently. Keep your tools in good condition: clean tips, flux fresh, and desoldering wick readily available. Remember to document your settings and cleaning routines to build a dependable, repeatable soldering process.
Tools & Materials
- Soldering iron (adjustable)(Prefer temperature-controlled unit; use appropriate tips for PCB work)
- Solder (lead-free Sn-Ag-Cu or tin-lead, depending on context)(Choose rosin-core solder for electronics to aid flow)
- Flux (rosin-based or water-soluble)(Apply flux to pads/components to improve wetting)
- Solder wick (desoldering braid)(For removing excess solder and correcting joints)
- Isopropyl alcohol (70-99%)(Cleans flux residues and surface oils after soldering)
- PCB holder or helping hands(Keeps the board stable during work)
- Tweezers(Precise handling of small components and leads)
- Safety glasses(Protect eyes from splashes and fumes)
- ESD wrist strap(Optional but recommended for sensitive components)
Steps
Estimated time: 45-60 minutes
- 1
Prepare your workspace and components
Set up a clean, well-ventilated area. Gather all tools and materials, verify component placements, and inspect the PCB for damage. This preparation reduces rework and ensures you can apply heat precisely where needed.
Tip: Keep a scrap board handy to practice tinning the tip and to test heat before working on the actual board. - 2
Apply flux and position parts
Apply a small amount of flux to the pads and the component leads. Place components on the board with correct orientation and alignment, using tweezers for small parts. Flux helps the solder flow and reduces oxide formation.
Tip: Do not flood pads with flux; a light coat is enough to promote wetting. - 3
Tin the iron tip and tin the pads lightly
Pulse the iron to maintain a steady temperature, then lightly tin the tip. Touch the tip to a pad to form a thin, even layer of solder on the pad surface. This helps heat transfer evenly when you solder the lead.
Tip: Keep the tip clean with a brass wool or damp sponge between joints. - 4
Join the lead and pad with controlled heat
Touch the pad and the component lead with the iron to transfer heat, then feed solder into the joint. Remove the solder, not the heat, and withdraw the iron once the solder forms a smooth, conical fillet.
Tip: Avoid touching the lead and pad with the iron tip for too long to prevent overheating nearby components. - 5
Inspect and rework as needed
Check for shiny, smooth joints with no gaps or bridges. If a joint looks dull or grainy, reheat and apply a fresh drop of solder. Remove excess solder with wick if adjacent joints are bridged.
Tip: If you see a dull joint, reheating rather than adding more solder often improves the appearance and reliability. - 6
Clean up and test
Wipe away flux residue with IPA and inspect all joints. Use a multimeter to verify continuity and check for short circuits. Perform a functional test if the circuit is safe to power.
Tip: Document any unusual joint or setting to refine your process for next time.
Quick Answers
What is the role of flux in soldering boards?
Flux cleans oxides on metal surfaces and improves wetting so solder can flow smoothly between pads and leads. It also protects the joint during heating and helps prevent cold joints.
Flux cleans oxides and improves how solder flows, which helps create reliable joints.
Can I use lead-based solder today?
Lead-based solders are still used in some contexts, but many regions require lead-free alloys for consumer electronics. Always follow local regulations and your project requirements.
Lead-based solders are still used in some cases, but lead-free is common and often required.
How do I prevent cold joints?
Ensure adequate heat is applied to the joint, keep the tip clean, and avoid excessive cooling while the solder is still molten. A good joint should flow smoothly and form a shiny fillet.
Keep the heat steady and don’t rush; a smooth, shiny joint is the goal.
What safety gear should I use?
Wear safety glasses, work in a ventilated area, and consider an ESD strap for sensitive components. Always follow safety guidelines to protect yourself from fumes.
Glasses, ventilation, and careful handling keep you safe.
What is tombstoning and how can I avoid it?
Tombstoning happens when one lead sinks or rises during soldering due to uneven heating or placement. Ensure correct orientation, stable heat, and use proper hold-downs for diagonally opposite pads.
Prevent by placing components firmly and heating evenly.
Should I clean flux after soldering?
Yes, especially with water-soluble flux. Use isopropyl alcohol to remove residues that could attract moisture or corrode over time.
Clean flux residues after soldering when required by the flux type.
Watch Video
Top Takeaways
- Understand the role of heat, flux, and wetting in joint formation
- Choose flux and solder types to match your project context
- Prepare surfaces thoroughly to minimize defects
- Apply precise heat and inspect joints for reliability
- Prioritize safety and workspace setup to protect yourself and boards