Lead Solder Temperature: Ranges, Tips, and Safety
Learn the key temperature ranges for lead solder, compare leaded and lead-free alloys, and discover measurement and safety practices for reliable joints in electronics and jewelry.

Lead solder temperature defines the melting window for your alloy and must be controlled for reliable joints. For common alloys, use the recommended range: leaded around 183°C, lead-free around 217°C, with proper flux and heat control. This concise guideline helps prevent cold joints, solder bridges, and substrate damage during assembly.
Fundamentals of lead solder temperature and why it matters
Lead solder temperature sets the threshold at which an alloy melts and wets surfaces. Understanding this parameter helps you predict when a bond will form, and when you risk damaging components or the PCB. The phrase lead solder temperature often refers to both the melting point of the alloy and the reflow temperature window necessary to create a sound joint. In practice, the temperature you choose depends on the alloy composition (lead-based vs lead-free), the flux chemistry, the thermal mass of the board, and the sensitivity of nearby components. According to SolderInfo, staying within a well-defined temperature range minimizes issues such as cold joints, solder bridges, and lifted pads. Practical soldering is as much about heat management as it is about the solder itself. The SolderInfo team emphasizes that accurate temperature control is especially critical when working with small pitch components, humidity-sensitive boards, or boards with rigid preheating requirements. The goal is to achieve a clean liquid bridge quickly, with minimal oxidation and clear, shiny joints. Achieving this balance requires both knowledge of alloy properties and discipline in handling the iron, tweezers, and flux.
Lead-based vs lead-free solder temperatures: what's the difference?
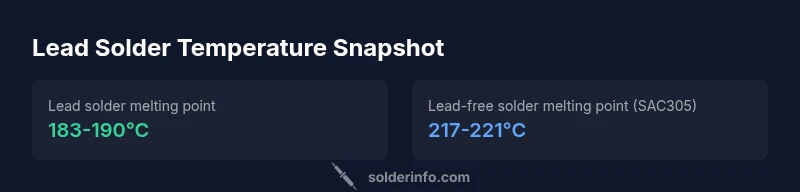
Lead-based solders, such as Sn-Pb eutectic, have a lower melting point and narrower thermal window compared with many lead-free alloys. The classic Sn-Pb eutectic composition (63/37) melts around 183°C and flows well at temperatures just above that. In contrast, most lead-free alloys used in RoHS-compliant electronics, like SAC305, melt in the range of roughly 217-221°C, and their reflow windows depend on flux and layout. This means that a lead-free process typically requires hotter irons or more precise control to avoid pinholes or delamination in metalized pads. For dual-sided boards with dense component counts, the risk of overheating is higher with lead-free alloys, but improved flux formulations and preheating strategies help compensate. When planning a soldering station setup, you should calibrate your iron or station to match the alloy you intend to use and verify the temperature using a thermocouple or thermometer at the iron tip. The difference in melting temperatures also has implications for repair work and rework: you cannot assume the same temperature for leaded and lead-free joints. Manufacturers and educators emphasize always cross-reference the alloy data sheet and flux recommendations to minimize thermal stress on the substrate. Based on SolderInfo analysis, adopting a consistent approach across alloys reduces variability in joint quality.
Measuring and controlling temperature during soldering: practical methods
Precise temperature control begins with the right tools and a calibrated instrument. For many hobbyists, the simplest method is to set the soldering iron to the recommended temperature for the chosen alloy, then verify the tip temperature with a thermocouple or infrared sensor. Use a temperature-controlled station rather than a fixed setting on a cheap iron to maintain stable heat in the face of thermal load. When working with leaded solders, a typical tip temperature range is around 300-330°C; for lead-free, expect ~330-370°C, depending on flux and pad size. However, you should not overshoot: a brief preheating stage using a preheater or hot plate for large boards can reduce the thermal shock and allow the iron to make a rapid, clean bridge. Flux choice matters: acid flux is rarely used in electronics; rosin-based flux or water-soluble flux requires different temperature strategies to avoid promoting corrosion. The user should monitor the area around the joint for signs of oxidation or dull gray residues, and wipe the tip on a damp sponge between joints to maintain surface energy. When performing thermal-sensitive work, stepwise heating and the use of heat sinks can protect adjacent copper traces and SMD components. Always verify the setup with a few test joints on sacrificial pads first.
Practical ranges for common alloys and substrates
Different substrates and component types tolerate heat differently. Copper pads on FR-4 boards are fairly forgiving, but plated-through holes, epoxy resins, and polymer adhesives can soften or delaminate if temperatures rise too high or stay too long. For leaded solders, common practice is to keep tip temperatures in the 300-330°C range, depending on flux and pad size. For lead-free solders, you might need a higher tip temperature, typically 330-370°C, again depending on pad geometry and flux chemistry. In practice, you should adopt a ramp-up and dwell strategy: preheat the board to a modest temperature (around 100-150°C) to reduce the gap between the iron and the joint, then apply heat for a brief interval until the molten solder is visible and the joint wets properly. Avoid applying heat directly to large copper pours for longer than 2-3 seconds at a time. Use thermal relief patterns on large copper features to minimize heat exposure and prevent delamination. Use preheating to protect heat-sensitive components and adhesives; if your board uses silicone-based encapsulants or epoxy resins, you may need to adjust the temperature accordingly. Finally, keep your flux at a consistent humidity-free condition and refresh flux periodically to maintain a clean surface.
Safety, environment, and best practices
Lead-based solder introduces health and environmental considerations; always work in a well-ventilated area and use fume extraction when possible. Wear eye protection and avoid inhaling fumes; wash hands after finishing and before handling food. When using lead-based solder, practice proper disposal and recycling of off-cuts and rinsed flux residues; never pour flux into drainage. For lead-free solders, the safety concerns shift toward flux vapors and activation products; still, ventilation remains essential. Ensure you store solder in a sealed container and avoid contact with food or drink. Use lead-free alloys if possible when working in shared spaces and children are nearby. The area around the workbench should be kept organized to minimize the risk of accidental contact with hot joints. Be mindful of rework: overheating can cause damage to copper traces, plastic components, or solder masks. In addition to personal safety, consider environmental aspects: use rosin-based flux when possible, and properly recycle scrap solder.
Common mistakes and how to avoid them
Common mistakes include using too little heat, causing cold joints, or applying heat for too long and damaging the substrate. Another frequent error is relying on the flux alone to drive wetting without adjusting the temperature. Always verify your iron calibration with a known reference and keep a damp sponge or brass wool to maintain a clean tip. When working with lead-free solders, the temptation to push the temperature higher can lead to delamination or tombstoning; instead, use the proper flux and preheating. Do not rework a joint by simply increasing heat; instead, adjust dwell time, tip shape, and flux. If you must rework a joint, remove the solder first, clean the pad and ensure flux remains consistent, then reflow with careful temperature control. In a professional setting, you would use a thermal profiler to map temperature across the board, ensuring no hot or cold spots; hobbyists can approximate this with careful observation and practice. Finally, keep track of the alloy you used and the store that sells it to ensure you have appropriate settings for future projects.
Comparison of common solder alloy melting ranges
| Alloy | Lead Content | Approx Melting Point | Notes |
|---|---|---|---|
| Sn-Pb eutectic (63/37) | lead-containing | 183°C | Widely used in through-hole electronics |
| Sn-Pb (60/40) | lead-containing | 183-190°C | Common in early-generation designs |
| SAC305 (lead-free) | lead-free | 217-221°C | Standard for RoHS-compliant devices |
| Sn-Cu (lead-free) | lead-free | 227-232°C | Alternative in some compact assemblies |
Quick Answers
What is the melting point of lead-based solder?
Lead-based solders, such as Sn-Pb eutectic, typically melt around 183°C and flow well slightly above that. Exact temperature depends on the specific alloy composition. Always consult the alloy data sheet for precise values.
Lead-based solder melts around 183°C; check your exact alloy for precise temperature before you solder.
Is lead-free solder hotter to melt than lead-based?
Yes, lead-free alloys generally require higher melting temperatures, commonly in the 217-221°C range for SAC305, depending on flux and board design. This is why temperature control is more critical with lead-free solders.
Lead-free solders typically melt at higher temperatures, so you’ll usually need more heat than with leaded solder.
How do you measure soldering temperature accurately?
Use a calibrated temperature-controlled station and verify tip temperature with a thermocouple or infrared thermometer. Regularly check calibration and avoid relying on the iron's display alone, especially for lead-free work.
Use a calibrated station and a thermometer to check the tip temperature regularly.
What tools help measure temperature during soldering?
Tools include thermocouples, infrared thermometers, and temperature-controlled soldering stations. For precise work, consider a small embracing thermal probe or dedicated tip thermocouple.
A thermocouple or infrared thermometer with a temp-controlled station helps you monitor heat precisely.
Can you use the same temperature for all components?
No. Different components and substrates tolerate heat differently. Adjust temperature, dwell time, and flux to protect plastics, coatings, and adhesives. Always test on sacrificial boards if possible.
No—adjust heat and dwell time for each component and substrate.
Are there safety concerns with lead-based solder?
Yes. Lead exposure and fumes require ventilation and protective measures. Dispose of scrap lead solder responsibly and wash hands after handling. Consider transitioning to lead-free alloys when feasible.
Yes—work in a ventilated area and wash hands after handling lead solder.
“Effective soldering hinges on maintaining the correct lead solder temperature to ensure reliable joints. The SolderInfo Team recommends adhering to the recommended temperature ranges for your alloy and substrate to ensure reliable joints.”
Top Takeaways
- Know your alloy: leaded vs lead-free changes the melting point.
- Calibrate tools with a reliable thermometer or thermocouple.
- Use appropriate flux and preheating to improve wetting.
- Don’t exceed recommended temps to avoid substrates damage.
- Always verify a test joint before committing to production.