How Hot to Solder: A Practical Temperature Guide
A comprehensive guide to choosing and controlling soldering temperatures for electronics, plumbing, and jewelry, with practical ranges, techniques, safety, and troubleshooting to prevent cold joints and damage.

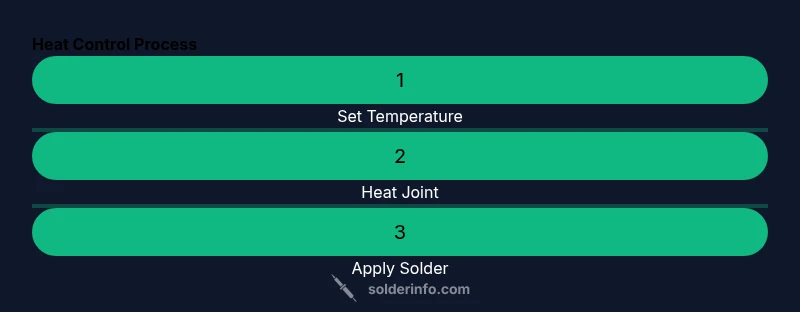
Set your iron to 350°C for leaded solder or 370–400°C for lead-free alloys. Heat the joint, not the solder, and feed solder quickly to the molten pool. Remove heat as soon as the joint flows, then inspect for a smooth, shiny fillet.
Temperature fundamentals
Soldering hinges on precise heat that melts the solder and allows it to flow into a joint. Too little heat and the solder resists flow, forming a dull, unreliable connection known as a cold joint. Too much heat and you risk lifting pads, scorching flux, or damaging sensitive components. According to SolderInfo, temperature control is the single most important factor for reliable joints. The goal is to reach the solder’s effective melting range at the joint without exceeding the heat tolerance of nearby components. For most hobbyists, the question of how hot to solder boils down to choosing the right temperature for the solder alloy you’re using and the task at hand. Leaded solders generally melt at lower temperatures than lead-free alloys, so the heat target shifts accordingly. A good joint should be shiny, smooth, and flow into the pads and wires without gaps.
Heat transfer and the role of flux
Heat transfer in soldering happens mainly through the tip and the workpiece. Flux lowers the surface tension and reduces oxide buildup, making it easier for the solder to wet the surface. If flux dries out too quickly or oxidizes, heat efficiency drops and you’ll need more time at the joint, increasing the risk of damage. Always prep the joint by cleaning it and applying fresh flux before heating. Leaded solders typically form reliable joints around 350°C, while lead-free alloys (like tin-silver-copper) require higher temperatures and shorter contact times to avoid damaging heat-sensitive components. The sanitary rule of thumb is to aim for just enough heat to melt the solder quickly and form a good fillet.
Leaded vs lead-free: choosing the right temperature
There are two broad categories of solder to consider. Leaded solder, such as 60/40 or 63/37, usually flows around 320–350°C, depending on the wire diameter and flux. Lead-free solder, often a Sn-Ag-Cu alloy, melts closer to 217–227°C for the alloy itself, but you will typically heat your tool to the 370–400°C range to ensure reliable wetting on copper PCBs and stainless parts. The higher temperature helps overcome surface oxides and ensures rapid solder flow, but it also elevates the risk of damage, especially near plastic components or heat-sensitive ICs. In practice, set up your iron within the lower end of the lead-free range and adjust as needed based on the feedback from the joint.
Prep and safety: preparing the workspace for heat control
Before you start applying heat, ensure your workspace is well-ventilated and free of flammable materials. Secure the board, wires, and components with a helping hand or small clamp. Clean the tip, tin it shallowly with a small amount of solder, and keep a damp sponge handy for tip maintenance. Flux should be fresh and appropriate for the solder you’ve chosen. A clean, organized workspace reduces surprises when you apply heat and helps you make quick, precise joints. Remember that temperature control is not just about the iron; it’s about how you manage heat transfer and timing throughout the process.
Setting and validating iron temperature
Modern irons with adjustable temperature controls are ideal for consistent results. Start at a conservative setting (for example, 350°C for leaded, 380–400°C for lead-free), then test on a scrap pad to verify that the solder wets and flows smoothly. If the solder beads up or fails to form a fillet, your temperature may be too low, your flux insufficient, or your tip not properly tinned. If joints heat too quickly, back off by 20–40°C and retry. A good practice is to measure the molten pool with a quick touch and watch for a bright, conical wetting angle that trails solder cleanly along the pad and lead.
Placement and heat application: electronics-focused technique
When soldering electronics, place the component and pad, then heat the joint for a brief moment so that the pad is warm and the flux activates. Bring the solder to the joint, not the iron, and allow capillary action to draw it into the gap. If the joint requires multiple passes, reheat quickly after each pass rather than leaving heat applied for an extended period. This minimizes damage to plastic components and reduces the risk of thermal shock to sensitive ICs. Practice on a scrap board to calibrate temperature and timing before moving to your final project.
Soldering safety and ventilation considerations
Heat and fumes from flux can irritate eyes and lungs. Work in a ventilated area and consider a small fume extractor or at least a window fan. Wear safety glasses to protect against splatter, and keep a fire extinguisher nearby in case of emergencies. The goal is to maintain stable heat while avoiding prolonged exposure to fumes. Proper ventilation also helps you notice heat-related warning signs like scorching flux or burnt board material early, allowing you to adjust temperature and technique before damage occurs.
Tools & Materials
- Adjustable-temperature soldering iron(Aim for 15–60W; set temperature to a safe starting point (leaded 350°C, lead-free 380–400°C))
- Solder (lead-based 60/40 or 63/37)(Choose based on regulatory needs; lead-free is common for consumer electronics)
- Solder (lead-free Sn-Ag-Cu)(If using lead-free solder, be ready to operate at higher temperatures)
- Flux (rosin-core or liquid flux)(Flux improves wetting and prevents oxidation)
- Solder wick (desoldering braid)(For removing excess solder and correcting mistakes)
- Soldering iron stand and damp sponge(Keeps the tip clean and ready)
- Isopropyl alcohol or flux cleaner(Used for post-solder cleanup)
- Heat-resistant mat or silicone mat(Protects the work surface from hot tips)
- Safety gear: goggles and ventilation(Protect eyes and lungs from fumes and splashes)
- Helping hands or clip vise(Stabilizes components for precise heating)
- Tip cleaner or tinning flux(Maintain tip health between joints)
Steps
Estimated time: 60-75 minutes
- 1
Preheat and prep workspace
Set the iron to the appropriate temperature for your solder type and clean the work area. Gather parts, flux, and the solder you’ll use. Inspect the board for bent pins or damaged traces before applying heat.
Tip: Test on a scrap pad to verify the iron’s temperature and solder flow. - 2
Tin the tip and prepare solder
Lightly coat the iron tip with fresh solder to improve heat transfer and prevent oxidation. Apply flux to the joint if using solid wire solder; flux helps the solder wet the surface quickly.
Tip: A well-tinned tip conducts heat more efficiently and lasts longer between cleanings. - 3
Position the joint and apply heat
Place the iron tip on the joint to heat both the pad and lead simultaneously. Heat for 1–3 seconds, just enough to bring the joint up to solder flow without overheating nearby components.
Tip: Avoid direct contact with component bodies; heat the pad and lead instead. - 4
Feed solder to the joint
Touch the solder wire to the joint, not the iron. Feed just enough solder to form a smooth fillet without excessive buildup. Withdraw the solder as soon as the joint flows and the solder height is even.
Tip: If the joint doesn’t flow, reheat briefly rather than applying more solder directly against the iron. - 5
Inspect and rework if needed
Look for a shiny, conical fillet with no dull areas or gaps. If you see a cold joint or excess solder, reheat and adjust the angle to improve wetting. Use flux to encourage flow if necessary.
Tip: Use a magnifier for small surface-mount joints to ensure good wetting. - 6
Cool, clean, and test
Allow the joint to cool naturally; avoid blowing on it. Clean excess flux residue if present and test electrical continuity. Verify alignment and ensure there is no short between adjacent pads.
Tip: Never tug on wires while the joint is cooling; this can crack or bridge joints. - 7
Finish up and store tools
Turn off and unplug equipment after cooling. Store tips clean and tinned, clean the sponge, and replace worn tips as needed. Keep your workspace ventilated for future sessions.
Tip: Wipe off any residual flux with isopropyl alcohol after cleaning.
Quick Answers
What temperature should I solder electronics at?
For electronics, start with leaded solder around 350°C and lead-free around 380–400°C. Adjust based on flux and component sensitivity, aiming for quick flow without overheating.
For electronics, begin near 350°C if you’re using leaded solder or around 380 to 400°C for lead-free. Adjust as needed to get a quick, smooth flow without overheating.
Why is my solder joint dull or lumpy?
A dull or lumpy joint usually means insufficient heat, poor flux, or contamination. Reheat with proper flux and reflow until you get a bright, smooth fillet.
Dull joints often mean not enough heat or flux. Reheat with fresh flux and reflow until it looks bright and smooth.
Can I reuse solder after removing it?
Yes, you can reuse solder worth reflow if it’s clean and has not formed oxide. If oxidation or contamination is present, discard and use fresh solder for reliable joints.
You can reuse solder if it’s clean and free of oxide; otherwise use fresh solder for best results.
What equipment helps maintain temperature?
A temperature-controlled soldering iron is ideal. If you can’t, calibrate by testing on scrap and aim for average wetting behavior. Use a quality flux and keep your tip properly tinned.
A temperature-controlled iron is best. If not available, test on scrap and adjust until you get good wetting.
Is lead-free solder hotter to work with?
Lead-free alloys generally require higher temperatures and shorter contact times. Expect slightly higher heat settings and more careful timing to avoid damage.
Lead-free solder often needs higher heat and quicker application to prevent damage.
How long should I heat a joint?
Heat just long enough to melt the solder and form a fillet, usually a second or two. Prolonged heat increases risk to pads and nearby parts.
Keep heat to a second or two; don’t linger on a joint.
Watch Video
Top Takeaways
- Match solder type to temperature; leaded vs lead-free requires different targets.
- Heat the joint, not the solder, for reliable wetting.
- Keep the tip clean and well-tinned for best heat transfer.
- Flux and ventilation are essential for clean, safe soldering.
- Inspect joints for a smooth, shiny fillet and correct any defects promptly.