How to Solder a Valve: Step-by-Step Plumbing Guide
Learn to solder a valve onto copper piping safely using lead-free solder and proper flux. This practical guide covers preparation, heat control, leak testing, and code considerations.

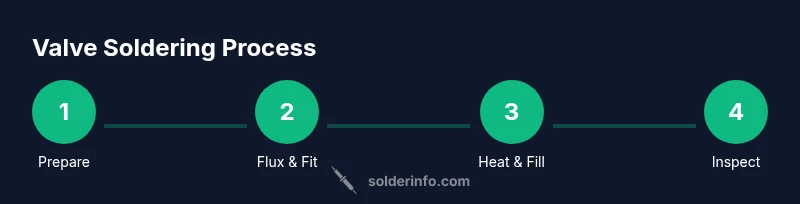
By the end of this guide you will learn to solder a valve onto copper pipe safely and code-compliantly, using lead-free solder and proper flux. You'll prep the pipe, deburr, fit the valve, tin the surfaces, heat evenly, apply solder, and perform a leak test. Always follow local plumbing codes and safety practices.
What is a solder valve and where it is used
According to SolderInfo, a solder valve is a copper-pipe fitting that uses solder to create a permanent, watertight joint between a valve body and piping. This technique is common in potable water lines and heating circuits where metal-to-metal joints must be sealed without compression or gasket components. When done correctly, solder joints are strong and durable; when done poorly, they can leak or fail under pressure. The term “solder valve” often arises in plumbing contexts where a valve must be integrated into an existing copper network. In this block, we’ll outline the practical scenarios where soldering a valve makes sense, the types of valves that are compatible with copper piping, and how to confirm that the joint will meet typical residential code requirements. For hobbyists and professionals alike, mastering this skill reduces dependence on boxed fittings and strengthens field reliability.
From the outset, plan your approach: match valve type to pipe size, choose a lead-free solder suitable for potable water, and verify that the workspace is dry, well-ventilated, and free of flammable materials. The SolderInfo team emphasizes a methodical prep process and clean joints as the foundation for leak-free performance. This means inspecting the pipe ends, trimming square, and ensuring the valve threads or sockets seat evenly for a snug fit. With proper preparation, even a novice can achieve professional results the first time.
Safety and scope of practice for soldering a valve
Before you pick up a torch or soldering iron, consider safety and code compliance. Work in a well-ventilated area and wear eye protection. If you’re new to soldering, start on a scrap section of copper to build confidence. For potable-water applications, always use lead-free solder and fittings rated for drinking water. Check your local codes; some jurisdictions require certification or inspection for new valve installations. If you are in a rental or a shared building, confirm access to the main shut-off valve and ensure you can shut off water without causing other service interruptions. Solder joints are not heat-proof components—allow adequate cooling time and perform leak testing only after the joint has cooled to the ambient temperature.
Tools and materials you’ll need
Having the right tools makes all the difference in soldering a valve. Gather essentials ahead of time to avoid mid-task trips to the store:
- Valve compatible with copper piping (ball or gate valve rated for potable water)
- Lead-free solder for plumbing (flux-core or fluxed as appropriate)
- Flux suitable for copper and soldering
- Pipe cutter and deburring tool
- Clean rags and a bucket of water for quick safety checks
- Propane or MAPP gas torch (or a compatible heat source for small-diameter joints)
- Heat shield or fireproof mat, plus a dry-work surface
- Flux brush or cotton swabs for applying flux
- Dry-fit spacers or clamps to hold parts in place during assembly
- Alcohol or solvent to wipe flux residue after cooling
Safety note: never use old lead-containing solders for potable water lines. Lead-free alloys are the standard for drinking water systems and should be your default choice. The quality of a joint depends on clean surfaces and precise heating, not the amount of heat applied.
Preparing the pipe and valve for soldering
The preparation stage is where you set the stage for a reliable joint. Start by turning off the water supply and draining the line until it’s dry. Cut the copper pipe straight and square using a quality pipe cutter, then deburr the inner and outer edges to remove sharp edges that could damage the valve seat or hinder solder flow. Inspect the valve’s ends for cleanliness; if it has threaded ends, cap and protect those threads. Clean both the pipe end and the valve socket with a cloth or a 120-grit abrasive pad until they shine. A clean, smooth surface ensures capillary action draws solder into the joint rather than forming voids. For best results, dry-fit the valve and pipe before applying flux to confirm alignment and seating depth. Soldering works best when there is a slight gap to allow capillary action to draw solder into the joint.
Fluxing and assembling the dry fit
Flux serves two critical roles: it keeps oxidation off the copper as it heats and helps the solder flow into the joint. Apply a light, even layer of flux to both the pipe end and the valve socket. Use a flux brush to spread flux evenly, avoiding thick globs that can trap air and create poor joints. Slide the valve onto the pipe ends and maintain alignment; if needed, use dry-fit spacers to keep things steady. When you’re satisfied with the fit, wipe away any flux that will not be needed after heating; excess flux can burn, creating dark residues that are difficult to remove later. The joint should be clean, dry, and properly aligned before heating begins.
Heating the joint and applying solder
Heating technique is often the most challenging part of soldering a valve. Begin with a gentle, even flame kept at a safe distance from the joint to avoid scorching flux and pipe. Move the flame around the joint in a circular motion to heat the joint evenly; avoid concentrating heat in one spot for too long. When the pipe and socket reach the right temperature—usually around the melting point of the solder—touch the solder wire to the joint and let capillary action draw it in. Do not press the solder into the joint directly; instead, allow it to melt and flow inward as the heat travels around the joint. Stop adding solder when the joint is fully filled and there is a smooth, glossy surface. Wipe away excess flux immediately after cooling.
Cleaning, cooling, and initial leak test
Let the joint cool naturally; do not quench with water or subject it to rapid cooling, which can induce stress fractures. Once cooled, lightly wipe away flux residue with a damp cloth and inspect for uniform coverage and a consistent fillet around the valve socket. If you notice a dull or bead-like appearance on the joint, re-evaluate the heat and flux flow; a poor fillet can indicate incomplete wetting of the joint. Perform a preliminary leak test by briefly pressurizing the line and inspecting for small drips. If you see a leak, dry the area, re-flow a small amount of solder, and re-test.
Final inspection and pressure testing
A thorough final inspection helps ensure long-term reliability. Use soapy water on the entire joint and slowly pressurize the system; watch for bubbles that indicate a leak. If leaks appear, identify their source and reheat the joint, applying more solder if necessary. After confirming no leaks, wipe down the area to remove flux residue and restore any panels or insulation as needed. A properly soldered valve should maintain a steady seal under typical residential pressure with no motion or noise in the joint.
Maintenance, code considerations, and best practices
Ventilation and heat safety matter even after you finish the job. Document valve specifications and pipe sizes to ensure future replacements or repairs stay within code requirements. Even small deviations from recommended practices can lead to leaks or leaks down the line. The SolderInfo team notes that consistent results come from disciplined prep, controlled heating, and careful inspection. When in doubt, consult local plumbing codes or hire a licensed plumber for complex installations.
Alternatives to soldering a valve and choosing the right approach
Soldering isn’t the only way to add a valve to a copper line. You can also use compression fittings or push-to-connect valves depending on your project, space, and preferred permanence. Each method has its own advantages and limitations in terms of tool requirements, reliability, and cost. If space is limited or if you’re working in a retrofit scenario, compression fittings may offer a faster path to a leak-free connection without the heat management concerns of soldering. If maintaining a clean, code-compliant system is essential, check whether your local jurisdiction accepts compression fittings in potable water lines.
Conclusion: practical takeaways before you start
This guide provides a clear, practical path to soldering a valve onto copper piping using lead-free solder and proper flux. The most important steps are thorough preparation, clean surfaces, controlled heating, and comprehensive leak testing. For hobbyists and professionals, these practices help ensure joints are strong and durable under pressure. The SolderInfo team emphasizes keeping safety and code compliance at the forefront of every project. As with any plumbing task, patience and methodical technique deliver the best results.
Tools & Materials
- Valve compatible with copper piping (potable-water rated)(Ball or gate valve sized for your pipe; ensure end connections match pipe diameter)
- Lead-free solder for plumbing(Choose solder rated for potable water; avoid lead-containing solders)
- Flux for copper piping(Rosin-based flux is common; follow manufacturer guidelines for flux type)
- Copper pipe cutter(Cuts clean, square ends; avoid deforming pipe wall)
- Deburring tool(Remove burrs for a smooth joint surface)
- Torch and fuel (propane or MAPP gas)(Control the flame; have a ready fire-safe surface nearby)
- Heat shield or fireproof mat(Protects surrounding materials from heat)
- Flux brush or cotton swabs(Apply flux evenly and cleanly)
- Rags and a bucket of water(For safety and cleaning flux residues)
- Dry-fit spacers or clamps(Optional, keeps valve in place during assembly)
Steps
Estimated time: 60-90 minutes
- 1
Turn off water and drain line
Shut off the supply at the main or local valve and drain the line until no water remains in the section to be soldered. This minimizes pressure and reduces the risk of a sudden leak during heating.
Tip: Open a nearby faucet to vent air and help the line drain faster. - 2
Cut and square the pipe
Use a quality pipe cutter to cut the pipe square. A square cut ensures the valve seat seals evenly and the joint fills properly with solder.
Tip: Place the cut end against a fixed stop to maintain straightness during cut. - 3
Deburr and clean the pipe end
Run a deburring tool along the inside and outside of the cut edge until it is smooth. Wipe with a clean cloth to remove debris and oils that could interfere with solder flow.
Tip: A smooth edge reduces tear-out and helps solder wick into the joint. - 4
Dry-fit the valve and pipe
Slide the valve onto the pipe ends to check seating depth and alignment. Ensure the valve will accept the pipe without binding or twisting.
Tip: If misalignment is detected, perform minor adjustments before fluxing. - 5
Apply flux to both surfaces
Coat the pipe end and the valve socket with a thin, even layer of flux. Flux prevents oxidation and helps solder flow into the joint.
Tip: Avoid applying flux on threads if the valve is threaded; only flux the copper surfaces. - 6
Heat and apply solder
Warm the joint evenly with the torch, then touch solder to the joint fillet (not directly to the heat source). The solder should melt and wick into the joint by capillary action.
Tip: Keep the flame moving to prevent overheating any single spot. - 7
Cool and clean the joint
Let the joint cool naturally, then wipe away flux residue. Inspect for a smooth, even fillet around the valve.
Tip: Never quench with water; thermal shock can cause cracks over time. - 8
Perform a leak test
Gradually restore water pressure and check the joint with soap solution or water with a small amount of dish soap. Look for bubbles that indicate a leak.
Tip: If a leak is detected, reheat and apply more solder as needed. - 9
Final inspection and code check
Confirm the joint is clean, accessible for future maintenance, and compliant with local codes. Document the valve size and solder type for future service needs.
Tip: Keep a record of the installed valve in case future repairs are required.
Quick Answers
Is soldering a valve safe for potable water lines?
Yes, when you use lead-free solder and compatible, rated valves, and follow proper prep, heating, and testing procedures.
Yes, safely, when using lead-free solder and proper technique.
Do I need to shut off water and relieve pressure before soldering?
Yes. Close the main or local shut-off valve and drain the line to reduce pressure during heating.
Yes; shut off water and drain the line.
What flux should I use for copper plumbing?
Use a flux suitable for copper and lead-free solder; rosin-based flux is common for plumbing joints.
Use rosin-based flux suitable for copper with lead-free solder.
Can I solder a valve in tight spaces?
It’s possible with careful technique, a compact torch, and good access. Plan your heat path to avoid scorching nearby components.
It can be done with careful technique and proper tools.
How do I test the valve joint for leaks after soldering?
Gradually restore pressure and apply soapy water to joints; bubbles indicate leaks that need rework.
Test the joint with pressure and soap for leaks.
Can I reuse an old valve if it leaks?
Leaking valves should be replaced; reusing or re-soldering a faulty valve is not reliable.
Replace a leaking valve rather than re-soldering.
Watch Video
Top Takeaways
- Plan, prepare, and dry-fit before heating.
- Use lead-free solder for drinking-water applications.
- Flux and heat control are critical for a leak-free joint.
- Test for leaks under gradual pressure after cooling.
- Follow local codes and document the installation.