Soldering a 3/4 Ball Valve: A Step-by-Step Guide
Learn how to solder a 3/4 ball valve safely with practical plumbing guidance. Prep, flux, heat control, leak testing, and durable, code-compliant joints.

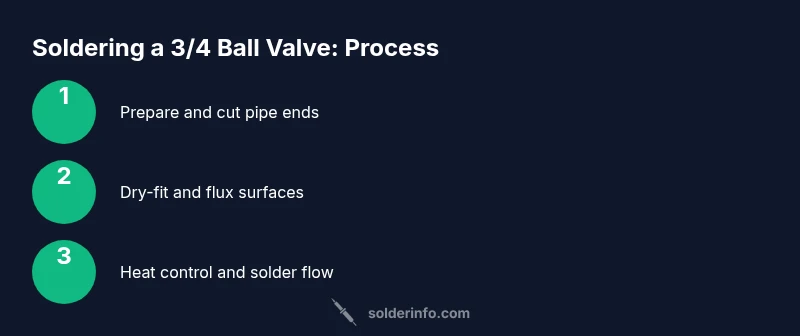
In this guide, you will learn how to solder a 3 4 ball valve safely and reliably. You’ll verify materials compatibility, prep the valve and pipes, apply flux, and perform a controlled solder joint with appropriate heat and cooling. By following the step-by-step method, you’ll minimize leaks and ensure a durable connection for plumbing or equipment projects.
3/4 Ball Valve Soldering Essentials
Anyone tackling a project with a 3 4 ball valve needs a clear plan. When you solder, you're creating a metal-to-metal seal that must withstand pressure, vibration, and temperature swings. The decision to solder rather than use compression fittings depends on pipe material, local codes, and the valve's compatibility with heat. According to SolderInfo, the most reliable joints come from clean surfaces, proper flux, and controlled heat. The SolderInfo team found that using the right flux and keeping the flame away from the valve seat reduces the risk of defective joints and leaks. Before you begin, confirm that your valve body material (often brass or stainless steel) is compatible with your pipe material (copper, steel, or PEX) and that the solder you plan to use is lead-free and rated for potable water if the system carries drinking water. In plumbing or equipment setups, even a small leak can cause water damage or downtime, so precision matters more than speed. This block will guide you through prepping, selecting materials, and executing a reliable solder joint on a 3/4 ball valve.
Material compatibility and choosing the right solder
Choosing the right solder and flux for a 3/4 ball valve requires understanding material compatibility. Brass or stainless steel valve bodies pair with copper or steel pipes and with flux types designed for plumbing. For potable water lines, select lead-free solders and flux that are rated for drinking water. Flux helps remove oxides as heat travels to the joint, promoting wetting and capillary flow. Solder types vary by alloy and diameter; for small diameter joints on 3/4 size fittings, a mid range diameter solder (about 1/8 inch) usually works well. Always verify that the solder and flux are compatible with the pipe material, the valve body, and the operating temperature range. This section helps you match the correct solder alloy and flux to your specific valve and pipe configuration.
Workspace setup and safety considerations
Set up a clean, well-ventilated workspace with a stable work surface. Use eye protection, heat resistant gloves, and a fireproof mat or board to protect the bench. Keep a damp cloth or water source handy to cool joints if needed, and have a fire extinguisher within reach. Be mindful of nearby electronics, flammable solvents, and combustible materials. Soldering 3/4 ball valve assemblies generates heat and flux fumes; ensure good ventilation and avoid breathing vapors. This foundation keeps you safe while executing precise joints, and it aligns with best practices from the SolderInfo team, who emphasize controlled heat and clean surfaces for reliable results.
Cleaning, deburring, and dry-fitting the joint
Start by cutting and deburring the pipe ends to ensure square, smooth surfaces that seat properly against the valve. Clean both the pipe ends and valve seats with a wire brush or abrasive pad to remove oxidation and oil. Dry-fit the assembly before applying flux to check alignment and ensure the joint will close evenly without gaps. Any misalignment or debris will cause mismatched joints and leaks after soldering. In this stage, you confirm the 3/4 valve aligns with the pipe and that the mating surfaces are free of burrs and oils that could inhibit solder flow.
Fluxing, tinning, and heat preparation
Apply flux to both the pipe ends and the valve fittings. The flux acts as a chemical cleaner and heat conductor, supporting even solder flow. Lightly tin the pipe ends and valve seats by applying a thin layer of solder, which reduces the heat required to form a solid joint and helps prevent heat concentration that can damage the valve seal. Ensure you do not apply flux in excess, as excess flux can create carbonization and weaken the joint. This careful preparation reduces the risk of cold joints and improves capillary action during soldering.
The soldering process: heat control and flow
With the dry-fit complete and surfaces fluxed, loosely anchor the pipe ends and gradually apply heat with the torch, keeping a steady, circular motion to distribute heat evenly. Feed solder to the joint as the metal surfaces reach a consistent temperature, allowing capillary action to draw the solder around the joint. Avoid overheating the valve seat or seating surfaces, which can degrade operation and leak resistance. Stop applying heat as soon as the solder flows fully into the joint and forms a smooth, shiny ring around the connection. Allow the joint to cool naturally without forced cooling to prevent microcracking. This stage requires patience and steady hands, and it mirrors the controlled heat approach recommended by SolderInfo.
Post-solder inspection, leak testing, and maintenance
After cooling, inspect the joint for uniform solder around the entire circumference and check for any gaps or voids. Perform a leak test by pressurizing the line and applying a soap solution to the joint; look for bubbles indicating leaks. If you detect a leak, rewarm and apply additional solder only to the affected area after cooling. Wipe away flux residues to prevent corrosion and verify the valve operation by cycling it open and closed. Regular maintenance includes periodic leak checks and ensuring the joint remains free of corrosion and deposits. Following best practices yields long lasting performance for your plumbing or equipment setup.
Tools & Materials
- Propane or MAPP gas torch(Use a stable, adjustable flame; keep away from flammable materials)
- Lead-free solder (3/8 to 1/4 inch diameter as appropriate)(Plumbing-grade solder suitable for potable water if used on drinking systems)
- Flux suitable for plumbing (rosin-core or paste flux)(Choose flux compatible with copper and brass alloys)
- 3/4 inch ball valve (brass or stainless)(Ensure it matches pipe material and pressure rating)
- Copper pipe and fittings(Clean, with square cuts; deburred ends)
- Pipe cutter(Cuts should be square and clean)
- Deburring tool and wire brush(Remove burrs and oxides for clean seating surfaces)
- Heat shield or damp cloth, for nearby components(Optional safety to protect adjacent parts)
- Rags and solvent for cleanup(Keep work area clean and flux-free surfaces clean)
Steps
Estimated time: 60-90 minutes
- 1
Inspect components and prepare workspace
Check valve and pipe compatibility; clear workspace; assemble tools and safety gear. Ensure ventilation and have water handy in case of overheating or spills. Confirm the 3/4 ball valve is the correct size for the piping and that you have lead-free solder for potable water if applicable.
Tip: Keep a dedicated workspace and avoid cross contamination with other tasks. - 2
Cut and deburr pipe ends
Cut copper pipe square using a pipe cutter. Deburr the inside and outside of the cut to prevent sharp edges from damaging the valve seat or preventing a proper seal.
Tip: Use a deburring tool in a single, gentle pass to avoid elongating the cut edge. - 3
Dry-fit the assembly
Slide the pipe ends into the valve to check fit and alignment. Ensure there is enough insertion depth and that the valve turns freely without binding.
Tip: If alignment is off, re-cut the pipe and re-debur until the fit is clean. - 4
Apply flux to joints
Coat the pipe ends and valve fittings with flux to promote cleaning and wetting. Avoid applying flux to the valve seat to prevent interference with seating.
Tip: A thin, even layer works best; too much flux can carbonize and hinder solder flow. - 5
Tin the joints
Warm the pipe ends and lightly coat with solder to create a tin layer. This reduces the amount of heat required and helps the solder flow smoothly around the joint.
Tip: Do not over-heat; the goal is a light tin coat, not a full melt. - 6
Solder the joint
Apply heat to the joint and feed solder gradually as the joint reaches the proper temperature. Stop feeding once the solder flows around the joint and forms a continuous ring.
Tip: Keep the torch moving to avoid heat concentration at any single point. - 7
Cool and inspect
Allow the joint to cool naturally, then inspect for a uniform, smooth bead with no gaps or voids. Wipe away flux residues.
Tip: Cool time may vary; avoid quenching with water. - 8
Test for leaks
Pressurize the line and apply a soap solution to the joint area. Look for bubbles indicating leaks; if found, reheat and apply more solder after cooling.
Tip: Test under realistic pressure conditions before returning to service.
Quick Answers
What is the correct solder type for plumbing connections with a ball valve?
Choose lead-free plumbing solder suitable for copper and brass alloys. Flux should be compatible with potable water systems if the line carries drinking water. This ensures safety and code compliance.
Use lead-free plumbing solder and appropriate flux for safety and code compliance.
Can I solder a 3/4 ball valve to PVC or PVC-to-metal?
PVC piping often requires solvent cement rather than soldering. For transitions to metal ball valves, use appropriate adapters or compression fittings designed for PVC-to-metal connections.
PVC usually needs adapters or cement; soldering directly to PVC is not standard practice.
What signs indicate a failed solder joint?
Look for visible gaps, dull or grainy beads, or leaks when tested. A good joint should be bright, smooth, and continuous around the circumference.
A good joint is smooth and leak-free; if you see gaps or leaks, rework it.
How long does it take for solder joints to cool and seal?
Let the joint cool naturally for several minutes before testing. Avoid forced cooling; rapid cooling can cause microcracking and weak seals.
Let it cool naturally, then test for leaks.
Is deburring the pipe ends necessary before soldering?
Yes. Deburring removes sharp edges that can prevent proper seating and create leaks. It also improves the finish of the joint.
Deburr the pipe ends to ensure a clean, leak-free joint.
Watch Video
Top Takeaways
- Prepare compatible materials before starting
- Dry-fit to ensure correct alignment
- Apply flux evenly and control heat for a clean joint
- Test for leaks thoroughly before commissioning
- Use lead-free solder for potable water systems