How to Solder Pipe with Water in It: A Practical Guide
Learn to solder a pipe with water in it safely. This step-by-step guide covers drainage, heat control, flux choices, leak testing, and practical tips to prevent blowouts and leaks in live plumbing projects.

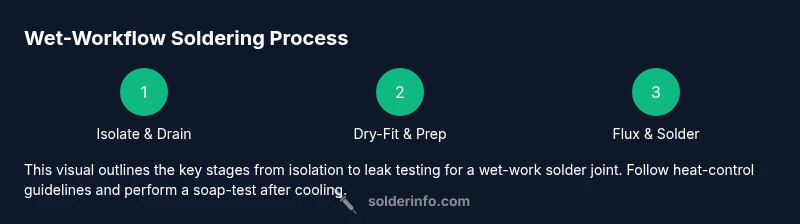
Goal: safely solder a pipe that still contains water. This guide covers draining strategies, heat control, and leak testing, so you can complete a reliable joint without scalding or failure. You’ll learn when to drain completely, what flux and solder to use, and how to verify the seal under pressure. Follow the step-by-step instructions for best results.
Understanding the challenge: solder pipe with water in it
Soldering a pipe that still contains water is a tricky scenario that tests both planning and technique. When you solder pipe with water in it, steam and rapid boiling can disrupt the capillary action that forms a tight joint. The result may be a cold joint, leak, or a joint that fails once water is restored. According to SolderInfo, readiness is the foundation of success in this task. Preparation means evaluating whether you can safely drain the line, deciding on a partial drain strategy, and knowing which fittings, flux, and solder formulations are best suited for wet-work conditions. In many cases, full drainage is the simplest path to a quality joint, but there are situations—such as a live system or inaccessible shutoffs—where you must proceed with controlled dewatering and rapid work. This section lays out the principles you’ll apply across copper and brass fixtures, ensuring you minimize heat transfer to surrounding materials while maintaining a clean joint. The keyword solder pipe with water in it will appear in real-world discussions like this because the risk profile is different from dry-work soldering, and planning matters more than forceful heat alone.
Safety first: protecting yourself and the environment
Safety is non-negotiable when dealing with live water in pipes and hot solder. Water boils at temperatures well below the solder’s melting point, so you must prevent steam burns and scalding from splashed water. PPE should include safety goggles, cut-resistant gloves, and a heat-resistant sleeve or jacket. Keep a bucket or drain pan ready, and ensure there is adequate ventilation. If you’re working near electrical components or flammable materials, shut off power to nearby outlets and clear the area of combustibles. Remember that even a small amount of water can eject hot solder or flux, so set your work area with a buffer zone and stable footing. SolderInfo recommends practicing on scrap joints before tackling live installations, especially when the pipe still carries water, to build confidence with heat control and timing.
Planning and isolation: how to approach drainage
In plumbing projects, isolation is your first line of defense. Turn off the water supply and drain the line as much as possible. If there is a valve downstream of the joint, close it to reduce backflow risk. Use a rag or towel to catch any residual drips and wipe the pipe dry where you’ll apply flux. If you can’t drain completely, you’ll need to design a safe sequence: first secure the joint, then apply flux to the dry portion, and prepare to work quickly as the water recedes under heat. Dry-fit the pipe and fittings to confirm alignment and ensure there’s no binding. Soldering a pipe with water in it requires fast, precise action and a plan for removing moisture without scalding, so take your time with setup and do not rush the joint formation.
Materials and flux choices for wet-work joints
Flux is essential for copper soldering, and selecting the right flux can make or break a wet-work joint. For plumbing copper, use a lead-free solder compatible flux with robust corrosion resistance. Rosin-core flux is common for electronics but can be effective for plumbing when properly wiped and dried. When water is present, you may choose a water-soluble flux for easier cleanup, but be mindful of its compatibility with your solder alloy. Pre-clean the pipe with emery cloth to remove oxidation and create surface tension favorable to capillary action. Use quality, lead-free solder (such as a tin-copper alloy) designed for potable water systems, and ensure it’s appropriate for the pipe diameter you’re joining. Keep flux off downstream seals and threads to avoid contamination.
Step-By-Step technique: heat management, alignment, and forming the joint
This section details the practical approach when you must work with water in the line. If drainage is partial, maintain a narrow heat path so you don’t boil away all moisture at once. Dry-fit each joint before fluxing to ensure the elbow or coupling seats properly. Apply flux sparingly to a dry surface, then insert the pipe and fitting. Use a well-controlled flame, moving around the joint to heat evenly while avoiding overheating surrounding plastics or insulation. As the pipe heats, water will boil and create steam pressure; pause briefly if you see vigorous bubbling, then resume with shorter heat bursts. Insert solder into the joint’s capillary gap, not directly into the flame, and allow the metal to flow as the joint fills. When you have achieved a uniform fillet around the joint, remove the heat and allow it to cool undisturbed.
Testing and verification: confirming a leak-free joint after soldering
Leak testing is critical after any plumbing solder joint, and even more so when water was present during the process. Allow the joint to cool fully, then dry it completely. Perform a soap-test or air-pressure test to check for leaks. If a leak is detected, re-clean, re-flux, and re-solder only the affected area after cooling. In some cases, a wet joint may show micro-leaks only after the system returns to normal pressure, so test under the same conditions as service. Document any weak points and consider replacing the affected segment if leaks persist after rework. SolderInfo emphasizes validating both static and dynamic leak resistance in these scenarios.
Real-world scenarios: best practices for consistency and reliability
Real-world installations often involve tight spaces, awkward angles, or partially drained lines. In these environments, maintain a steady workflow: quick, clean joints; minimal heat exposure; and a calm approach to moisture management. Always work with properly sized fittings and ensure all components are rated for potable water. Practicing on scrap sections helps build muscle memory for timing, flux application, and heat control. Solder pipe with water in it is not unusual in older homes or remote projects, so developing a repeatable process reduces risk and speeds up repairs. The SolderInfo team encourages documenting any deviations from standard dry-work procedures so you can refine your technique over time.
Maintenance, cleanup, and long-term considerations
After the joint cools, wipe away flux residue with a damp rag and inspect the joint for uniform color and proper bead formation. Store solder and flux in a cool, dry place to prevent oxidation. If leaks appear after initial testing, rework the joint promptly to avoid water damage and mold growth. Regular inspection of joints in high-humidity spaces or exposed plumbing helps catch corrosion early. With practice, you’ll be able to manage water in piping more confidently, reducing the risk of future failures and extending the life of your copper piping.
Tools & Materials
- Torches and regulators suitable for copper piping(Use a small, controllable flame; avoid overheating nearby insulation)
- Copper pipe and fittings (copper-to-copper, elbows, couplings)(Match pipe diameter to existing system (e.g., 1/2)
- Lead-free solder (e.g., tin-copper alloy)(Check local code for compatibility with potable water)
- Flux compatible with copper plumbing(Rosin-based or water-soluble flux, depending on method)
- Emery cloth or wire brush(Clean oxidation from copper surface before fluxing)
- Flux brush or pen(Apply a thin, even coat of flux)
- Leak-testing supplies (soap solution or air-pressure gauge)(To verify joints after cooling)
- Drain pan or towel(Catches residual water during work)
- Protective eyewear(Prevent splash from water and hot solder)
- Gloves and heat-resistant sleeve(Avoid burns when water boils and metal heats)
- Adjustable wrenches and/or pliers(For securing fittings without marring edges)
- Safety mat or non-slip surface(Adds stability in tight spaces)
Steps
Estimated time: 60-90 minutes
- 1
Isolate and assess
Identify the section to be joined. Turn off the water supply, locate the shutoff valves, and inspect for corrosion or damage. If possible, plan your drainage so that the area around the joint remains safe and stable while you work.
Tip: Have a helper manage the shutoff valve if you’re working in a tight space. - 2
Drain the line as much as possible
Open the downstream valve and drain the line into a pan or bucket. Use towels to catch any remaining drips. If you can’t get all water out, proceed with controlled drainage and calm, steady heat.
Tip: Do not leave the torch unattended; keep the flame away from wet surfaces. - 3
Dry-fit the joint
Assemble the pipe and fittings dry to confirm alignment and seating. This helps you anticipate how water may move during heating and ensures the joint will form a solid capillary bead.
Tip: Mark the insertion depth on the pipe for consistent assembly. - 4
Prepare the surfaces
Clean the copper surfaces with emery cloth until bright and free of oxide. Wipe with a dry cloth to remove dust before flux application. Proper prep improves solder flow and joint integrity.
Tip: Avoid over-scratching the pipe; too much surface roughness can trap flux and create voids. - 5
Flux and assemble
Apply a thin, even coat of flux to both the pipe and fitting. Insert the pipe into the fitting and rotate slightly to spread flux evenly. Position the joint so heat will be directed to it cleanly.
Tip: Flux on dry surfaces helps prevent water from flashing and boiling on contact with hot metal. - 6
Apply heat and introduce solder
Begin with a few controlled heat bursts around the joint, not directly at the bead. When the joint reaches the right temperature, touch the solder to the joint and allow capillary action to draw it in. Stop when you see a consistent bead around the joint.
Tip: Keep the flame moving in a circular pattern to avoid overheating one spot. - 7
Cool, clean and inspect
Withdraw heat and let the joint cool naturally. Wipe away flux residue and inspect the bead. Look for uniform coverage and no gaps or voids. If you detect porosity, rework the joint after cooling.
Tip: Do not cool aggressively with water; sudden cooling can stress the joint. - 8
Test for leaks
With the system re-pressurized, apply a soap solution or use a gauge to test for leaks. If you see bubbles or a rise in pressure with no steady state, rework the joint or replace the affected section.
Tip: Test at operating pressure; a joint may pass a dry blast test but leak under real use. - 9
Document and clean up
Record what parts were used, the methods, and the leak-test results for future reference. Clean up flux residues and store tools properly to prevent corrosion or injury.
Tip: Label the plumbing joint for future maintenance and inspection.
Quick Answers
Is it safe to solder a copper pipe when water is still in the line?
Soldering a water-filled pipe can be done, but it increases risk of steam burns and cold joints. If possible, drain the line fully and perform the work in a dry environment. Follow proper heat control and testing procedures to ensure a reliable joint.
Soldering a pipe with water requires draining when feasible and careful heat control to prevent burns and poor joints.
What flux is best for potable water copper piping?
Choose a flux compatible with copper plumbing and your solder alloy. Rosin-based flux is common, while some installers prefer water-soluble flux for easier cleanup, depending on the system and code requirements.
Use flux that matches your solder type and local codes; rosins or water-soluble fluxes are common choices.
Do I need to drain the entire system before soldering?
If feasible, fully drain the line to prevent steam and water from boiling during heating. If complete drainage isn’t possible, perform the work in a staged, cautious manner with short heat bursts and rapid work.
Whenever possible, drain the line completely; if not, proceed with caution and quick, controlled steps.
Can I test leaks after the joint has cooled?
Yes. After cooling, perform a leak test using soapy water or an air-pressure test to ensure the joint holds under service conditions.
Test once it’s cooled using soap bubbles or air pressure to confirm reliability.
What tools help when water remains in the pipe during soldering?
Have drain traps, towels, flux brushes, and a small, controllable flame. A helper can assist with shutoffs or positioning, especially in tight spaces.
Keep towels handy and use a precise flame; a helper can make setup safer.
What should I do if a joint leaks after repair?
Cool the area, re-clean the surfaces, reapply flux, and re-solder the joint. If the leak persists, replace the faulty section and re-test.
If you see a leak, rework the joint with fresh flux and solder, testing afterward.
Watch Video
Top Takeaways
- Drain or control moisture before soldering for reliability.
- Use proper flux and lead-free solder suited for potable water.
- Heat control and dry-fit are essential in wet-work joints.
- Always test joints under operating conditions before finalizing.
- Document the process for future maintenance.