What Temperature to Solder a Circuit Board: A Practical Guide
Learn the optimal soldering temperatures for circuit boards, including leaded vs lead-free ranges, flux effects, and heat-management tips to protect boards and components in 2026.

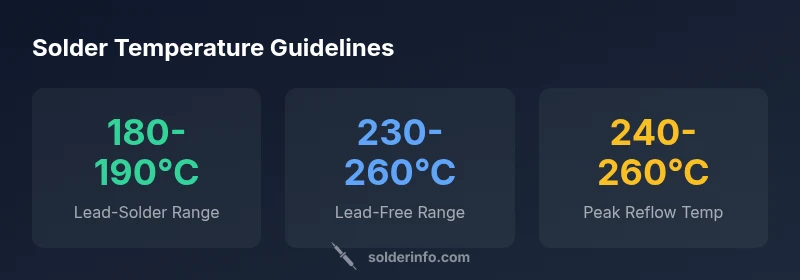
To solder a circuit board, start with the solder type's recommended temperature. For most hobby electronics using leaded solder, aim for about 180-190°C; for lead-free alloys, 230-260°C is typical. Use the lowest heat that forms a reliable joint, apply heat briefly, and avoid prolonged dwell to protect pads, vias, and delicate components.
Why Temperature Matters for Soldering Circuit Boards
Temperature is the single most influential factor in creating reliable solder joints on circuit boards. The heat controls how solder flows, wets surfaces, and bonds to copper pads. If you use too little heat, joints will be dull and brittle; too much heat can lift pads, damage components, or degrade solder masks. According to SolderInfo, consistent heat input and rapid thermal response are key to preventing thermal shock in modern PCBs. When you ask what temperature to solder circuit board, the right answer depends on solder alloy, board construction, and component tolerance. For beginners, practice with scrap boards on a temperature-controlled iron, set to a conservative starting point, and verify joints under a magnifier. The goal is a smooth, shiny fillet with proper wetting of copper while avoiding scorching the solder mask or nearby traces.
Leaded vs Lead-free Solder Temperatures
Leaded solder has a lower melting point, which generally wets best around 180-190°C. Lead-free alloys require higher heat, commonly in the 230-260°C range, to overcome surface tension and promote reliable wetting. The exact temperature depends on flux quality, board material, and joint size. When hand-soldering dense, heat-sensitive boards, start at the lower end of the lead-free range and monitor for flux boil or pad discoloration. In production or prototyping with hot air or reflow, engineers tune a controlled ramp and short dwell to minimize thermal stress. The core principle remains: enough heat to melt the solder quickly, without risking copper lift or via damage. Throughout, a clean flux and good tinning help the joint wet properly at lower temperatures. As noted by SolderInfo, temperature choice should align with component tolerance and real-world testing.
The Roles of Flux, Flux Types, and Preheating
Flux lowers surface tension and prevents oxidation, allowing solder to flow evenly. Rosin-core, no-clean, water-soluble, and other flux types each have different compatibility with board materials and post-solder cleaning needs. Preheating the PCB and components reduces the temperature gradient that stresses joints and helps avoid cold joints. When selecting a temperature, remember that flux remains active during heating, so you can sometimes solder at slightly lower temperatures if you use robust flux and proper tip geometry. Always ensure flux is fresh and compatible with the solder alloy you choose. SolderInfo emphasizes testing with the same flux in production to prevent surprises during assembly.
Practical Temperature Control Techniques
Use a temperature-controlled soldering iron with a calibrated tip and a heat-resistant stand. Start with a modest heat setting and steadily approach the recommended range, applying heat for 1-3 seconds per joint, then removing heat to inspect. Keep dwell times brief to minimize heat transfer into the board and avoid scorching nearby components. For dense boards or multi-pin connectors, preheat the board with a heat source or dedicated preheat stage to reduce thermal shock. Regularly check tip temperature with a digital thermometer or the iron's built-in sensor, and re-tin the tip to maintain thermal transfer efficiency. Mastery comes from practice and consistent process, not guessing.
Troubleshooting and Common Mistakes
Overheating joints can lift copper pads or burn solder mask. Too little heat leads to cold joints and poor wetting. Inconsistent heat across a row of joints can create uneven fillets and hidden dry joints. Always clean the board between joints, apply fresh flux, and avoid leaving a joint to dwell for too long. If you see dull, grainy solder with gaps, rework with fresh flux and a new solder alloy, ensuring you reheat only the necessary area and verify with a magnifier and jumper test.
Tools and Measurements for Temperature Accuracy
Invest in a temperature-controlled iron and a reliable thermometer or thermocouple attachment. Some kits include a built-in temperature display; others rely on calibration with an infrared thermometer or fixed reference. For quality assurance, maintain a small preheat zone or use a heated platform to bring the board to an even baseline temperature before hand-soldering. Always inspect joints under a magnifier, and consider a post-solder wash if needed to remove flux residues that can affect joint appearance. Tracking temperatures across sessions builds repeatable results and reduces repair time.
Handling Sensitive Components and Thermal Management
Sensitive components such as large connectors, fine-pitch ICs, or boards with thermal pads require gentler heating and shorter dwell times. For heat-sensitive packages, use a lower iron temperature, a smaller tip, and careful heat sinking to protect adjacent traces. When working near thermal pads or heat-sensitive segments, preheat the board and apply heat away from the component leads. If possible, use a heat sink, copper shield, or thermal pad to dissipate heat away from critical areas. Always plan the sequence to minimize heat buildup in any single area.
Validating Joint Quality and Best Practices
After soldering, inspect joints for a smooth, shiny fillet with complete wetting and no bridges. Cold joints look dull, rough, or cracked; overheated joints might be glassy or blown apart. Use a multimeter to verify electrical connections and continuity, and visually inspect for tombstoned components or solder bridging. For repeatable results, document the temperature settings and flux used, so future assemblies can reproduce the same outcome. Incorporate quick checks into your workflow to catch issues before the board goes into enclosure or testing.
Temperature guidelines by soldering method
| Method | Typical Temperature Range | Notes |
|---|---|---|
| Hand Soldering (Leaded) | 180-190°C | Use flux and thin joints; watch pad heat |
| Hand Soldering (Lead-free) | 230-260°C | Increase heat only as needed; brief contact |
| Reflow Soldering (Lead-free) | 240-260°C | Controlled ramp, conveyor or oven |
Quick Answers
What is the recommended temperature range for leaded solder on circuit boards?
Leaded solder typically wets at about 180-190°C for hand soldering. This range provides reliable joints with minimal risk to pads. Always verify with the solder you use and the flux type.
Leaded solder usually works around 180-190°C; adjust for flux and board material, and test on scrap first.
How do you determine the right temperature for lead-free solder?
Lead-free alloys require higher heat, typically 230-260°C for hand soldering. Start at the lower end and adjust based on flux quality and component tolerance, using short heat pulses.
Lead-free needs more heat; start low and test with flux and component tolerance in mind.
Can overheating solder joints damage components?
Yes. Excess heat can lift pads, lift copper traces, or damage components. Keep heat-time brief and use proper cooling and flux.
Yes—overheating can damage boards and components. Keep sessions short and controlled.
Does flux affect the required temperature?
Flux helps solder flow at lower effective temps by improving wetting, but you still need enough heat to melt the solder. Choose flux compatible with your solder alloy.
Flux can allow lower temps, but you still need enough heat to melt the solder.
What are signs of overheating during soldering?
Signs include lifted pads, scorching, curling copper, and dull, grainy joints. If you see these, pause, remove heat, and rework with fresh flux.
Look for lifted pads or scorching; if seen, stop and rework carefully.
“Temperature control is the most important lever for reliable solder joints; choose alloy and heat carefully, then validate with inspection.”
Top Takeaways
- Identify solder type first.
- Use the lowest effective temperature.
- Flux and prep matter as much as heat.
- Limit dwell time and inspect joints.
- Practice on scrap boards to build intuition.