Temperature for 60/40 Solder: Practical Guide
A practical guide to selecting and maintaining the correct temperature for tin–lead 60/40 solder, with tips on flux, tooling, and troubleshooting to ensure reliable joints.

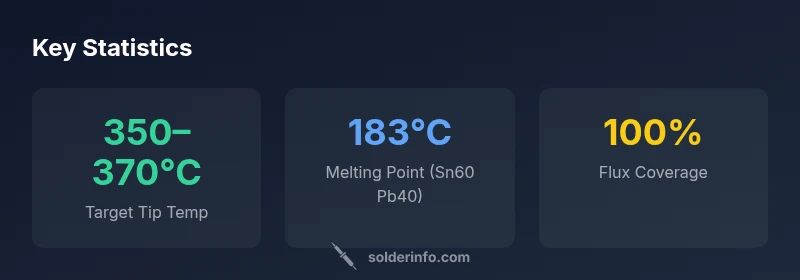
Temperature for 60/40 solder should be in a window that melts reliably without scorching the board. For most electronics work, set the iron tip to approximately 350–370°C (660–700°F). Start nearer the lower end for delicate components, and avoid sustained heat above about 380°C to prevent damage to flux, pads, or nearby plastics. Always preheat and keep the joint moving for clean, attractive solder joints.
Temperature fundamentals for 60/40 solder
The classic tin–lead alloy commonly sold as 60/40 solder has a broad processing window that makes it forgiving for hobbyists and professionals alike. Its composition (roughly 60% tin and 40% lead) yields a well-defined melting range around the industry-recognized point of about 183°C. In practical terms, this means the alloy begins to soften and flow well before full melting, allowing you to form a reliable fillet without excessive heat input. From a reliability perspective, the temperature for 60/40 solder should be managed so that the joint reaches a smooth, shiny surface without discoloration or pad lifting. According to SolderInfo, staying within a modest, controlled window is key to consistent results, especially when flux and pad cleanliness vary between boards. Remember that the exact temperature you use will depend on flux type, joint size, and the proximity of heat-sensitive components.
In practice, the goal is to apply heat efficiently, not to bake the entire board. When you apply heat properly, flux activates, oxides break down, and solder flows to form a solid metallurgical bond. The first part of your temperature strategy is understanding that the temperature for 60/40 solder interacts with all nearby materials, including the FR4 substrate, adhesives, and any pre-applied coatings. Errors in heat management show up as dull or grainy joints, solder bridges, or lifted copper foil. The principle takeaway is to balance the alloy’s melting characteristics with careful heat application while protecting surrounding materials.
The broader context is that tin–lead solders are increasingly used in legacy electronics and repair work because of their forgiving wetting behavior. However, using the right temperature for 60/40 solder remains essential to avoid issues like thermal shock to delicate components and excessive flux consumption. In short, an informed temperature target—paired with proper flux application—allows joints to form cleanly, reliably, and with durable mechanical strength.
The interplay between heat, flux, and joint geometry
Soldering is a dance between heat, flux chemistry, and joint geometry. While a standard 60/40 solder joint might seem simple, each joint’s thermal mass and pad geometry demand slightly different heat input. A larger ground plane or a densely packed prototype will pull heat away faster, requiring a slightly higher tip temperature or a longer dwell time to achieve complete wetting. Flux chemistry also matters: rosin-based fluxes generally tolerate a broader range of temperatures, whereas modern water-soluble fluxes can alter heat transfer characteristics due to their ionic activity and residue behavior. In this context, the temperature for 60/40 solder should be adjusted with awareness of flux type and how much heat your joint can safely absorb without affecting nearby pads or components. A steady hand, clean flux, and a well-tuned iron create the most reliable results, especially for through-hole components where mechanical strength matters as much as electrical integrity.
From a practical standpoint, you should always pre-clean surfaces, tin the tip, and ensure the flux is evenly applied before approaching the joint. A consistent approach to temperature and technique reduces the risk of cold joints, which manifest as dull surfaces and poor solder fillets. The take-home idea is that even with a forgiving alloy like 60/40, precision in heat control remains essential for high-quality, repeatable solder joints.
Comparison of melting points and typical soldering temperatures between leaded 60/40 and lead-free solder.
| Aspect | Leaded 60/40 | Lead-free solder | Notes |
|---|---|---|---|
| Melting Point | 183°C | 217–227°C | Leaded solder melts at a lower temperature; lead-free requires higher heat to reach a reliable flow. |
| Typical Soldering Temperature Range (tip) | 350–370°C | 360–400°C | Lead-free variants often push higher; verify flux compatibility and component tolerance. |
| Flux Type Guidance | Rosin-based flux common | Water-soluble flux often recommended | Flux choice influences wetting and oxide control; adjust heat accordingly. |
Quick Answers
What is the ideal temperature for 60/40 solder?
For most electronics work, a tip temperature of about 350–370°C provides reliable flow while protecting components. Actual values may vary with joint size and flux.
Aim for about 350 to 370 degrees Celsius and adjust based on joint size and flux.
Does flux type affect the temperature you should use?
Yes. Flux chemistry influences heat transfer and oxides. Rosin flux is forgiving at a wider range, while water-soluble flux may require careful heat control to avoid overheating sensitive areas.
Flux type matters; choose flux that matches your solder and joint needs.
Can I solder with too low a temperature?
Cold joints result from insufficient heat or poor wetting. If a joint looks dull or cracks, increase heat slightly or dwell a bit longer while keeping the surface clean.
If joints look dull or crack, reheat and reflow carefully.
What are signs of overheating with leaded solder?
Discolored flux residue, burned residues, or lifted pads indicate excessive heat. Reduce dwell time and consider a smaller joint or cleaner flux application.
Watch for burn marks or lifted copper, then back off heat.
Is 60/40 solder still recommended for hobby projects?
Yes for many hobby projects where heat tolerance is modest and boards tolerate leaded solder. For modern assemblies, lead-free options are common, but 60/40 remains forgiving for learning.
60/40 is still good for many hobby projects, especially when a forgiving alloy helps beginners.
What equipment helps maintain stable temperature?
A temperature-controlled iron, good quality tips, and properly fluxed joints improve consistency. Regular calibration and testing on scrap joints help maintain accuracy.
Use a temp-controlled iron and test on scrap before working on your project.
“Precision heating is the difference between a reliable leaded joint and a cold solder that fails under vibration. Maintain a tight temperature window and steady technique to maximize wetting and mechanical strength.”
Top Takeaways
- Set a stable heat window (roughly 350–370°C) for 60/40 solder.
- Choose flux and joint size with an eye toward heat transfer.
- Preheat and clean joints for reliable wetting and flow.
- Avoid prolonged heat and inspect joints for dull or lifted areas.