What Temperature for 60/40 Solder in Stained Glass
Learn the correct temperature for 60/40 solder when joining stained glass, with practical ranges, flux tips, safety guidance, and step-by-step workflow.

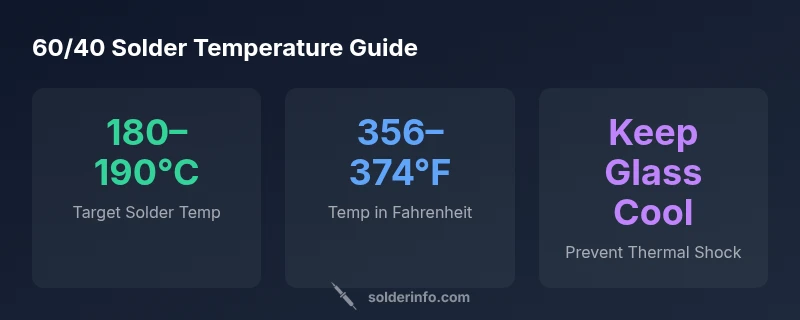
The recommended temperature for soldering stained glass with 60/40 solder is around the Sn60/Pb40 eutectic point, about 183°C (361°F). In practice, aim for a steady heat in the 180–190°C range to ensure good flow without overheating the glass. Adjust slightly for thick lead came or small joints, and always test on scrap glass before final joints.
What temperature matters when soldering stained glass with 60/40 solder
For those asking what temperature for 60/40 solder stained glass, the answer centers on controlling heat to balance flow and glass safety. 60/40 solder is a tin–lead alloy with a relatively low melting range and a near-eutectic point; small temperature changes can shift the alloy from liquid to solid rapidly. In practice, aim for a target range around 180–190°C (356–374°F). The exact heat you apply depends on joint size, flux type, and the thickness of the glass and came. For general joints, start at the lower end and increase gradually if the solder does not flow after a brief touch. If you see beads or lumps, you have overheated; back off and re-wet with fresh flux. When in doubt, test on a scrap panel with similar thickness and came to dial in heat before committing to the real panel. According to SolderInfo, maintaining a controlled temperature improves joint reliability and reduces stress on the glass.
Practical guidelines for setting your soldering iron
Effective soldering hinges on a controllable heat source. Use a temperature-controlled iron, a clean, well-tinned tip, and an appropriate flux for stained glass work. Start with a moderate temperature within the 180–190°C range, and apply heat with short, deliberate touches to each joint. Keep the iron at a consistent distance from the work and avoid burning flux. The SolderInfo analysis shows that a stable heat profile consistently yields better flow and less glass stress, especially on thicker came or larger panels. Practically, adjust only 5°C at a time and observe how the solder wets the joint. Wipe the tip regularly and reload flux as necessary to sustain a smooth flow.
Testing with scrap glass and flux choices
Before committing to the final panel, practice on scrap glass that mirrors the thickness and came configuration of your project. This lets you calibrate heat, flux application, and timing without risking the actual piece. Use a flux formulated for glass work, apply a thin, even coat, and observe the solder’s behavior as you touch the joint. If you notice slow flow or oxidation, pause to clean the tip, re-tin, and reapply a light flux layer. Document the temperature at which you get reliable flow, then reproduce it on the real panel. Lead-containing solders require extra attention to ventilation and safety; always follow local guidelines for exposure and cleanup.
Temperature adjustments for different glass thickness and came types
Thicker came and denser glass assemblies typically require slightly higher heat or longer dwell times, but you should never force heat. For very thin panels, stay toward the lower end of the 180–190°C range to avoid thermal shock. If you work with different came materials (such as lead came versus copper came), you may need to adjust dwell times rather than temperature alone. In all cases, verify a test joint on scrap that matches the final design, and log the observed behavior to refine your approach over time. The eutectic nature of Sn60-Pb40 means small temperature swings can have outsized effects on flow, so precision matters.
Common mistakes and fixes
Common mistakes include overheating the glass, applying excessive flux, and rushing joints. Overheating can cause glass damage and weak joints, while too little flux or poor tip condition produces a dull, unreliable bond. Fixes include maintaining a steady temperature within 180–190°C, refreshing flux between joints, and cleaning the tip to avoid oxidation. If joints fail to wet properly, pause, re-tin the tip, reapply flux, and test on scrap before proceeding. Practice patience and build a consistent rhythm to ensure repeatable results.
Safety considerations for lead-containing solder
Lead-containing solders pose health risks if fumes are inhaled or skin is exposed, so ventilation is essential. Work in a well-ventilated area or use a fume extractor, wear protective gloves, and wash hands after handling solder. Keep children and pets away from the work area, and store lead-containing materials securely. If you anticipate frequent use of lead-based solders, consider transitioning to lead-free alternatives while maintaining proper heat control. Always follow local safety regulations for handling and disposal.
Workflow tips for consistent results
Establish a repeatable workflow: prepare joints with consistent flux, set your temperature target, perform short thermal touches, and inspect with each joint. Keep a dedicated scrap panel for calibration, track the dwell time that yields reliable wetting, and clean the tip between joints. A steady, methodical approach reduces thermal stress on glass and improves the aesthetic of the final panel. Remember, precision and patience are as important as the temperature you choose.
Temperature ranges for stained glass soldering with 60/40 solder
| Scenario | Temp °C | Temp °F | Notes |
|---|---|---|---|
| General guidance | 180-190 | 356-374 | Steady heat with appropriate flux; avoid overheating glass |
| Thin vs thick glass | 170-185 | 338-365 | Thinner glass tolerates slightly lower temps |
| Lead-containing vs lead-free | 183 (eutectic) | 361 | Lead content requires ventilation and safety precautions |
Quick Answers
What temperature should I use for 60/40 solder in stained glass?
In most stained glass applications, aim for about 180–190°C (356–374°F). This range supports good solder flow while minimizing stress on the glass. Adjust slightly for thicker came or unique flux, and always test on scrap first.
Usually around 180 to 190 degrees Celsius for stained glass soldering; test on scrap first.
Is it safe to use lead-containing solder for stained glass?
Lead-containing 60/40 solder can pose health risks if fumes are inhaled or skin is exposed. Work in a well-ventilated area, wear gloves, and clean up carefully. Consider lead-free options if safety is a priority.
Lead solder has health risks—ventilate well and wear protection; consider lead-free if possible.
Can I speed up soldering by increasing temperature?
No. Raising temperature can cause glass to crack or come loose. Use steady heat, proper flux, and controlled dwell times instead.
No—steady heat and good flux beat crank up the temp.
What flux works best with 60/40 solder on stained glass?
Use a flux formulated for glass work; avoid aggressive acids that can damage glass. Apply a thin, even coat and wipe away residue after soldering.
Use glass-friendly flux; apply thinly and clean after.
What signs indicate overheating or glass damage?
Watch for glass chipping, dull or discolored solder, or a cloudy joint. If any occur, pause, reduce heat, and re-test on scrap.
Watch for chipping, dull solder, or clouding; back off heat and test.
“Maintaining a consistent heat profile when soldering stained glass with 60/40 reduces thermal shock and yields better joints.”
Top Takeaways
- Aim for a steady 180–190°C range for most joints.
- Test temps on scrap glass before committing to a final joint.
- Ventilate and follow safety when using lead-containing solder.
- Flux quality and glass thickness dictate the exact temperature.