Speaker Solder: A Practical DIY Wiring Guide
Master speaker solder techniques for reliable connections, minimal buzz, and long-lasting audio quality. This guide covers tools, prep, heat control, testing, and safety for DIY audio projects.

This quick answer previews how to solder speaker wires reliably: prepare tools, strip wire correctly, tin strands, seat wires to terminals, apply heat with the right solder, test with a multimeter, and reseal if needed. Following these steps improves sound quality and reduces cold joints. It also helps avoid damaging voice coils and keeps enclosure connections secure.
Context: Why speaker solder technique matters
Speaker solder technique sits at the intersection of audio quality and long-term reliability. A solid solder joint ensures minimal electrical resistance, robust mechanical connection, and consistent signal transfer from amp to driver. When done correctly, you’ll notice cleaner mids and highs, especially in sealed enclosures where vibration is transmitted through terminals. According to SolderInfo, the quality of a speaker solder joint affects not only audible performance but also the durability of the connection under temperature changes and vibration. Understanding the fundamentals—clean surfaces, proper tinning, and controlled heat—gives you a dependable workflow you can repeat on different speakers and listening setups. This article uses speaker solder as a core example of practical soldering for electronics, plumbing, and jewelry contexts, so you can transfer the logic to other projects.
Safety first: precautions when soldering speakers
Safety in soldering is non-negotiable. Always work in a well-ventilated area and wear safety glasses to protect against splashes. Keep heat away from the speaker cone and voice coil, as excessive heat can damage the diaphragm. Unplug devices and disconnect the speaker from any amplifier before starting. Use a third-hand tool or clamps to hold wires steady while you work. If you notice scorching or melted insulation, stop and reassess your technique to avoid irreversible damage. A controlled, mindful approach reduces risks and yields safer, more reliable joints.
Materials and setup: choosing the right solder and tools
Selecting the right solder and tools is foundational for a durable speaker solder. Prefer rosin-core, lead-free solder for reliability and safety, and use a fine-point tip on your iron for precision at the terminal posts. Keep flux handy for improving copper-to-copper wetting and tinning. Always inspect the wire and terminal surfaces for oxidation; clean with isopropyl alcohol if needed. Have heat shrink tubing ready to insulate the joints after soldering. A quality multi-meter for continuity checks helps confirm successful connections before reassembly.
Soldering basics: heat, flux, and tinning explained
Key to good soldering is heat control. Apply heat to the joint, not the solder directly, and allow the solder to flow smoothly into the joint. Flux helps prevent oxidation, improves flow, and reduces the chance of cold joints. Tinning wires before joining them ensures a ready surface for solder and yields stronger joints. Always remove excess flux after cooling to prevent corrosion. For speaker work, using moderate heat for just enough time to form a glossy, smooth joint reduces risk to the voice coil and surround.
Handling speaker terminals: wire types and polarity
Speaker terminals expect two conductors with a clear polarity: positive and negative. Use two-core speaker wire with good copper purity and clearly marked conductors. Stranded wire is easier to route inside enclosures, but ensure it’s cleanly stripped and tinned so strands don’t fray when you twist them onto the terminal posts. Always connect the red (+) wire to the positive terminal and the black (−) wire to the negative terminal. Recheck polarity after wiring to prevent phase issues that degrade stereo imaging.
Common mistakes and how to fix them
Common mistakes include overheating the voice coil, which can lead to distortion or coil damage; creating cold joints that appear dull or crumbly; and leaving exposed conductors that may short against the chassis. To fix, reheat solder joints carefully, add a small amount of fresh solder, and ensure wires are correctly tinned and seated. If insulation is damaged, cut back to clean, intact wire and redo the joint. For stubborn joints, cleaning with a flux cleaner and re-tinning can restore proper flow and adhesion.
Testing and verifying your work: continuity, polarity, and sound
Verification is essential. Use a multimeter to confirm continuity from the amplifier wiring to the speaker terminals; check for the correct resistance range to ensure a proper connection. Verify polarity by applying a test signal and listening for proper phase in stereo setups. A humming or buzz may indicate a ground loop, loose connections, or insufficient shielding. Perform a light excursion test at a safe volume to confirm the joint remains stable under normal operating conditions.
Long-term reliability: strain relief and environment considerations
Even a perfect joint can fail if wires are stressed. Implement strain relief with heat shrink tubing or cable clamps to prevent movement at the solder joint. Route wires away from heat sources, sharp edges, and moving parts within the enclosure. Consider moisture and humidity in the final installation; solder joints in damp environments can corrode over time if not properly sealed. Regular checks during maintenance cycles help catch looseness early.
Quick tips for different speaker types: woofers, tweeters, and crossovers
Woofers and midrange drivers may tolerate longer runs with thicker gauge wire; tweeters require extra care to avoid excessive heat near delicate diaphragms. When working with crossovers, avoid directly soldering to fragile plastic terminals; if possible, desolder from easier points and reassemble with stable wiring. In all cases, keep heat application brief and precise to minimize the risk of heat damage to the voice coil or magnet assembly.
Tools & Materials
- Soldering iron (15-30W fine-point)(Fine tip preferred for terminals)
- Lead-free rosin-core solder (0.7-1.0 mm)(Rosin core recommended for clean joints)
- Flux pen or flux paste(Helps with tinning and flow)
- Solder wick (desoldering braid)(Useful for rework)
- Wire stripper(Strip 5-7 mm of insulation)
- Speaker wire (two-core, copper)(Clearly mark positive/negative)
- Heat shrink tubing (adhesive-lined)(Insulate and relieve strain)
- Heat gun or lighter(For shrinking tubing)
- Multimeter(Check continuity and polarity)
- Safety glasses(Eye protection from splashes)
- Desoldering pump (optional)(For removing excess solder)
- Third-hand/tool with alligator clips (optional)(Keeps components steady)
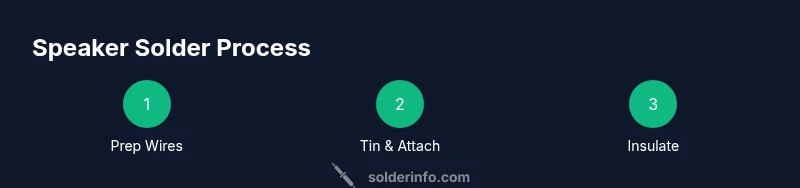
Steps
Estimated time: 45-60 minutes
- 1
Prepare workspace
Set up a clean, well-ventilated area with a non-slip mat. Gather your tools and materials, and wear eye protection. If you’re reworking a pair of speakers, plan both channels together to stay consistent.
Tip: Have a small container for small screws and a heat-safe mat to protect surfaces. - 2
Disconnect power and remove speaker from enclosure
Unplug the audio source and detach the speaker from the enclosure to access terminals without interference. Note the orientation of wires before removal.
Tip: Label wires if you’re working on multiple drivers to avoid confusion later. - 3
Strip wires and inspect strands
Use a wire stripper to remove insulation evenly, exposing enough conductor without nicking strands. Inspect for frayed wires and corrosion; trim damaged areas as needed.
Tip: Twist strands together lightly before tinning to prevent stray filaments. - 4
Tin the wire ends
Apply a small amount of solder to the stripped wire ends to coat the strands. This prepares the wire for a smoother joint and reduces the risk of cold joints.
Tip: Don’t over-tin; a thin coat is enough to improve wetting. - 5
Prep soldering iron tip
Clean the tip and re-tin it with a small dab of solder. A clean, well-tinned tip transfers heat efficiently and prevents oxidation during the joint.
Tip: Periodically wipe the tip on a damp sponge for best results. - 6
Position wires on terminals with polarity
Place the wires on the correct positive and negative terminals. If possible, pre-fit and lightly twist the wires to hold them in place before heating.
Tip: Double-check polarity against the enclosure markings or diagram. - 7
Apply heat and solder the joints
Touch the joint with the iron and feed solder until the joint forms a smooth, glossy fillet. Remove heat promptly once the solder has flowed.
Tip: Heat the joint, not the solder; timing is key to avoid overheating the voice coil. - 8
Inspect and trim excess
Ensure the joint is shiny and free of cracks. Trim any stray strands and remove excess solder to prevent shorts.
Tip: If joints look dull, rework with a touch more solder after cleaning the area. - 9
Insulate the joints
Slide heat-shrink tubing over the joint and apply heat to shrink. Ensure complete coverage and a snug seal.
Tip: Use adhesive-lined tubing for extra strain relief. - 10
Reconnect and test with a multimeter
Reattach the speaker, reconnect to the amp, and test continuity. Confirm there’s no short and that polarity remains correct.
Tip: Perform a quick bench test before final enclosure assembly. - 11
Reinstall speaker in enclosure
Secure the speaker back into its place and reconnect mounting screws. Ensure no wires are pinched or stretched.
Tip: Tidy up routing to prevent vibration-induced noise. - 12
Test audio at safe levels
Play a familiar track at low volume and gradually increase while listening for distortion or buzz. If you hear issues, stop and re-examine joints and insulation.
Tip: If you detect a buzz, check for grounding issues or loose connectors.
Quick Answers
Do I need flux for speaker soldering?
Flux helps prevent oxidation and improves solder flow. If your solder is rosin-core, extra flux is optional but can aid in difficult joints.
Flux helps solder flow and prevent oxidation; use extra flux if joints resist wetting.
Is lead-free solder safe for audio applications?
Yes. Lead-free solder is standard for consumer electronics and is safe when used with proper ventilation and hand hygiene.
Lead-free solder is common for electronics; use in a ventilated area and wash hands after soldering.
How do I fix a cold joint on a speaker?
Identify the dull joint, reapply heat, and add a small amount of fresh solder. Ensure wires are tinned and joint surface is clean before reseating.
Look for a dull joint, reheat, apply more solder, and re-test.
Can I solder directly to a tweeter or voice coil?
Only on designed terminals. Excessive heat can damage the diaphragm. Use indirect connections or dedicated terminals when possible.
Be careful with heat around tweeters; use proper terminals and avoid direct heavy heat.
What gauge wire should I use for typical home speakers?
Choose a suitable two-core speaker wire for your run length and impedance. Thicker gauge reduces resistance over longer distances.
Use appropriate two-core speaker wire; thicker gauge helps for longer runs.
Watch Video
Top Takeaways
- Prepare tools and workspace before starting.
- Tin wires and control heat to protect drivers.
- Polarity must be correct to preserve phase and soundstage.
- Insulate and strain-relieve joints for durability.