How to Solder Headphone Wire: A DIY Guide
Learn to solder headphone wires safely and effectively with a step-by-step guide covering enamel stripping, tinning, flux application, and connector reattachment for durable repairs.

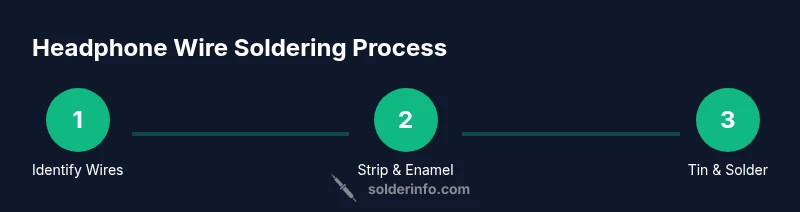
With this guide, you will learn how to solder headphone wire safely and effectively. You’ll identify left, right, and ground conductors, strip enamel, tin the wires, apply flux, and solder them to a connector or driver. The steps cover safety, heat control, and insulation to restore headphones without damage. This article keeps jargon to a minimum.
Understanding headphone wire and connectors
Headphone cables are small, flexible conductors that carry stereo audio signals to the left and right drivers, and share a common ground. In most consumer headphones you’ll encounter a three-conductor layout: left, right, and ground. Some premium cables include additional conductors for microphones or inline controls. Before you start any repair, identify which conductors correspond to which channel so you can reconnect them correctly after soldering. The insulating layers vary: many sets use enamel-coated copper wires, which look like bare copper but carry a thin lacquer layer that must be removed or burned away for a reliable solder joint. Working with these cables requires patience and a steady hand, not brute force. According to SolderInfo, mastering basic soldering fundamentals yields reliable headphone repairs. When you inspect the connector end, check whether you’re soldering to a jack, a plug, or a driver terminal; the approach changes slightly with each destination. This guide focuses on common 3-conductor headphones and assumes a standard 3.5 mm plug. For microphones or USB-C style connectors, adapt wiring notes accordingly and refer to the connector manufacturer’s guidelines.
Tools and materials you’ll need
Stripping enamel and preparing wires
Tinning and flux application
Soldering to the connector or driver
Insulation, testing, and reassembly
Safety and best practices
Tools & Materials
- Soldering iron (temperature-controlled)(Choose a fine tip suitable for electronics; moderate heat control is essential.)
- Lead-free rosin-core solder(Thin diameter is easier for small wires; rosin-core improves wetting.)
- Flux (pen or paste)(Apply to joints to improve solder flow and reduce cold joints.)
- Thin replacement wires(Use lightweight wires matching the gauge of the original cable.)
- Heat-shrink tubing (various diameters)(Insulate each conductor after soldering.)
- Fine-point tweezers(For handling tiny wires and connectors without slipping.)
- Wire strippers/cutters(Accurate stripping without nicking copper.)
- Multimeter (continuity tester)(Optional but helpful for confirming connections.)
- Replacement headphone jack or connector (optional)(If you’re replacing the connector rather than repairing it.)
Steps
Estimated time: 40-60 minutes
- 1
Set up workspace and safety
Prepare a clean, well-lit bench with a heat-safe mat. Put on eye protection and ensure good ventilation. If you’re working with enamel-coated wires, know that enamel must be removed or burned away before a reliable solder joint. Keep flammable materials away from the soldering area.
Tip: Always position the iron stand and fire-safe area before you turn on the iron. - 2
Identify wires and plan connections
Test or inspect the headphone cable to determine which conductors correspond to left, right, and ground. If you’re repairing a microphone-enabled cable, identify extra conductors accordingly. Plan your wiring path so that each conductor will reach its destination on the connector without tension.
Tip: Label wires with colored tape or a small mark to avoid mixing channels. - 3
Prepare the wires (strip and clean)
Carefully remove the outer jacket with wire strippers, exposing a short length of insulated conductor. For enamel-coated wires, burn off or abrade the enamel until the copper shines, then twist the strands gently to prevent fraying. Keep copper clean and dry before tinning.
Tip: Work slowly to avoid nicking the copper or removing too much insulation. - 4
Tin the conductors
Apply a small amount of solder to each conductor tip so the copper is lightly coated. Tinning helps create a smooth, reliable joint and reduces the risk of a cold joint when you later solder to the connector. Let the solder flow to form a shiny, even fillet.
Tip: Use just enough solder to coat the conductor; excess solder can create shorts. - 5
Prepare the connector and apply flux
If you’re reusing the original connector, clean its terminals and roughen metal surfaces slightly for better wetting. Apply a thin line of flux to each terminal to improve solder flow and prevent oxidation during heating.
Tip: Flux is your friend—don’t skimp on it for enamel or oxidized surfaces. - 6
Solder wires to the connector terminals
Position each tinned wire at its respective terminal and briefly apply the iron to form a solid bond. Remove heat as soon as the solder flows cleanly to the joint and forms a smooth, shiny fillet. Avoid dragging solder onto neighboring terminals to prevent shorts.
Tip: Keep joints small and neat; large fillets can bridge to adjacent pads. - 7
Insulate and protect wires
Slide heat-shrink tubing over each joint and shrink it with the iron or a heat gun. Without proper insulation, strands can touch and cause a short. Trim excess tubing and ensure all exposed copper is protected.
Tip: Use multiple layers if needed for extra protection. - 8
Test, reassemble, and verify
Connect the repaired headphone to a source and test both channels for clear sound. If you have a multimeter, check continuity from each conductor to its corresponding terminal. Reassemble the housing and gently flex the cable to ensure joints stay solid.
Tip: If you hear crackling or no signal, recheck every joint for cold joints or bridging.
Quick Answers
Can I solder enamel-coated headphone wire without stripping enamel?
Enamel must be removed or breached for the copper to take solder. You can burn away the enamel with the iron or lightly abrade until copper shows, then tin the exposed conductor.
Enamel needs to be removed so solder can stick; burning or abrasion is usually required.
What type of solder should I use for headphones?
Use lead-free rosin-core solder for electronics. Rosin flux helps the solder wet the surface and reduces the risk of cold joints.
Lead-free rosin-core solder is standard for electronics connections.
Is it safe to solder headphones while the housing is still on?
It’s safer to detach the housing to access the terminals. If you must solder with the housing, ensure no plastic is near the hot iron and avoid overheating nearby parts.
Detach the housing if possible to avoid melting plastics.
How can I test the repaired headphone wire?
Use a multimeter to verify continuity from each wire to its corresponding terminal. Then plug in headphones and listen for both channels without crackling.
Check continuity first, then test with actual audio.
Will soldering affect sound quality?
If joints are clean, well-formed, and properly insulated, sound quality should be unaffected. Poor joints or shorts can cause crackling or channel loss.
Good joints won’t change sound quality; bad joints can.
Do I need heat-shrink tubing or can tape suffice?
Heat-shrink tubing provides durable, clean insulation and strain relief. Tape can work short-term, but tubing is superior for longevity.
Heat-shrink is the better long-term option.
Watch Video
Top Takeaways
- Identify L/R/GND correctly before soldering
- Use flux and tinning for reliable joints
- Insulate joints thoroughly to prevent shorts
- Test continuity and sound after repair