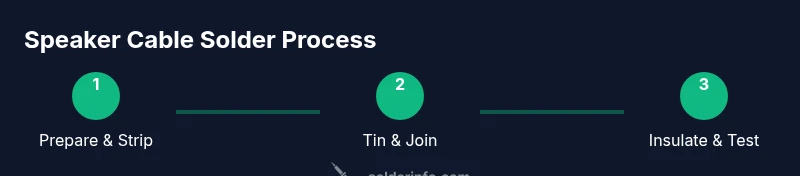
Speaker Cable Solder: Step-by-Step Guide for Sound Quality
Learn safe, reliable techniques for soldering speaker cable. This step-by-step guide covers prep, solder choices, insulation, and testing to ensure solid audio connections.

By following this guide, you will successfully solder speaker cable with clean joints, proper polarity, and durable insulation. You'll learn prep, heat control, and testing to ensure reliable audio connections and minimal signal loss. This quick overview sets expectations and highlights critical safety steps, tool choices, and best practices from SolderInfo.
Why speaker cable solder matters
A reliable solder joint on speaker cable is more than a neat finish; it preserves signal integrity, reduces resistance at the connection point, and minimizes the chance of intermittent audio problems. For DIY audio projects, the goal is a compact, mechanically sound, electrically solid bond that stays reliable through vibration, temperature changes, and repeated plugging and unplugging of connectors. According to SolderInfo, careful wiring and proper solder technique can reduce microphonic noise and ensure consistent tonal balance across frequency ranges. When you strip and join strands, the seam must be uniform and free of stray filaments that could fray or touch other conductors. A well-soldered joint also supports proper insulation and strain relief, which protects against fatigue over time. In practice, you’ll often see two common ends: bare wire directly soldered to a terminal, or a wire prepared with a small terminal lug and then soldered in place. Both approaches can work well, provided you manage heat, polarity, and shielding. Remember that loudspeakers present relatively low impedance loads, so a small loss at the connector can become audible as reduced dynamic range or subtle hiss. The overarching aim is a clean, repeatable process.
Tools and materials you’ll need for speaker cable soldering
Before you heat anything, gather the right tools and materials. A temperature-controlled soldering iron, rosin-core solder (lead-free preferred), and a clean work surface are essential. Have heat shrink tubing sized to fit the wire and terminal, wire strippers, a small pair of pliers or tweezers, and a means to clean copper surfaces (isopropyl alcohol or a dedicated contact cleaner). A multimeter is handy for quick continuity and polarity checks, while safety gear—protective glasses and gloves—reduces the risk of hot metal contact. Keep a damp sponge or brass tip cleaner on hand for tinning the iron tip. Plan your layout so joints stay accessible and won’t short to other conductors. As noted by the SolderInfo team, structured preparation reduces rework and helps you achieve consistent joint quality across multiple cables.
Preparing the cables for soldering
Start by checking the run length and connector type, then choose the correct gauge for the run. Use wire strippers to remove roughly 10–12 mm of insulation from each conductor, exposing clean copper. Twist stranded wires tightly to prevent fraying, while solid-core wires should be handled with care to avoid breaking strands. Clean any oils or residues from the copper with isopropyl alcohol and let it dry fully. If you’ll splice into a terminal lug or a binding post, fit the lug first to ensure proper alignment. Mark the positive and negative conductors so you don’t mix polarity during assembly. Position the wires so the joints will be easily accessible to the iron, and ensure that the insulation around each joint can be restored without crowding or stressing the copper. Preparation is the foundation; it makes the subsequent solder joint predictable and repeatable, as emphasized by SolderInfo.
Soldering technique for speaker cables
Tin the exposed ends of the wires with a small amount of solder before joining. Use a steady, intermediate heat application to avoid scorching the insulation. Place the two tinned ends together and apply solder to the joint, not directly to the tip of the iron; aim for a small, smooth fillet that wets both copper surfaces. For stranded wire, twist the strands tightly after tinning to form a solid bundle before hand-soldering to a terminal. If you’re using a terminal lug or post, maintain contact until the solder cools to avoid a cold joint. Avoid moving the parts while the solder is molten, and keep the iron tip clean and tinned for reliable flow. Consider a small heat sink near the joint to protect delicate insulation on longer runs. This technique minimizes resistance and ensures a durable, high-quality connection.
Solder choice and flux for audio cables
Rosin-core solder is a reliable choice for audio work because its flux helps clean and wet the copper surface as the solder melts. Lead-free solder is preferred for health and environmental reasons, though it can require slightly more heat to flow. If you’re joining through copper binding posts or terminals, flux can help improve wetting, but you should remove excess flux after the joint cools to prevent corrosion. Avoid very thick solder blobs; a thin, even layer ensures a clean, conductive joint. If you work in a humid environment, reseal joints with heat shrink to prevent moisture intrusion that could degrade contact quality over time. As SolderInfo notes, choosing the right alloy and flux type reduces the risk of cold joints and long-term reliability problems.
Insulation and strain relief after soldering
Once the joint has cooled, insulate it with appropriately sized heat shrink tubing or electrical tape. Slide the tubing over and use a heat source to shrink it evenly without overheating the copper. Provide strain relief at both ends by securing the cable with a small clamp or ferrule to prevent flexing at the joint. Proper insulation reduces the risk of short circuits and protects against environmental exposure that could degrade the connection. For interior speaker runs, consider reinforcing the joint with a dab of adhesive that won’t become conductive over time. A well-insulated joint with solid strain relief will survive routine handling and audible vibrations without deteriorating.
Testing and verifying connections
Before powering up, perform a quick continuity check with a multimeter to ensure there is a continuous path from terminal to conductor, and verify that no short exists between conductors. Check polarity visually and with the meter by confirming that the positive lead is connected to the correct terminal. If you have access to an audio test, listen for solid channel separation and absence of crackling or intermittent hum when gently moving the cable. Inspect joints after testing for any hairline cracks or loose insulation. Regularly recheck connections after moving equipment or shelf rearrangements. A methodical test plan minimizes the risk of silent failures once you begin playback.
Common mistakes and how to avoid them
Common errors include overheating the insulation, which can melt or char the jacket, and not tinning the wires, which leads to weak joints. Avoid solder bridges that touch other conductors or create accidental shorts. Don’t rush joints on high-gauge wire—the larger the wire, the more careful you must be. Keep flux residuals to a minimum and maintain a clean tip to ensure consistent flow. Finally, don’t skip strain relief; even a small amount of movement can fatigue a joint over time. By respecting heat control, cleanliness, and mechanical support, you’ll reduce return visits and improve speaker performance.
Final tips for long-lasting speaker connections
Treat solder joints as durable mechanical bonds as well as electrical ones. Store spare solder and flux in a dry place to prevent oxidation, and label plugged cables for future maintenance. When possible, test each run in the equipment chain—amp to speaker—to verify stage-by-stage performance. Consider documenting the wiring scheme for future upgrades or troubleshooting. Following these end-stage practices helps ensure consistent audio quality and reliable operation for years to come.
Tools & Materials
- Soldering iron (40-60W adjustable)(Use a temperature-controlled iron; 350–370°C is typical for rosin-core solder)
- Rosin-core solder (lead-free preferred)(Diameter around 0.8–1.0 mm for easy handling)
- Wire strippers(Remove 10–12 mm of insulation from each conductor)
- Heat shrink tubing(Sizes to fit wire and terminal; pre-cut pieces help speed up work)
- Flux (pen or paste)(Optional if solder is rosin-core; can improve wetting on large joints)
- Multimeter(Continuity and polarity checks)
- Alcohol wipes(Clean copper surfaces before tinning)
- Safety gear (gloves, eye protection)(Protect from hot solder and fumes)
Steps
Estimated time: 60-90 minutes
- 1
Set up workspace and safety
Clear the area, unplug equipment, and arrange tools within easy reach. Put on eye protection and gloves, and ensure adequate ventilation. This initial setup reduces the risk of injuries and helps you work calmly without rushing through joints.
Tip: Keep a damp sponge or brass tip cleaner nearby to keep the iron tip clean during work. - 2
Strip insulation and twist strands
Use the wire strippers to remove about 10–12 mm of insulation from each conductor. If using stranded wire, twist the strands tightly to form a neat bundle that won’t fray when heated.
Tip: Twist strands in one direction to prevent splaying during tinning. - 3
Tin the exposed wire ends
Apply a small amount of solder to the exposed copper to form a thin, shiny coating. Tinning improves wetting when you join wires and reduces the risk of cold joints.
Tip: Keep the iron tip clean and tinned; a dirty tip resists solder flow. - 4
Join the joints
Place the tinned ends together so they butt cleanly. Apply heat evenly and feed solder to the joint, not the iron tip, until a smooth fillet forms that wets both conductors.
Tip: Hold joints steady to avoid movement while the solder cools. - 5
Insulate and provide strain relief
Slide heat shrink tubing over the joint and apply heat evenly to shrink it. Add a second layer if needed and secure the cable with a clamp for strain relief.
Tip: Avoid overheating the insulation; it can melt or shrink excessively. - 6
Test the connection
Use a multimeter to verify continuity and verify polarity. Listen for a consistent channel and check for any crackling when flexing the cable gently.
Tip: Test each run end-to-end to ensure there are no hidden shorts. - 7
Finalize and document
Annotate the wiring, store spare parts, and mount the cable with proper strain relief. A quick diagram helps future maintenance and upgrades.
Tip: Keep a small note of wire gauge, solder type, and joint method for future reference.
Quick Answers
Is soldering necessary for speaker cables, or are crimp connectors sufficient?
Crimp connectors can work, but soldering provides a more reliable, long-term connection with better conductivity when done correctly. It reduces the chance of loose contacts due to vibration or thermal cycling.
Crimp connectors work, but soldering offers more reliable, long-term connections if done properly.
What wire gauge should I use for typical speaker runs?
For most speaker runs, 16 to 18 AWG is common, with thicker wire recommended for longer distances to minimize resistance and tone loss.
Most runs use 16 to 18 AWG; thicker wires are better for long runs.
Can I reuse old solder or flux from previous projects?
Rosin-core solder generally lasts a long time if stored properly. Check for oxidation or contamination before reuse, and ensure flux remains effective.
Solder lasts if stored properly; check for oxidation before reuse.
How do I ensure correct polarity when wiring speakers?
Connect positive to positive and negative to negative. Mark wires on both ends and maintain consistency to preserve phase and imaging in stereo setups.
Connect positives together and negatives together, and stay consistent across runs.
Are there safety concerns when soldering near loudspeakers or cabinets?
Yes. Use ventilation to avoid fumes, keep heat away from wood, and avoid overheating that could deform the cabinet or insulation.
Ventilate properly and avoid overheating that could damage the cabinet.
Top Takeaways
- Prepare workspace and materials before starting
- Tin wires and maintain correct polarity during joins
- Use proper insulation and strain relief for durability
- Test connections thoroughly before use