Solder Without Flame: Torch-Free Soldering Guide
Learn torch-free soldering using electric irons, hot air, and induction heating. This step-by-step guide covers flux selection, tools, safety, and practical tips for electronics, jewelry, and plumbing.

Solder without flame means joining metals using heat sources other than a flame, such as electric irons, hot air, or induction heating. This approach emphasizes precise heat control, safer workspaces, and reliable joints for electronics, jewelry, and plumbing. Use rosin-core or lead-free solder with appropriate flux, and manage ventilation to minimize fumes.
Why solder without flame
Solder without flame is a practical mindset that replaces a traditional flame with safer heat sources to join metals. In many hobbyist and professional contexts, avoiding an open flame reduces fire risk, minimizes heat exposure to surrounding components, and improves joint quality when working with delicate substrates. The phrase solder without flame describes techniques that rely on heat sources other than a traditional torch. For electronics, jewelry, and plumbing projects, this approach aligns with safer studio practices and stricter temperature control. According to SolderInfo, adopting torch-free methods can significantly lower incident rates in busy shops while maintaining reliable joints. The core idea is to deliver precise heat to the solder joint momentarily, allowing the alloy to flow without overheating the base materials. When you choose a torch-free path, you gain greater control over the thermal profile, essential for delicate components or small-gauge wires. The method also emphasizes clean prep, the right flux, and appropriate solder alloys to ensure good wetting and reliable mechanical strength. Solder without flame is not a fantasy; it's a matured practice supported by modern heat sources like electric irons, hot-air stations, and induction heaters. This guide from SolderInfo will walk you through tools, techniques, and safety considerations to help you master torch-free soldering across electronics, jewelry, and plumbing tasks.
wordCountMarkdownAmendmentNoteInBodyBlocksToFollow
Tools & Materials
- Electric soldering iron (temp-controlled, fine tip)(Adjustable temperature; use precision tip for small joints)
- Hot air rework station(Controlled airflow and adjustable temperature for SMDs)
- Induction heater(Optional for larger joints; fast, uniform heating)
- Solder (lead-free, rosin-core)(Widely used for electronics; flux included in solder)
- Flux (rosin-based or polymer)(Promotes wetting and prevents oxidation)
- Solder wick (braid)(For desoldering and cleaning excess solder)
- Safety glasses(Eye protection against splashes and hot tips)
- Ventilation/fume extractor(Manage flux fumes during soldering)
- Tweezers, clamps, PCB holder(Holding parts steady during heating)
- Sharp cleaning tools(Tip cleaners and brushes to maintain metal cleanliness)
Steps
Estimated time: 60-120 minutes
- 1
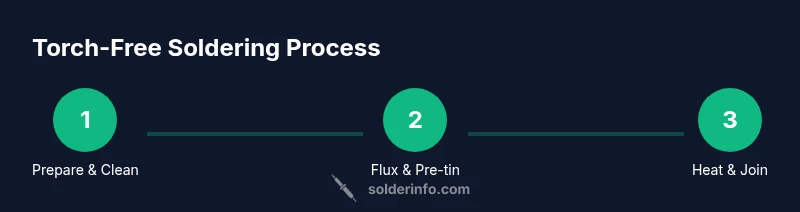
Prepare workspace and parts
Set up a clean, well-ventilated area. Inspect components, pre-fit joints, and organize flux and solder. Ensure tools are within reach and powered with proper safety gear.
Tip: Dust-free area improves joint cleanliness; dry-run to verify fit - 2
Clean and pre-tin surfaces
Use isopropyl alcohol to clean surfaces, then lightly pre-tin the joint with a small amount of solder.
Tip: Pre-tinning gives the solder a head start and improves capillary action - 3
Select heat source and settings
Choose a heat source (iron, hot air, or induction) and set safe, lower-end temperatures suitable for the alloy.
Tip: Start with the lowest effective temperature to avoid overheating - 4
Position parts and flux
Secure parts; apply flux evenly across the joint to reduce surface tension and promote wetting.
Tip: Flux should cover the entire joint; too much flux can be messy - 5
Apply heat and introduce solder
Apply heat to the joint, allow solder to flow into the seam, and remove heat once wetting is achieved.
Tip: Use brief heat pulses; avoid sustained heating - 6
Inspect and rework as needed
Check for shiny, smooth fillets and no cold joints. Reheat if necessary to improve wetting.
Tip: If you see dull patches, reheat briefly and adjust flux - 7
Cool, clean, and test
Allow joints to cool undisturbed, wipe away residue, and test mechanical and electrical integrity.
Tip: Let joints cool naturally to maximize strength
Quick Answers
Can I solder without flame for electronics work?
Yes. Electric irons or hot-air stations allow precise heating without an open flame. Use flux and rosin-core solder suitable for electronics.
Yes, you can solder electronics without flame using an iron or hot-air station.
Is torch-free soldering suitable for jewelry?
It can be suitable with careful temperature control and suitable flux. Induction heaters or precision irons reduce the risk to stones and metal.
Yes, with proper technique and heat control.
What heat source is best for plumbing joints without a torch?
Induction or hot-air methods can preheat joints and work with appropriate flux and solder designed for plumbing; avoid overheating to protect pipes.
Induction or hot-air can help with plumbing joints without a flame.
Do I always need a flame for soldering?
Not for many common tasks. Torch-free methods are widely applicable but some specialty alloys or large joints may still require heat that approaches a flame-like intensity.
No, you can often solder without flame, depending on the alloy and joint.
What safety gear is essential for torch-free soldering?
Safety glasses, ventilation, and heat-resistant gloves are recommended; keep a fire extinguisher nearby for any emergencies.
Wear safety glasses and ventilate your workspace.
What is the cost of non-flame soldering tools?
Costs vary; you’ll typically see a range of prices for irons, hot-air stations, and induction heaters based on features and build quality.
Tool costs vary, but you can start with a good iron and add tools later.
Watch Video
Top Takeaways
- Solder without flame uses safer heat sources for precise joints
- Choose heat source, flux, and alloy based on task
- Control heat with pulses to avoid damage
- Practice and document your torch-free protocol