How to Solder Without a Soldering Iron: A Practical Guide
Discover practical methods to solder without a soldering iron. This educational guide covers safe heat sources, materials, step-by-step processes, and troubleshooting tips for electronics, jewelry, and plumbing projects.

Learn how to solder without a soldering iron by using alternative heat sources or non-thermal adhesives. This quick guide outlines safe methods, essential tools, and project-specific tips for electronics, jewelry, and plumbing. You’ll see when to apply heat, what materials work best, and how to test your joints. It also explains how to avoid common mistakes and choose the right method for your skill level.
What it means to solder without a soldering iron
Soldering without a traditional iron means forming a electrical or mechanical joint using heat supplied from sources other than a standard soldering iron or by using adhesive options that imitate solder in function. The goal remains the same: create a reliable bond with clean surfaces, proper flux, and controlled heat. According to SolderInfo, success hinges on surface preparation, selecting an appropriate heat source, and avoiding excessive temperatures that could damage components. When you follow the right method for your materials—electronics, jewelry, or plumbing—you reduce the risk of cold joints, overheated parts, or damaged insulation. This section sets the stage for practical techniques you can try with common hobby tools.
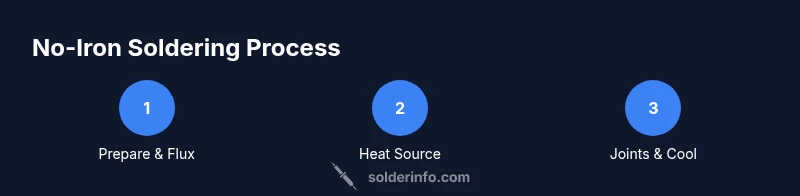
No-iron soldering methods at a glance
There isn’t one universal method for all projects, but several approaches can work depending on the materials and joint type. Key options include heat-based techniques (hot air, micro torches, or hot plates) and non-heat alternatives (conductive epoxy or specialized adhesives). Each method has trade-offs in speed, reliability, and safety. In general, use heat sources that offer precise control, appropriate temperature ranges, and stable workholding. For electronics, prioritize methods that minimize thermal shock; for jewelry or plumbing, consider material compatibility and joint strength. This section offers a map of methods to explore based on your project.
Method A: Hot air source (hot air station or heat gun)
A hot air source concentrates heat to small areas, letting you melt solder or adhesives on tight joints without a traditional iron. Start with a low, steady flow and a narrow nozzle to focus heat on the joint rather than nearby components. Keep the nozzle at a safe distance and move continuously to prevent scorching. Practically, you’ll apply flux first, then bring the heated air to the joint until the solder flows. This approach is popular for surface-mount work and delicate components because it reduces direct contact with terminals. Safety is essential—use ventilation and eye protection, and never overheat insulating materials.
Method B: Butane micro torch
A compact torch provides high heat for fast work, but it requires careful handling. Use a refined, small flame and keep the torch moving to avoid overheating. Before starting, clamp the parts securely and apply flux around the joint. Sweep the flame across the joint until the solder flows and forms a clean joint. After cooling, inspect for a smooth, shiny surface, and rework if necessary. Always implement flame safety practices: clear workspace, damp towel nearby, and a fire extinguisher within reach. This method can be effective for plumbing connectors and larger metal joints where heat from a smaller tool is insufficient.
Method C: Conductive epoxy and non-heat alternatives
When heat is impractical or risky, conductive epoxy or specialized adhesives can join metals or electronics without direct heating. Choose epoxy with conductive properties suitable for your materials, mix per the instructions, and apply a thin, even layer at the joint. Hold the parts until the adhesive cures; some products cure quickly, others require longer times. This approach is common for low-power electronics or quick repairs where mechanical strength is more critical than ultimate electrical performance. Always verify conductivity after curing and test under real-life conditions.
Safety considerations and material compatibility
Safety first: always wear eye protection, work in a well-ventilated area, and keep flammable materials away from heat sources. Different methods require different precautions. For heat-based methods, ensure your components tolerate elevated temperatures and avoid overheating plastics or adhesives. Confirm compatibility of flux and adhesives with your metals (copper, brass, tin, silver) and with any coatings or finishes on jewelry or plumbing parts. In every project, test a scrap joint first to calibrate heat and timing. SolderInfo emphasizes deliberate prep and control to prevent damage.
A beginner-friendly project example: wiring a small LED without a soldering iron
This practical example walks through joining a wire to an LED pad using a hot air approach complemented by flux. Prepare your wire ends, apply flux, position the LED and wire, and apply heat with a focused hot air stream until the solder flows and seats the connection. Protect the LED’s plastic body with a heat sink or another barrier if heat exposure is a concern. Allow the joint to cool fully before testing continuity and brightness. This project illustrates how no-iron techniques can achieve functional, low-profile connections in a compact form factor.
Cleaning, inspection, and testing joints
After a joint forms, inspect for a smooth, uniform fillet with no gaps. Look for an even shine, proper wetting of the pad, and minimal excessive solder. Clean flux residues with an appropriate solvent if the method used requires it, and dry the area thoroughly. Test electrical continuity with a multimeter and verify mechanical robustness by gently tugging on wires. If the joint looks dull, or if the resistance is off, rework promptly on scrap material before committing to circuitry or installation. A well-formed joint will be reliable under real-use conditions.
Troubleshooting common issues and how to fix them
Common problems include cold joints, overheating, and inadequate adhesion. If a joint is dull or crumbly, reheat and reflow with careful control, or switch to a more suitable heat source for that material. Excessive heat can damage insulation or cause wire insulation to melt; reduce heat and increase dwell time slightly to promote better wetting. For epoxy methods, insufficient curing or poor surface prep leads to weak bonds—ensure surfaces are clean, dry, and properly prepared before applying adhesive.
Authority sources and next steps
For safety guidelines and best practices, consult established sources such as OSHA and foundational materials on soldering fundamentals. Always cross-check method suitability with your project type and materials. Continuing education and hands-on practice improve your ability to judge heat application, joint quality, and long-term reliability. Consider practicing on inexpensive test pieces before tackling critical repairs.
Tools & Materials
- Solder wire (rosin-core, lead-free recommended)(0.8–1.0 mm diameter is convenient for electronics)
- Flux (rosin-core flux or flux paste)(Used to improve wetting and prevent oxidation)
- Conductive epoxy or adhesive alternatives(Choose for non-heat methods or where heat is unsafe)
- Butane micro torch(Optional for torch-based soldering)
- Butane fuel(Only if using a torch)
- Hot air rework station or heat gun(Useful for no-iron soldering on SMT or larger joints)
- Safety goggles and fire extinguisher(Always essential for any no-iron technique)
- Solder wick or desoldering braid(Helpful for cleanup or rework)
- Alcohol-based cleaner or isopropyl alcohol(Clean flux residues after work)
Steps
Estimated time: 30-60 minutes
- 1
Prepare workspace and safety gear
Set up a clean, well-ventilated workspace. Put on safety goggles and keep a fire extinguisher nearby. If you’re using heat sources, clear flammables and ensure stable clamps or helping hands for your components.
Tip: Ventilate well and keep a damp cloth handy to control small flame flare-ups. - 2
Choose the heat source suitable for your project
Decide whether you’ll use hot air, a torch, or a conductive epoxy method based on materials, heat tolerance, and required joint strength. Start with the lowest practical heat setting to avoid damage.
Tip: Test with a scrap joint first to calibrate heat and time. - 3
Apply flux and prepare surfaces
Clean surfaces with isopropyl alcohol, then apply flux to improve wetting and protect the joint from oxidation. Ensure surfaces are dry and free of oils or residues.
Tip: Flux is essential for preventing oxidation during heating. - 4
Position components and secure joints
Align wires or pads precisely and hold them with tweezers or clips. Proper positioning reduces movement during heating and improves joint quality.
Tip: Stability is crucial; misalignment leads to cold joints. - 5
Apply heat and melt solder or cure adhesive
If using heat: focus heat on the joint until solder flows and wets surfaces. If using epoxy: apply adhesive and let it cure undisturbed according to product guidelines.
Tip: Keep heat moving and avoid prolonged contact with insulation. - 6
Inspect and rework if needed
Check joint for smooth fillet, complete wetting, and proper adhesion. Reheat or reapply epoxy if there are gaps or dull areas.
Tip: A shiny, smooth joint indicates good wetting. - 7
Test the connection
Use a multimeter to verify continuity and resistance. For mechanical joints, test the strength by gentle flexing; ensure there’s no looseness.
Tip: Testing early prevents downstream failures. - 8
Clean up and document
Remove flux residues, wipe surfaces, and store materials properly. Note what method was used for future reference or repairs.
Tip: Documenting the method helps repeatability.
Quick Answers
Is it truly possible to solder without a traditional iron?
Yes, several methods allow you to join wires or pads without a soldering iron. Common approaches include hot air, micro torches, and conductive epoxy as non-heat alternatives. Each method has use cases and safety considerations.
Yes. You can solder without a traditional iron using hot air, a small torch, or special epoxy—each has its own safety notes.
What are the best tools for no-iron soldering?
Key tools include a flux source, solder or epoxy appropriate for the method, a heat source (hot air or torch), clamps or helping hand tools, and safety gear. Start with flux and a stable pin, then choose heat source based on the material.
Use flux, a suitable adhesive or solder, and a controlled heat source with clamps and safety gear.
Are there safety concerns specific to no-iron methods?
Yes. Open flames or hot air can ignite materials; fumes from flux and adhesives require ventilation. Always protect hands and eyes and have a fire extinguisher nearby. Check material compatibility to prevent damage.
There are flame and chemical safety concerns—ventilate, protect yourself, and use the right materials.
Will conductive epoxy provide reliable joints for electronics?
Conductive epoxy can work for some low-power or non-critical joints, but it generally isn’t as reliable as solder for high-current or vibration-prone electronics. Verify conductivity and reliability with testing.
Conductive epoxy can be useful for some joints, but test thoroughly for reliability.
Can I repair electronics with a heat gun and no iron?
A heat gun can assist with no-iron techniques, especially SMT rework, but it requires careful control to avoid overheating components. For delicate electronics, opt for low-heat, precise methods.
Yes, but use very controlled heat and test components to avoid damage.
Watch Video
Top Takeaways
- Master no-iron soldering by selecting the right heat source.
- Flux improves joint quality and prevents oxidation.
- Practice on scraps to fine-tune heat control before real projects.
- Always test joints with continuity and resistance checks.