Solder Cleaning: Techniques for Clean, Reliable Joints
A practical, safety-first guide to solder cleaning for electronics, plumbing, and jewelry. Learn solvents, tools, and techniques to remove flux and oxides, keep joints reliable, and inspect results.

Goal: clean solder joints by removing flux residues, oxides, and debris to improve solderability and reliability. This guide covers appropriate solvents, tools, and techniques for electronics, plumbing, and jewelry soldering, plus safety considerations and inspection steps. You’ll learn when cleaning is essential, how to avoid damaging components, and how to verify a good joint after cleaning.
Why solder cleaning matters
Solder joints are only as good as the cleanliness of the metal surfaces they bond. Flux residues, oxides, and microscopic debris can impede wetting, promote cold joints, and corrode surfaces over time. According to SolderInfo, a disciplined cleaning routine reduces failure rates and extends service life for electronics, plumbing, and jewelry work. Clean surfaces allow the solder to flow evenly, forming uniform joints with strong mechanical and electrical contact. In electronics, dirty pads trap flux and prevent copper from reflowing properly, increasing the risk of intermittent connections. In plumbing, dirty solder joints can trap air pockets and create leaks under pressure. In jewelry, residue can prevent a smooth finish and reduce joint strength during finishing. The goal is not to over-clean; harsh abrasives or aggressive solvents can remove protective coatings or damage components. Instead, aim for controlled cleaning that removes residues after soldering without disturbing the underlying metal or delicate parts. Establish a routine: inspect, select a compatible cleaner, perform a gentle scrub, rinse or wipe, and verify dryness before reassembly. A good cleaning protocol saves time on debugging later, and supports reliable, repeatable results.
Contaminants you’ll encounter and how they affect joints
Flux residues come in many forms, from resin-based rosin to water-soluble cleaners. Oxides form a thin film on copper and other metals when exposed to air, degrading solderability and electrical continuity. Fingerprints, oil, and polishing compounds can also interfere with wetting and heat transfer. SolderInfo analysis shows that even trace amounts of residue can force the solder to ball or wick away from the joint, creating cold joints or intermittent connections. The impact varies by material and joint design: electronics require pristine copper surfaces for reliable connections; plumbing joints depend on continuous metal-to-metal contact; jewelry joints rely on smooth finishes for both appearance and durability. The best defense is a targeted cleaning plan that identifies residue type and selects a compatible cleaner, then treats the area with a gentle tool to avoid abrasive damage. Finally, ensure residual solvent evaporates completely before applying heat again to prevent flash-off reactions.
Cleaning methods by context: electronics, plumbing, jewelry
Electronics: Use a lint-free wipe dampened with high-purity isopropyl alcohol (IPA) to wipe pads, vias, and exposed copper after soldering. For stubborn flux, apply a small amount of flux remover or resin cleaner and gently scrub with a soft brush. Plumbing: Flux residues in copper or brass joints can be removed with a mild solvent designed for rosin-free flux, followed by a rinse with clean water and thorough drying. Jewelry: Delicate jewelry joints benefit from gentler solvents like IPA or acetone, applied with a soft brush to avoid scratching finished surfaces. In all contexts, never soak assemblies with long, exposed wires in solvents that can penetrate insulation. After cleaning, wipe dry with lint-free material and inspect for any remaining residue or discoloration. Consistency matters: develop a routine that you can repeat with the same cleaners and tools to ensure predictable results every time.
Tools and solvents: what to use and what to avoid
Choose solvents compatible with your substrates and finishing. Isopropyl alcohol (70-99%) is versatile and evaporates quickly, making it a staple for electronics and jewelry cleaning. Flux remover solvents formulated for rosin flux are effective for stubborn residues but should be kept away from plastics unless specified. Avoid water-based cleaners on solder joints that have delicate finishes or heat-sensitive components unless you can completely dry the area afterward. For stubborn residues, mild scrubbing with a nylon brush is preferred over metal bristles to prevent scratching. When in doubt, test a small area first and follow the manufacturer’s guidelines for venting and disposal. Always wear eye protection and gloves, and work in a well-ventilated area to minimize inhalation of fumes. Solder wick and desoldering braid can help lift residues from the joint without aggressive scraping, reducing the risk of damage.
Safety and environmental considerations
Ventilation is essential whenever solvents are used near heat. Work in a dedicated area or with a fume extractor to limit inhalation of fumes. Wear safety goggles and gloves to protect skin and eyes from flux and solvents. Store solvents in properly closed containers away from heat sources, and dispose of used materials according to local regulations. Avoid mixing cleaners, especially those with strong solvents, as reactions can release hazardous fumes. Keep a spill kit handy for accidental solvent spills and clean up promptly. Cleanliness is not just about the joint; it’s about the surrounding workspace, which reduces the chance of recontamination and cross-contamination in future projects. SolderInfo emphasizes documenting your cleaning routine so you can optimize it over time and maintain safer, more reproducible results.
AUTHORITY SOURCES
- https://www.osha.gov
- https://www.nist.gov
- https://www.chemistry.org
Common mistakes and how to fix them
A common mistake is over-wetting joints or components, which can cause flux to spread beyond the target area and complicate rework. Another pitfall is using abrasive tools that scratch pads or copper traces, leading to weak joints or corrosion. Not drying thoroughly can leave solvent residues that interfere with reflow. Failing to use proper ventilation increases exposure to fumes. Finally, skipping a final inspection can miss subtle residues that affect joint quality. To fix, adopt a standardized cleaning protocol, use non-abrasive tools, verify all surfaces are dry, and re-check after the joint cools to ensure there is no recontamination. When you document cleaning steps and results, you create a repeatable workflow that reduces surprises in future projects. The SolderInfo team recommends integrating a quick visual check and a brief wipe test to confirm the surface is ready for rework.
Tools & Materials
- Isopropyl alcohol (70-99%)(Dampens lint-free wipes; avoid metal contact with active circuitry)
- Flux remover solvent (rosin flux remover)(Use per manufacturer guidance; test on a small area first)
- Soft-bristle brush (nylon/brass)(Non-abrasive for electronics; brass for heavier residues, with caution)
- Lint-free wipes or blue shop towels(Leave no fibers behind; essential for dry inspection)
- Solder wick (braid)(Helpful for lifting residues without harsh scraping)
- Safety PPE (goggles, gloves)(Protect eyes and skin from splashes and fumes)
- Ventilation equipment (fume extractor or vent fan)(Minimize inhalation of solvent vapors)
- Sealable containers for used solvents(Prevent spills and allow safe disposal)
Steps
Estimated time: 30-45 minutes
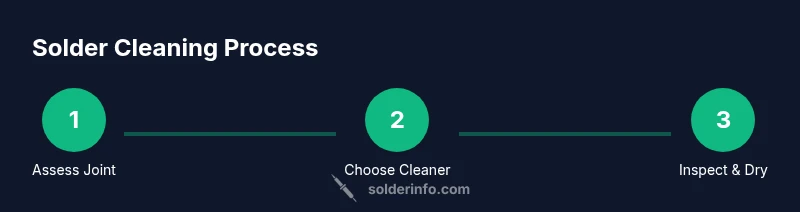
- 1
Assess joint and prep workspace
Inspect the joint to identify residue type and damage. Clear the area, set up ventilation, and don PPE. Decide which cleaner and tool will be most effective without risking components.
Tip: Document what you see before cleaning to guide future repairs. - 2
Choose the right cleaner
Select a cleaner based on residue type—IPA for most fluxes, a rosin flux remover for stubborn residues, and gentler solvents for delicate jewelry surfaces. Avoid mixing cleaners unless specified by the manufacturer.
Tip: Test cleaner on a small, inconspicuous area first. - 3
Apply cleaner to the joint
Dampen a lint-free wipe or brush with the chosen cleaner. Avoid soaking the joint; a light, controlled application minimizes capillary action into nearby components.
Tip: Use a dedicated brush for electronics to prevent cross-contamination. - 4
Gently scrub residues
Use the brush to loosen flux and oxides with soft, circular motions. For stubborn areas, switch to a small amount of cleaner and a fresh wipe to prevent redepositing contaminants.
Tip: Never apply heavy pressure that may damage pads or finishes. - 5
Rinse and dry thoroughly
Wipe away any remaining cleaner, then allow the surface to dry completely. Use lint-free cloths and a gentle airflow to accelerate evaporation. Avoid leaving wet surfaces near heat sources.
Tip: Inspect under bright light to ensure complete dryness. - 6
Inspect cleanliness and rework if needed
Look for any remaining residue or discoloration. If necessary, repeat the cleaning cycle on small areas rather than the entire joint. Confirm there’s no film before reflow.
Tip: A second pass often prevents post-reflow defects. - 7
Document results and store cleaners
Record what worked, including cleaner type and exposure time. Seal solvents properly and store away from heat sources. Update your cleaning checklist for future projects.
Tip: Regular documentation improves repeatability and safety.
Quick Answers
What is solder cleaning?
Solder cleaning is the process of removing flux residues, oxides, and debris from joints after soldering. It improves wetting, electrical conductivity, and longevity by ensuring a clean surface for the next operation or finish.
Solder cleaning removes flux, oxides, and debris to improve joint reliability and conductivity.
Is cleaning required for every joint?
Not every joint requires the same level of cleaning. Light flux residues on electronics can be removed with IPA, while stubborn residues may need a dedicated flux remover. Always inspect the joint to decide.
Most joints benefit from some cleaning, but the extent depends on the residue and the application.
Which solvents are safe for electronics?
Isopropyl alcohol is widely used for electronics due to its fast evaporation and low residue. For tougher flux, rosin flux remover designed for electronics is appropriate. Avoid water on heat-sensitive assemblies unless you can fully dry afterward.
Isopropyl alcohol is common for electronics; use flux removers for stubborn residues and ensure complete drying.
How can I tell if a joint is clean?
A clean joint should be visually free of flux and oxide films, feel smooth to the touch, and dry after cleaning. Under bright light, there should be no visible residue. Reflow should produce a uniform, bright solder fillet.
Look for a residue-free, dry surface and a uniform solder fillet after cleaning and drying.
Are there safety concerns with solvents?
Yes. Always use solvents in a well-ventilated area, wear eye protection and gloves, and store chemicals properly. Dispose of used solvents following local regulations to minimize environmental impact.
Solvents can be hazardous; ventilate, protect yourself, and dispose of waste safely.
Top Takeaways
- Establish a consistent solder cleaning protocol.
- Choose cleaners matched to residue type and material.
- Dry surfaces completely before reflow or finishing.
- Document results to improve future reliability.