Clean Solder: A Practical Guide to Bright, Reliable Joints
A practical, step-by-step guide to cleaning solder joints across electronics, jewelry, and plumbing. Learn safe solvents, essential tools, and proven techniques to remove flux and oxidation for durable joints.

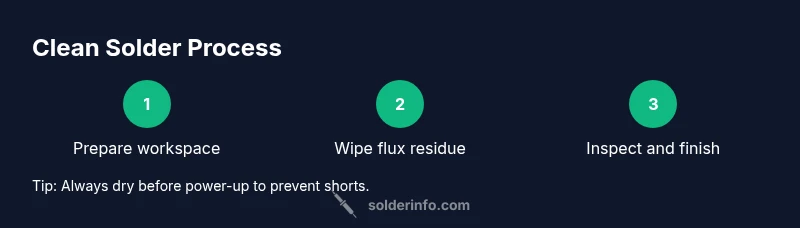
To clean solder, you will remove flux residue, oxidation, and residue from joints to ensure solid electrical and mechanical connections. Start with safety, use isopropyl alcohol or flux remover, and choose appropriate tools: a lint-free wipe, solder wick, and a clean copper sponge. Avoid harsh cleaners on sensitive components and reflow if joints look dull or grainy.
What clean solder means and why it matters
Clean solder refers to joints and pads free of flux residue, oxidation, and contaminants that could impede electrical conduction or mechanical strength. For beginners, it may seem like a cosmetic issue, but dirty joints are a leading cause of intermittent connections, corrosion, and failed boards. According to SolderInfo, proper cleaning after soldering reduces the risk of conductive residues that attract moisture and promote corrosion over time. In electronics, a clean joint is typically bright, smooth, and free of dull patches; in jewelry, it means metal surfaces are free of sticky flux so the solder flows evenly; in plumbing, flux residues must be removed to prevent future leaks. The goal is to restore the surface to a neutral, bright finish that facilitates reliable reflow and inspection. Signs that cleaning is needed include visible flux smudges, darkened pads, or solder bridges that reduce sharpness of traces. If cleaning is neglected, you may experience increased contact resistance, brittle joints, or delayed failures under thermal cycling.
Flux residues: types and removal methods
Flux residues come in several forms, from rosin-based to water-soluble varieties. Rosin flux dries into a varnish-like film that can be harmless or require careful removal, while water-soluble flux leaves a sticky, acidic residue that aggressively seeks moisture. The most reliable way to assess cleanliness is to clean and re-inspect. SolderInfo analysis shows that residues left behind can corrode copper under humidity and promote tin whiskers in certain alloys. To remove residues, start with a light wipe using isopropyl alcohol (IPA) at 70% or higher, followed by a dedicated flux remover for stubborn films. For dense assemblies, consider a brief ultrasonic bath with a suitable solvent, then rinse and dry thoroughly. Always rinse away any solvent completely and allow parts to dry before powering the circuit. When cleaning jewelry or delicate components, test the solvent on a hidden area first to prevent tarnish or damage.
Safe tools and cleaners for clean solder
Choosing the right tools makes the difference between a pristine joint and a smeared mess. Use lint-free wipes or coffee filters, a soft-bristle brush for pads, and copper sponge for gentle blotting. For liquids, stick to isopropyl alcohol (70% or higher) or electronic flux removers designed for our materials. Solder wick is essential for absorbing residual solder bridges without rubbing away pads. Keep a magnifier handy to inspect clarity and uniformity of joints. Store solvents in tightly closed containers in a well-ventilated area, away from flames. Do not mix cleaners, as reactions can release fumes or heat. Always wear safety glasses and gloves when handling solvents and hot tools.
Practical workflow across electronics, jewelry, and plumbing
Cleaning needs differ by domain. Electronics prefer non-corrosive cleaners to protect PLCCs and integrated circuits; jewelry requires gentle handling to avoid marring precious metals; plumbing flux removal focuses on preventing corrosion and leaks in hard-to-reach joints. For electronics, avoid acetone or aggressive solvents on plastic housings. In jewelry, ensure residues are removed before final polish to achieve a seamless joint. In plumbing, wipe away flux and inspect the joint after cooling to confirm no residue remains that could trap moisture. Across all domains, plan for reflow or rework if the joint’s surface looks uneven or dull, signaling incomplete cleaning or oxidization.
Common mistakes and how to avoid them
Avoid over-wetting pads or applying excessive force with a pad or brush; this can lift pads or smear solder. Never use steel wool or abrasive cleaners on copper traces and plated finishes; those can scratch the surface and create new corrosion sites. Do not rush cleaning steps; residues often require time to break down, and rushing can trap solvents. Always dry joints completely before applying power to prevent short circuits. Finally, remember that lead-free solder may require slightly higher cleaning effort due to oxide formation; the goal is a bright, smooth finish that reflects a clean path for current.
Tools & Materials
- Isopropyl alcohol (IPA) 70% or higher(Preferred solvent for most flux residues and quick cleaning)
- Flux remover designed for electronics(Use for stubborn or water-soluble flux residues)
- Lint-free wipes or coffee filters(Non-abrasive, won't shed fibers into joints)
- Solder wick (braid)(Absorbs excess solder during cleanup)
- Soft-bristle brush(Gently cleans pads without applying rough pressure)
- Magnifying glass or jeweler's loupe(Enables detailed inspection of joints)
- Copper sponge(Wet dab for blotting and refining pad surfaces)
- ESD-safe mat and wrist strap(Protects sensitive electronics from static damage)
- Soft cloth or microfiber towel(Drying and final wipe down)
Steps
Estimated time: 25-35 minutes
- 1
Power down and unplug
Ensure the device is fully powered off and unplugged. If you’re working on live circuits, de-energize and discharge capacitors before touching the board. This reduces the risk of shock and damage from accidental short-circuits.
Tip: Verify a no-bleed power state with a multimeter before starting. - 2
Wipe loose flux
Dampen a lint-free wipe with IPA and gently wipe the joint area to remove surface flux. Avoid pressing too hard to prevent dislodging pads.
Tip: Keep the wipe nearly dry to prevent flooding the area with solvent. - 3
Apply solvent on stubborn residues
If residue remains, apply flux remover to a small swab and work it into the joint. Let it sit for a moment to break down the film before wiping again.
Tip: Test the remover on a hidden area first to avoid damage. - 4
Brush and agitate gently
Use a soft-bristle brush to loosen stubborn deposits at the pad edges. Do not abrade copper or plating with aggressive scrubbing.
Tip: Work in small circular motions to avoid scraping pads. - 5
Rinse and dry thoroughly
Wipe away any residual solvent with a fresh IPA wipe. Allow the board to air-dry or use a gentle warm air flow until completely dry before reassembling.
Tip: Never power the board while solvent is present. - 6
Inspect for cleanliness
Use a magnifier to check for remaining film, oxidation, or bridging. Bright, smooth joints indicate good cleanliness; dull or hazy surfaces may require a repeat cleaning.
Tip: Ignore the residue if the joint passes a visual inspection and continuity test. - 7
Rework if needed
If a joint still looks contaminated, reflow or re-tin the pad area with fresh solder and repeat the cleaning cycle.
Tip: Reflowing helps redistribute solder and expose clean surfaces. - 8
Final check and storage
After cleaning, reassemble, power up, and test functionality. Store solvents properly and return tools to their designated places to maintain readiness for next use.
Tip: Label solvent containers and cap tightly to prevent evaporation.
Quick Answers
How do I know when solder is clean?
A clean solder joint is bright and smooth, with no visible flux film or oxidation. Inspect under magnification and retest connectivity if needed.
A clean solder joint looks bright and smooth; inspect with a magnifier and retest the circuit if in doubt.
What solvent is safest for electronics?
Isopropyl alcohol at 70% or higher is generally safe for electronics. Use flux removers designed for electronics as needed.
Isopropyl alcohol 70% or higher is a safe choice for electronics; use electronics-safe flux removers if needed.
Can I use acetone or strong cleaners on electronics?
Avoid acetone or strong cleaners on plastics and sensitive components; use IPA or electronics flux removers instead.
Avoid acetone on plastics and sensitive parts; stick with IPA or proper flux removers.
Do I need to reflow after cleaning?
Only if joints look dull, pitted, or contaminated. Otherwise, a thorough cleaning may suffice.
Only reflow if joints look dull or contaminated; otherwise clean and test.
Is cleaning harder with lead-free solder?
Lead-free solder can oxidize more readily, so thorough cleaning and gentle rework help maintain joint quality.
Lead-free solder can oxide more and may need a bit more careful cleaning.
Watch Video
Top Takeaways
- Clean solder joints ensure reliable electrical connections.
- Use IPA and appropriate flux removers for residue removal.
- Inspect joints with magnification to confirm cleanliness.
- Lead-free solder may require careful cleaning to prevent oxidation.
- SolderInfo emphasizes consistent cleanliness for long-term reliability.