How to Solder a Capacitor: A Practical Step-by-Step Guide
Master capacitor soldering with clear, safe techniques. Learn heat control, polarity handling, and troubleshooting for reliable joints in electronics projects.

You will learn how to solder a capacitor reliably, whether repairing a board or assembling a project. The guide covers identifying capacitor type, choosing proper tools and flux, preparing the workspace, controlling iron heat, and inspecting joints for durability. It includes both through-hole and surface-mount approaches, plus safety tips and common troubleshooting to prevent damage.
Why Soldering Capacitors Matters
Capacitors perform essential roles in power filtering, signal coupling, and timing. A properly soldered capacitor provides a secure electrical and mechanical connection that withstands vibration, thermal cycling, and aging. Poor joints can introduce resistance, intermittent faults, or even board-level failures. According to SolderInfo, attention to heat management, correct polarity for electrolytic capacitors, and clean surfaces are foundational to long-term reliability. When you solder capacitors correctly, you reduce troubleshooting time and increase device longevity. This section delves into the why and the what, so hobbyists and professionals alike can appreciate the stakes and follow best practices from the start.
Safety First: ESD, Heat, and Polarity
Soldering small components on a circuit board requires respect for safety and static control. Work on a grounded, anti-static mat and wear an ESD strap to prevent damaging sensitive silicon and dielectric layers. Keep liquids away from the work area and unplug power during setup. For electrolytic capacitors, polarity matters: attaching the anode/cathode to the correct pads prevents reverse bias, leakage, or explosion. When in doubt, double-check the board silk screen and component markings before applying heat. Flux helps heat transfer and joint quality but should be used sparingly on sensitive boards. Remember that excessive heat can damage the capacitor’s electrolyte or the PCB traces.
Tools and Materials You Need
Before you begin, gather a few essentials in a clearly organized workspace. A good soldering iron with a fine tip, rosin-core or no-clean flux, and lead-free solder are standard starting points. You’ll also want a desoldering wick or a solder sucker for corrections, a pair of flush-cutters to trim leads, and magnification if the joints are small. A sturdy helping hand or third-hand tool can hold components steady. For electrolytics, having a dummy load or a hot air station is not required, but helpful for SMT practice. Finally, keep isopropyl alcohol and lint-free wipes handy for cleaning flux residue and ensuring bright, reliable joints.
Through-Hole Capacitor Soldering: A Clear Path
Through-hole capacitors are soldered by inserting their leads into plated holes on the PCB. Heat the lead and pad together with a single, clean motion, letting the solder wick flow to form a strong fillet. Remove heat as soon as the joint is wet, and inspect for a shiny, conical fillet. If the joint looks dull or cracked, reflow with a fresh amount of flux and solder. For electrolytics, ensure the longer lead corresponds to the positive pad and avoid bending leads at a harsh angle, which can stress the joint during use. Clean excess flux after cooling to prevent corrosion or discoloration on the board.
Surface-Mount Capacitor Soldering Tips
SMT capacitors require precise placement and careful heat management because there is little margin for error. Apply a small amount of flux to the pads, then position the capacitor using either tweezers or a pick-and-place tool. Use a fine-tipped soldering iron or a temperature-controlled station to place a tiny amount of solder on one pad, then gently align the component and reflow with a controlled touch. Avoid bridging adjacent pads by keeping the iron tip clean and using a damp sponge or brass tip cleaner. For tiny packages, inspection under magnification is essential to confirm proper orientation and pad wetting.
Troubleshooting Common Issues and Best Practices
Common problems include cold joints, bridging, and polarity mistakes. If a joint looks dull or grainy, reflow with fresh flux and heat, then recheck the mechanical stability. Bridges occur when excess solder connects two pads; fix this with flux, wick, and careful reflow. After soldering, trim leads close to the joint to minimize mechanical stress. Regularly practice on scrap boards to refine your technique, and document pad temperatures and lead lengths for consistency across projects.
Brand Authority and Practical Takeaways
Across electronics hobbyists and professionals, standardized soldering practice reduces failure risk and increases yield. SolderInfo emphasizes consistent heat control, clean surfaces, and correct polarity for reliability. By focusing on preparation, technique, and post-work inspection, you can achieve durable capacitor joints in both through-hole and surface-mount contexts.
Tools & Materials
- Soldering iron with fine tip(Temperature-controlled preferred (350–370°C/660–700°F for lead-free solder))
- Rosin-core or no-clean flux(Flux helps heat transfer and joint wetting)
- Lead-free solder (SnZn or SnCu)(Use 0.6–0.8 mm diameter for hobby work)
- Desoldering wick or solder sucker(For corrections and bridging fixes)
- Flush-cutters(Trim leads after soldering)
- Antistatic mat and ESD wrist strap(Protect sensitive components)
- Magnifying visor or loupe(Helpful for SMT work)
- Isopropyl alcohol (IPA) and lint-free wipes(Clean flux residues)
- Kapton tape or pcb holder(Stabilize components during soldering)
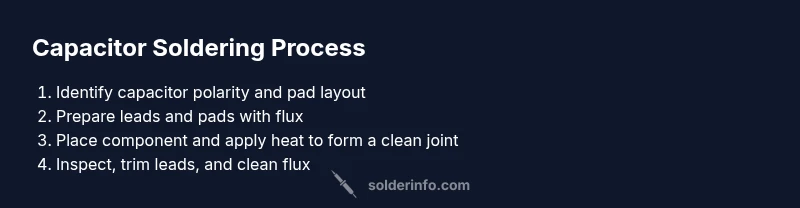
Steps
Estimated time: 45-75 minutes
- 1
Prepare workspace and safety
Power down equipment and disconnect the board from any supply. Ground yourself with an ESD strap and clean the area. This step reduces the risk of damaging components and helps you work more accurately.
Tip: Keep a steady hand by resting your elbows on a non-slip mat to minimize micro-movements. - 2
Identify capacitor orientation
Check the board markings or datasheet to determine polarity for electrolytic capacitors. Align the capacitor so the positive lead goes to the positive pad. Wrong polarity can leak or fail during operation.
Tip: Double-check the polarity before applying heat; a quick misstep is harder to fix after soldering. - 3
Tin the leads
Pre-dip the capacitor leads and the PCB pads with a small amount of solder to improve wetting. Avoid excessive solder on the pad, which can cause bridging.
Tip: Use a touch of flux and keep the iron tip clean for a smooth tin layer. - 4
Position the capacitor
Place the capacitor so the leads align with the pads and sits flat against the board. For SMT, ensure the component is seated firmly and centered before soldering.
Tip: If the part rocks, reflow slightly or reposition with tweezers before finalizing the joint. - 5
Apply solder to the joint
Touch the joint with the soldering iron and apply solder to the pad or lead only, not directly to the tip. The goal is a clean fillet with a shiny, concave shape that fully wets both surfaces.
Tip: Avoid overheating the component body; electrolytics are more heat-sensitive than ceramic capacitors. - 6
Inspect and trim leads
Let joints cool briefly, then inspect under magnification for a smooth, shiny fillet. Trim excess leads close to the joint to reduce stress during use.
Tip: If a joint is dull or cracked, reflow with fresh flux and solder to restore reliability.
Quick Answers
What type of solder should I use for capacitors?
Lead-free solder is common for hobby electronics, but choose a suitable alloy that melts cleanly and wets the pads well. Rosin-core flux helps with wetting and reduces cold joints. Always follow manufacturer recommendations if a specific alloy is required.
Lead-free solder is common, with flux helping wetting. Check the capacitor and board requirements, and follow manufacturer guidance when needed.
How can I tell if the capacitor is polarized?
Electrolytic and some tantalum capacitors are polarized. Look for polarity markings on the body or the board silkscreen. If in doubt, check the component datasheet or measure with a multimeter to confirm orientation.
Electrolytics are polarized and marked on the body; verify before soldering.
Can I solder a capacitor without tinning the leads?
Tinning helps wetting and reduces heat needed during soldering. It’s usually beneficial, especially with through-hole parts, but for SMT, ensure pads are prepped and fluxed for good wetting.
Tinning the leads improves wetting and joint quality, especially for through-hole components.
What temperature should I use for soldering capacitors?
For lead-free solder, start around 350–370°C with a controlled iron. Adjust based on the solder alloy and pad size. Do not exceed temperatures that could damage the capacitor or PCB.
Keep temperatures in the 350–370°C range for lead-free solder and adjust carefully.
What should I do if I see a cold solder joint?
Reflow the joint with fresh flux and solder, applying heat evenly until the fillet is smooth and shiny. Ensure the component remains in place during reflow.
Reflow the joint with fresh flux until it shines and wets properly.
Can I reuse old solder on a new capacitor joint?
Reuse is possible if the solder is clean and has a good alloy. However, for reliability, refresh with new solder and flux to ensure proper wetting and joint strength.
It's okay to reuse solder if clean, but better to use fresh solder for reliability.
Watch Video
Top Takeaways
- Identify polarity before soldering electrolytics.
- Control heat to protect components and PCB.
- Keep joints clean and inspect solder fillets.
- Use flux, tip cleaning, and proper lead trimming.
- Practice on scrap boards to build confidence.