Soldering Techniques for Electronics: A Practical Guide
master practical soldering techniques for electronics with safe setups, flux choices, temperature control, and reliable joint inspection. This guide by SolderInfo walks you from fundamentals to advanced practices for hobbyists and professionals.

With these steps, you will reliably join electronic components using proper temperature control, flux, and clean joints. You'll learn to choose the right solder and tip, set up a safe workstation, and inspect joints for quality. This guide emphasizes consistency, safety, and repeatable results for hobbyists and professionals. According to SolderInfo, disciplined technique reduces cold joints and bridges.
Foundational principles of soldering electronics
Soldering electronics is about creating reliable electrical connections that can withstand vibration, thermal cycling, and handling. At the core is wetting: the liquid metal must flow over the metal surfaces to form a strong bond. Good joints are shiny, smooth, and have a balanced fillet. A skilled technician manages heat, cleans surfaces, and uses flux to remove oxides that prevent bonding. According to SolderInfo, the core goal is reliable electrical connections with mechanically robust joints, not simply melting metal. By understanding heat flow, component mass, and solder properties, you can predict how long to apply heat and where to place your iron. In practice, you’ll balance thermal mass of the board and parts with the tip size to minimize heat soak. This section sets the baseline for everything that follows: preparation, technique, and inspection. Consistency in technique reduces rework and improves yield across hobby projects and professional assemblies. Take time to plan each joint: check orientation, lay out flux, and pre-place parts. Keep the area tidy to prevent stray solder bridges.
Temperature control and heat management
Temperature control is the single most critical factor in successful electronics soldering. A variable-temperature iron lets you match the heat to the solder, the pad, and the component. Start with a middle range and adjust downward for small parts or sensitive components, and upward for large copper pours or lead-free alloys. Short heat pulses are preferred to minimize pad lifting and damage. For heat-sensitive devices, consider preheating the board edge or using a hot plate to reduce thermal shock. Always maintain a clean, dry flux surface so the solder can flow cleanly. The goal is fast, controlled heat transfer that produces a shiny, conical fillet without overheating adjacent traces. Regularly inspect joints for dullness or graininess, which signal overheating or poor wetting.
Flux, solder alloys, and their roles
Flux acts as a chemical cleaner that removes oxides and promotes wetting. Rosin-core fluxes are common for electronics, but there are water-based and no-clean variants as well. The choice of solder alloy impacts melting temperature, wetting, and joint reliability. Lead-free alloys (often tin-silver-cointain) require slightly different heat management and can be more challenging for beginners, so use manufacturer recommendations and test on scrap boards first. Always apply flux to the joint surfaces before tinning or soldering to improve wetting and reduce oxidation during the joint formation.
Tools and setup for precise work
A well-organized station reduces mistakes. Use an ESD-safe mat and wrist strap, a magnifier or loupe for inspection, hobby-safe ventilation or a fume extractor, and good lighting. A quality fanless or low-noise fume extractor helps with safety without introducing drafts that cool the joint too quickly. Keep your desoldering braid, flux pen, and sponges handy. Store solder in a dry place and wipe the tip on a damp sponge or brass wool to clean oxidation between joints. A third-hand tool or helping hands is invaluable for holding components securely while you work. Finally, ensure your soldering iron tip is properly tinned and clean before you begin.
Techniques for through-hole components
Through-hole soldering relies on a strong mechanical bond and reliable conductive paths. Start by placing the lead tails through the board holes, bend the leads to hold them in place, and apply flux to accelerate wetting. Apply heat to the joint and add solder to the pad, not the iron tip, to ensure a clean fillet that wicks into the hole. Briefly touch only the pad and the lead to avoid heat migration into surrounding traces. Inspect the joint: a smooth, shiny fillet around the lead indicates a good bond. If you see a dull or gray joint, reheat and apply more solder as needed.
Techniques for surface-mount components
Surface-mount soldering requires steadier hands and precise heat control. For small chips, consider using solder paste with a stencil, then reflow with a hot air tool or reflow oven. If hand-soldering, apply a tiny amount of flux, place the part, and heat the pad to reflow the solder, ensuring the component seats flush and the joints form clean menisci. For fine-pitch ICs, use a magnifier to check for bridging and ensure consistent joint formation. When finishing, remove flux residues with isopropyl alcohol and a soft brush to keep pads clean for testing.
Inspecting joints: visual cues and testing
A good solder joint is smooth, shiny, and has a small, curved fillet that forms around the pad and lead. Look for: complete coverage of the pad, no gaps, no solder bridges to adjacent pads, and no cold joints. Lighting matters: use angled light to reveal dull surfaces and whiskers. Perform a quick continuity test with a multimeter to confirm resistance is low and within expected ranges. For critical connections, gently tug on the component to ensure mechanical integrity. Residue should be cleaned promptly to prevent long-term corrosion.
Common defects and how to fix them
Common defects include cold joints, solder bridges, lifted pads, and insufficient wetting. Cold joints are dull and crumbly; reheat with a touch of flux and a fresh bead of solder. Bridges occur when solder flows across two pads; rework with desoldering braid to remove extra metal and reapply solder precisely. Lifted pads happen when heat or mechanical stress separates the copper; if this occurs, use glue or epoxy to re-anchor and repair the copper trace or replace the board area. Regular inspection and practice will reduce these issues over time.
Practice plans and project progression
Begin with simple through-hole practice boards that use a handful of resistors, diodes, and IC sockets. Progress to mixed-layout boards with surface-mount components, then to more complex assemblies with delicate components and fine-pitch devices. Build a habit of pre-placing components, fluxing, and testing each joint as you go. Maintain a notebook of what worked and what didn’t to accelerate your learning curve. Regular, deliberate practice is the fastest way to build confidence and quality.
Tools & Materials
- Soldering iron with adjustable temperature(Choose a model with good heat control and a fine tip (0.5–0.8 mm) for precision.)
- Lead-free rosin-core solder (SnAgCu)(Use diameter appropriate for your joints (0.5–0.8 mm for most hobby work).)
- Flux pen or bottle flux(Rxs flux helps with wetting and reduces bridging.)
- Desoldering braid (solder wick)(For removing excess solder and fixing bridges.)
- Desoldering pump(Optional tool for through-hole removal.)
- Flame-free fume extractor or well-ventilated area(Always vent fumes to reduce inhalation risks.)
- ESD-safe mat and wrist strap(Protects sensitive components from static discharge.)
- Magnifying loupe or microscope(Helpful for fine-pitch components.)
- Isopropyl alcohol (IPA) 70-90%(Clean flux residue after cooling.)
- Soldering iron stand and damp sponge/brass tip cleaner(Keep tips clean and ready.)
- SMT tweezers and helping hands(Stabilizes small components during work.)
- Small flush cutters and wire strippers(Trim leads cleanly after soldering.)
Steps
Estimated time: 60-90 minutes
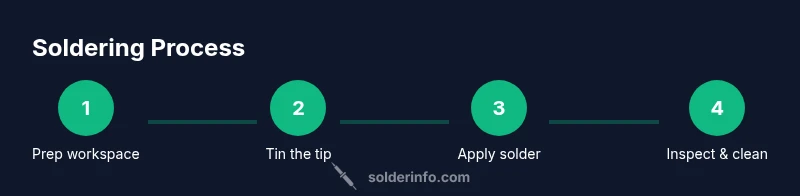
- 1
Prepare workspace
Set up a clean, organized soldering area with good lighting and ventilation. Wear safety glasses and an ESD wrist strap. Arrange tools and materials so you can reach them without reaching over hot components.
Tip: Keep a scrap board to test heat and tip cleanliness before touching actual parts. - 2
Choose tools and calibrate temperature
Select the right tip size for the joint and set the iron to a mid-range temperature suitable for your solder type. Use a temperature controller if available to prevent overheating delicate parts.
Tip: Test on a spare pad to ensure heat is transmitted efficiently without scorching. - 3
Tin the tip
Heat the tip and apply a small amount of solder to create a shiny, protective layer. Wipe off excess to keep the tip clean for the next contact.
Tip: Tinning reduces oxidation and improves heat transfer in future joints. - 4
Flux and prep joints
Apply flux to the pads and leads before placement. Pre-tin the lead or pad if needed to improve wetting and reduce the time the iron must stay on the joint.
Tip: Flux ensures faster wetting and cleaner joints, especially on copper pours. - 5
Position components
Place components onto the pads and hold them steady with tweezers or helping hands. For surface-mount parts, ensure correct orientation before heating.
Tip: Double-check polarity and orientation before applying heat. - 6
Apply solder to the joint
Touch the joint with the molten solder, not the iron tip alone. Allow a tiny fillet to form around the lead and pad. Withdraw the iron once the joint is wet.
Tip: Keep contact time short to prevent heat from damaging adjacent traces. - 7
Inspect and rework if needed
Look for a smooth, shiny fillet with no gaps or bridges. If dull or lumpy, reheat with slight flux and add more solder as required.
Tip: If you bridge two pads, rework with braid to remove excess solder. - 8
Clean residue and test
Clean flux residue with IPA and a soft brush. Re-test mechanical integrity and electrical continuity to confirm proper connection.
Tip: Thorough cleaning reduces long-term corrosion and residues that attract dust. - 9
Store tools and maintain tips
Turn off equipment, clean and store tips in their holder, and house parts in anti-static containers. Periodically replace worn tips for best performance.
Tip: Regular maintenance extends tool life and improves joint quality.
Quick Answers
What is the most important factor in achieving a good solder joint?
The most important factor is proper heat and clean wetting of the joint. Without adequate heat control and flux-assisted wetting, joints may be dull or fail mechanically. Always aim for a shiny, well-formed fillet and verify with a quick inspection.
The key is proper heat and clean wetting to form a solid, reliable joint.
Can you use lead-free solder safely for electronics?
Yes, lead-free solders are standard in modern electronics when used with proper flux and temperature control. They typically require a bit more heat and careful temperature management to ensure reliable wetting and mechanical strength.
Lead-free solders are safe when used with correct temperature control and flux.
What are flux types for electronics and when should I use them?
Electronics flux comes in rosin-core, water-soluble, and no-clean variants. Rosin-core is common for hobbyist projects; no-clean reduces cleaning needs; water-soluble requires thorough cleaning after soldering. Choose based on exposure, cleaning capability, and component sensitivity.
Choose rosin-core for simplicity, or no-clean if you want less cleaning.
Why do cold joints occur and how can you fix them?
Cold joints happen when heat transfer is insufficient or damp flux interferes with wetting. Reheat the joint with fresh flux and solder, ensuring the pad is thoroughly heated and the lead wets the surface properly. If needed, disassemble and re-solder with careful teardrop heat management.
Reheat with fresh flux and ensure proper wetting to fix cold joints.
How should you store solder and flux safely?
Store solder in a dry, cool place away from moisture. Keep flux in a sealed container to prevent evaporation and contamination. Always cap bottles after use and label containers clearly.
Keep solder dry and flux sealed to maintain effectiveness.
Is it okay to practice soldering on old circuit boards?
Yes, practicing on old boards is a great way to build skill without risking new projects. Use scrap components and dummy boards to practice joints, desoldering, and inspection techniques before working on real devices.
Practice on scrap boards first to build confidence.
Watch Video
Top Takeaways
- Master heat management for reliable joints
- Flux and proper tinning improve wetting
- Inspect joints with magnification and testing
- Prefer short heat pulses to avoid damage
- Practice on scrap boards to build confidence