Good Soldering Temperature: How to Choose and Control Heat for Reliable Joints
Discover how to determine the right good soldering temp for electronics, plumbing, and jewelry, with practical ranges, testing steps, and safety guidance.

Good soldering temp isn't a single fixed value; heat must match the alloy, flux, and substrate. In electronics, use a mid-range temperature per the solder manufacturer—roughly 330-370°C for lead-free alloys and slightly lower for leaded solders. For plumbing or jewelry, higher temperatures are common with different soldages. Always consult datasheets and test on scrap first.
Understanding what 'good soldering temp' really means
According to SolderInfo, good soldering temp isn't a single fixed value; it's a function of alloy, flux, and substrate. When you are assembling electronics, the temperature you apply must melt the solder reliably and promote good wetting without lifting pads or damaging sensitive components. The same principle applies to plumbing or jewelry, but the materials, heat sources, and heat transfer rates differ. In practice, you adjust dwell time and peak temperature to minimize thermal stress while ensuring the joint forms a clean, shiny fillet. A stable iron tip, properly tinned, transfers heat consistently; wandering temps cause dull joints or cold joints. Therefore, the best approach is to view temperature as a knob you dial during setup, then verify with tests on sacrificial materials before committing to a real joint. Acceptable ranges are not universal; they vary by solder type, flux chemistry, and substrate sensitivity.
Factors that influence the ideal temperature
Several variables determine the optimal soldering temperature, including the solder alloy (lead-free versus leaded), flux chemistry, pad cleanliness, and the heat transfer method (hand iron, hot air, or preheat). Lead-free alloys generally require higher peak temperatures and more controlled heat to avoid thermal shock. Flux reduces oxidation and improves wetting at elevated temps, while preheating large copper planes can distribute heat and minimize local overheating. Component sensitivity matters; delicate SMD parts demand shorter dwell times. Practice a structured approach: start at the lower end of the recommended range, observe wetting, and adjust in small increments. Always validate with tests on spare boards before committing to production.
Temperature ranges for common scenarios
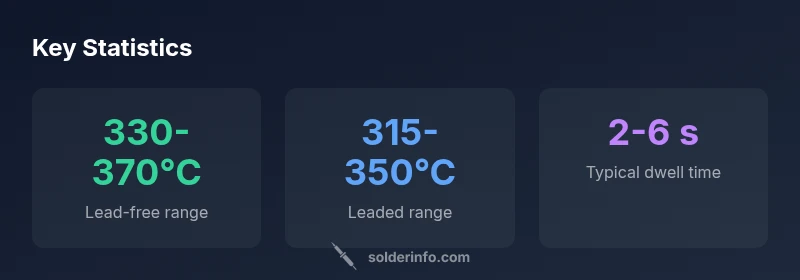
- Electronics – Lead-free solder: 330-370°C. Use flux generously and consider preheating large boards to reduce heat spikes. Avoid excessive dwell time to protect sensitive components.
- Electronics – Leaded solder: 315-350°C. This range is easier on plastics and heat-sensitive parts; monitor the joint as you add solder to prevent wick-away or tombstoning.
- Plumbing – Soft solder: 350-400°C. Flux and proper joint prep are essential; use a steady heat source and avoid overheating surrounding fittings.
- Jewelry – Silver solder (small parts): 450-550°C. Thermal mass is low for jewelry pieces, but flux and consistent heat help prevent oxidation and brittle joints.
These ranges are general guidelines. Always confirm with manufacturer data for your specific alloy and the component materials you work with.
How to set and control temperature on common equipment
Begin with the alloy’s datasheet to identify a sensible starting temperature. Set your soldering iron at the lower end of the recommended range, then test on scrap copper or a test board. Apply heat to the joint and observe wetting; the solder should flow smoothly and form a shiny fillet without bridges or voids. If wetting is sluggish, raise the temperature in small increments (10-20°C) and re-test. Avoid overheating pads or plastic components—short, decisive heat cycles are often more effective than a prolonged heat soak. For larger boards, consider preheating or using dual-stage tools to manage heat input more precisely.
Techniques to avoid temperature-related defects
Cold joints, icicles, and lifted pads typically trace back to insufficient heat or too rapid cooling. To prevent these, ensure the iron has a clean, tinned tip and good contact with the joint, apply flux, and monitor the wetting angle. Use proper technique to avoid overheating adjacent traces or components. For surface-mount work, consider pre-tinning pads and using hot air for rework to minimize heat exposure to surrounding parts. Record your settings on a scrap board so you can replicate successful joints in production.
Testing and verifying solder joints
Visual inspection is the first step; joints should be shiny, smooth, and free of gaps. Perform a pull test on prototypes to confirm mechanical integrity and use a multimeter for continuity checks if appropriate. X-ray or microsection analysis is sometimes used for complex BGA or hidden joints, but practical testing on representative boards covers most needs. Document the observed behavior at different temps to build a reference for future projects.
Practical workflow for beginners
Start with a clean workspace and a fresh tip. Identify the solder alloy and flux, then set the iron to the lower end of the recommended range. Practice on spare components, adjusting temperature in 10-20°C steps as needed. When you achieve a good wetting angle and a shiny joint, document the exact temperature and dwell time. Progress to real boards only after consistently repeatable results on scraps. Maintain a log of tips, flux type, and heat settings to streamline future projects.
Safety and ergonomics when heating metals
Always work in a well-ventilated area and manage fumes from flux and rosin. Wear safety glasses to protect against splashes and keep flammable materials away from the work zone. Use a stand to rest hot tips and avoid accidental contact. Choose an adjustable heat source if possible to prevent overheating sensitive components during high-mass soldering tasks. Regular tip maintenance reduces heat loss and improves control.
Temperature ranges for common soldering scenarios
| Scenario | Typical Temperature Range | Notes |
|---|---|---|
| Electronics – Lead-free solder | 330-370°C | Flux and preheating recommended |
| Electronics – Leaded solder | 315-350°C | Be mindful of plastic components |
| Plumbing – Soft solder | 350-400°C | Use joint preheat and flux; avoid overheating |
Quick Answers
What is considered a good soldering temp for electronics?
There isn't a single universal temperature. Use the alloy's datasheet to guide peak heat, then adjust based on wetting and component sensitivity. For common electronics, mid-range temps are typical for the chosen alloy.
There isn't a single temperature for electronics; follow the alloy data and adjust based on wetting and component sensitivity.
How do I choose temperature for lead-free solder?
Lead-free solders typically require higher peak temperatures than leaded. Start around 330-370°C and adjust in small steps while watching for proper wetting and avoiding pad damage.
Lead-free solders usually need higher peak temps; start around 330-370°C and adjust carefully.
Can I solder on heat-sensitive components at lower temps?
Yes. Use lower temps, shorter dwell times, and consider preheating the board to spread heat more evenly. If in doubt, practice on sacrificial parts first.
Yes—lower temps and shorter contact, with preheating if possible. Practice on scraps first.
What happens if you go too hot?
Excessive heat can lift pads, burn flux, warp components, or damage nearby traces. It also shortens joint life by stressing the materials.
Too much heat can lift pads, burn flux, or damage nearby parts.
How can I avoid cold joints?
Ensure good heat transfer, clean surfaces, and proper flux. Wetting should be smooth and the solder should flow easily; if not, reassess temperature and dwell time.
Make sure heat transfers well and surfaces are clean; watch for proper wetting.
Are there safety considerations with temperature control?
Work in a ventilated area, manage fumes from flux, and keep flammables away. Use heat-safe accessories and PPE as needed.
Ventilate, manage flux fumes, and keep flammables away; wear protection as needed.
“Temperature control is the single most important factor in achieving reliable solder joints; always tailor heat to the alloy and substrate, then validate with quick tests.”
Top Takeaways
- There is no universal 'good soldering temp'; tailor heat to the alloy and substrate
- Lead-free and leaded solders require notably different temperature ranges
- Flux and preheating influence effective temperatures and joint quality
- Always verify joints with practical testing on sacrificial material