Best Solder Temp for Circuit Boards: A Practical Guide for PCB Soldering
Learn the best solder temperature for circuit boards, including leaded vs lead-free ranges, iron settings, flux choices, and testing methods to prevent cold joints, pad lift, and heat-related damage. SolderInfo analyzes practical temps for reliable PCB soldering in 2026.

Lead-free PCB work typically requires 350-370°C; leaded solders commonly perform well at 315-350°C. Start near the lower end of your range and heat the joint quickly with a sharp tip, using adequate flux. Keep dwell time brief to protect traces, pads, and components while achieving solid wetting.
Why Temperature Control Matters for PCBs\n\nTemperature control is a foundational skill in PCB soldering. Too high a temperature or excessive dwell can delaminate solder mask, lift copper traces, or damage heat-sensitive components. In hot climates or when soldering large copper planes, heat migrates through the board, increasing the risk of scorching nearby pads. Conversely, too little heat yields cold joints, high-resistance connections, and poor wetting. For a reliable joint, you must balance heat with time, tip geometry, flux quality, and the board’s thermal mass. This section explains how temperature choice interacts with solder alloy, flux type, and component tolerance, so you can optimize your process without guessing.
How to Choose the Right Temperature Range\n\nChoosing the right temperature range starts with the solder alloy you’re using and the presence of heat-sensitive components. Lead-free solders generally require higher peak temperatures than leaded solders due to their higher melting points. Consider board thickness, copper weight, and the density of SMD pads. Preheating the board or using a warmed fixture reduces thermal mass, letting you apply heat precisely where needed. The iron’s tip size and condition matter too: a small, sharp tip heats a joint quickly with less collateral damage, while a broad tip can cause excessive heat spread. Always flux well and start at the lower end of the range, adjusting as you observe wetting and joint smoothness.
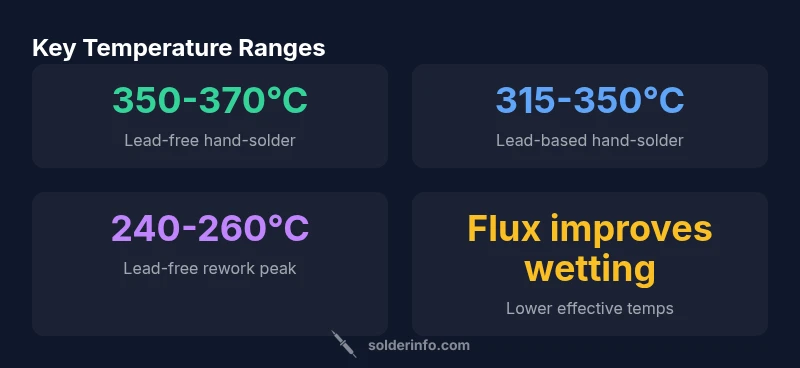
Temperature Ranges by Solder Type and Application\n\nLead-based solder (Sn/Pb) is forgiving at lower temps, typically around 315-350°C for hand-soldering. Lead-free solder (e.g., SAC alloys) performs best with higher peak temps in the 350-370°C range, with shorter dwell times to minimize heat stress. Rework or hot-air applications have different constraints: preheat the board to reduce thermal shock, then peak around 240-260°C for lead-free alloys. For sensitive components (ICs, connectors with close pin spacing), consider even lower dwell times and aggressive flux to reduce required temperature. Always verify with a test coupon on your specific PCB material and solder type.
Equipment and Calibration: Soldering Irons, Tips, and Tips Selection\n\nSelection of the right iron and tip is essential. Use a temperature-controlled station and verify accuracy with a digital thermocouple or built-in sensor. Micro-tips or fine-point tips concentrate heat, improving wetting on small pads, while chisel tips spread heat and risk overheating adjacent traces. Calibrate regularly because tip wear changes effective temperatures. If you notice dull joints, adjust downward slightly; if joints appear grainy or solder balls form, you may be nipping at too low a temperature. Keep flux fresh and within its shelf life for consistent results.
Flux, Wetting, and Cleaning: What It Means for Temperature\n\nFlux quality directly affects the temperature you must apply. Proper flux lowers surface tension, enabling good wetting at lower real surface temperatures. Rosin-activated fluxes are common for electronics, but water-soluble variants require thorough cleaning. After soldering, remove residues promptly to prevent corrosion and dendritic growth on the copper. Solder joints should be clean, shiny, and free of icicles or blobs. If you observe dull or oxidized joints, clean, re-apply flux, and re-solder with controlled heat.
Testing, Verification, and Practical Methods\n\nThe best practice is to measure actual temperature at or near the joint you’re heating. Use a fine thermocouple tip or a temperature measurement sticker placed close to the pad. Create a small test coupon mirroring your PCB’s copper density and solder mask to observe wetting behavior at your target temps. Log the temperature profile over several joints to identify any drift or inconsistencies between sessions. Use a timer to keep dwell under 3-5 seconds for lead-free work and 6-8 seconds for leaded work in most cases.
Common Pitfalls and Troubleshooting\n\nCommon mistakes include overheating components, using too large a tip, inadequate flux, and neglecting preheating. Pad lift often indicates excessive dwell or insufficient heat transfer from the iron. Cold joints show dull surfaces and a sharp edge around the joint; rework by applying flux, re-tacking with heat, and inspecting joint geometry. For dense BGA or QFP packages, consider preheating or a rework station with a controlled ramp profile to minimize thermal shock. Regular maintenance of the iron and consistent flux use are essential to prevent recurring issues.
Quick-start Checklist for Beginners\n\n1) Gather a temperature-controlled iron and a sharp, small-tip. 2) Choose lead-free or leaded solder based on components. 3) Preheat the board slightly if possible. 4) Flux joints generously and tin the tip before each joint. 5) Apply heat briefly and rely on flux to aid wetting. 6) Inspect joints for shininess and proper fillet formation.
Temperature guidelines by soldering scenario
| Scenario | Typical solder temp (°C) | Notes |
|---|---|---|
| Lead-free hand-soldering | 350-370 | Flux quality matters; brief heat dwell |
| Lead-based hand-soldering | 315-350 | Lower temps; component tolerance considerations |
| Rework/Hot air for lead-free | 240-260 | Preheat to reduce thermal shock |
Quick Answers
What is the ideal soldering temperature for most PCBs?
For most printed circuit boards, lead-free solder typically requires 350-370°C with brief dwell, while leaded solder works well around 315-350°C. Always validate with test coupons and adjust for your specific flux and components.
For most boards, use 350-370°C for lead-free and 315-350°C for leaded solders, with brief heating and good flux.
Does temperature affect pad lift or component damage?
Yes. Excess heat or long dwell can delaminate solder mask, lift pads, or damage heat-sensitive components. Use preheating, sharp tips, and flux to minimize heat and reduce dwell time.
Yes—too much heat or dwell can damage pads and parts; preheat and flux help reduce this risk.
How can I tell if I’m overheating a component?
Watch for discoloration around the joint, scorching of solder mask, or swollen components. If joints look dull or cloudy, reduce temperature or dwell time and reflow with better flux.
If you see scorched areas or dull joints, back off temps and shorten heating time.
Is flux temperature dependent?
Flux lowers the surface tension, enabling better wetting at lower effective temperatures. Use the correct flux type for your solder and clean residues after soldering.
Flux helps wetting, so choose the right flux and clean after soldering.
Can I use the same temperature for leaded and lead-free solders?
Not always. Lead-free typically needs higher peak temperatures and shorter dwell times; leaded solders can tolerate lower temps. Verify with test coupons and adjust as needed.
Usually not—lead-free needs higher temps, so test and adjust.
What about rework or hot-air soldering temps?
Rework temperatures depend on the alloy and board. Use a controlled ramp, preheat if possible, and keep dwell short to avoid thermal shock to delicate components.
For rework, use controlled heat and short dwell to protect the board.
“Temperature control isn’t just about hitting a number; it’s about how quickly you heat and cool a joint without stressing the board or components.”
Top Takeaways
- Start at the lower end of your temp range and adjust by joint feedback
- Differentiate temps for leaded vs lead-free solders
- Flux quality is a key driver of effective temperature and wetting
- Regularly calibrate your iron and tips for accuracy
- Use short heat dwell to protect PCB integrity