Why Solder Doesn’t Stick to Copper: Troubleshooting and Fixes
Discover proven methods to fix copper soldering adhesion problems. Learn surface prep, flux selection, heat management, and tinning techniques to ensure reliable joints on copper in electronics, plumbing, and jewelry projects.

The most likely cause why solder doesn t stick to copper is surface contamination and oxide buildup that prevent wetting. Start with a clean, oxide-free surface and fresh flux, then lightly abrade the copper, apply flux generously, and tin the area before soldering. Control temperature to melt solder without overheating the copper.
Why copper surfaces fail to wet with solder
The phrase why solder doesn t stick to copper often points to a surface that won’t wet. Copper forms a quick oxide film when exposed to air, and oils, fingerprints, or handling residues can remain on the metal. When these films are present, solder beads up rather than adheres, creating cold joints and weak connections. Another common contributor is using an old or inappropriate flux that isn’t compatible with copper oxides. The SolderInfo team finds that most adhesion problems are not due to the solder alloy itself, but to surface condition and flux strategy. By prioritizing cleaning, proper flux, and controlled heat, you dramatically improve wetting and joint quality on copper.
Surface contamination and the oxide layer
Copper oxide forms instantly when copper is exposed to air. This oxide is not solderable and requires removal before you can achieve good wetting. The most reliable approach is mechanical cleaning followed by chemical fluxing. Avoid touching the copper with bare fingers after cleaning, since oils from skin can re-contaminate the surface. For jewelry or electronics, plan your workflow to minimize handling between steps and keep tools clean to prevent re-oxidation. The goal is a bright, shiny copper surface that will wet smoothly when soldering.
Cleaning and mechanical preparation methods
Start with a clean workspace and gather the right tools: isopropyl alcohol or acetone, brass or nylon scrub pads, fine-grit sanding sponge or emery cloth, and a flux appropriate for your copper work. Use the solvent to remove oils, then scrub with a non-metallic scrub pad to lift surface films. If oxidation is stubborn, a light abrasive like 400–600 grit sandpaper or a dedicated copper scrub can help remove the top oxide layer. Always finish with a fresh wipe of solvent to remove any loose particles before applying flux. The goal is a clean, pink-to-bright copper surface that will wet reliably when heated.
Flux selection and application
Flux serves two purposes: deoxidation and heat transfer. For copper, a halide-containing flux or rosin flux designed for electronics or plumbing can dramatically improve wetting. Apply a thin, even coat; too much flux can burn and create residues that interfere with solder flow. If you’re working with lead-free solder, choose a water-soluble flux or a flux rated for lead-free alloys to ensure effective wetting. After flux application, re-clean the tip if flux residue accumulates on the iron.
Temperature control and heat management
Copper conducts heat well, so you must feed solder and heat carefully. Preheat the copper surface briefly to activate flux but avoid overheating, which can burn flux and produce thick residues that hinder wetting. The rule of thumb is to use the minimum heat required for solder to flow, then remove heat as soon as the joint wets. A properly heated copper surface will accept solder with a smooth, glassy bead rather than a dull, grainy surface. If the joint doesn’t wet, pause, clean, reapply flux, and re-establish heat with a fresh approach.
Tinning copper prior to soldering
Tinning creates a ready surface for solder to flow onto. Lightly tin the copper with a small amount of solder and flux, then wipe away excess before making the final joint. Tinning can be especially helpful on electronics where copper traces are fine and easily damaged by excessive heat. If you tin too aggressively, you may dull the edge or create a build-up that impedes proper joint formation. Practice light, even tining on scrap copper before attempting critical joints.
Steps
Estimated time: 60-90 minutes
- 1
Inspect workspace and prep tools
Gather all required materials, ensure the work area is clean, and inspect your soldering iron tip for oxidation. A clean tip is essential for transferring heat evenly to the copper. Prepare flux, cleaning solvents, and a fresh cloth or tissue to wipe surfaces.
Tip: Keep a dedicated copper workspace to avoid cross-contamination from other metals. - 2
Clean the copper surface
Wipe the copper with isopropyl alcohol or acetone to remove oils. If oxide is present, gently scrub with a nylon brush and, if needed, light emery cloth. Finish with a final solvent wipe to ensure a pristine surface.
Tip: Never touch the cleaned surface with bare fingers after cleaning. - 3
Choose and apply flux
Select flux appropriate for copper and intended solder (leaded or lead-free). Apply a thin, even layer to the copper and the soldering iron tip if recommended by the flux manufacturer.
Tip: Avoid applying excess flux; a thin layer improves wetting and reduces cleanup needs. - 4
Pre-tin the surface
Melt a small amount of solder on the copper surface to create a tin layer that will attract additional solder. Wipe away excess and reflow as needed to ensure an even coating without creating blobs.
Tip: Keep the tip of the iron clean during tinning to promote even heat transfer. - 5
Apply heat and solder
Place the heated iron near the joint and feed solder to the joint, not the iron tip. Maintain steady heat to allow wetting; remove heat as soon as the solder flows into a smooth bead.
Tip: If the solder balls up, pause, re-clean, re-apply flux, and reheat with gentler contact. - 6
Inspect and clean up
Examine the joint for a shiny, smooth wets-on bead. If the joint looks dull or grainy, re-apply flux and reflow. Clean any flux residues with isopropyl alcohol after cooling.
Tip: A well-wetted joint should have a uniform appearance with no cracks or gaps.
Diagnosis: Copper joint won’t wet and solder doesn’t bind
Possible Causes
- highOxide layer or surface contamination on copper
- mediumOld or incompatible flux that doesn’t activate properly
- lowInsufficient cleaning or heavy oxide on non-flat surfaces
Fixes
- easyClean with isopropyl alcohol and a nylon brush, then re-apply fresh flux
- easyLightly abrade the surface to remove oxide, then re-clean and re-flux
- mediumSwitch to a flux compatible with copper and re-heat joints with controlled heat
Quick Answers
Why doesn t copper solder stick even when I apply flux?
Flux helps remove oxides, but if the surface remains oxidized or contaminated, solder won’t wet. Re-clean the surface, reapply flux, and ensure you heat the joint properly. Poor cleaning is the more common cause than flux failure alone.
Flux helps remove oxides, but if the surface is still contaminated, the solder won’t wet. Re-clean, re-flux, and heat correctly.
Should I tin copper before soldering on electronics?
Tinning creates a ready surface for solder flow and improves wetting, especially on copper traces. Don’t over-tin; apply a light layer and wipe excess before the final joint.
Tin copper lightly before soldering to improve wetting; wipe away excess before final joint.
What type of flux is best for copper with lead-free solder?
Lead-free solders benefit from water-soluble or appropriately formulated flux for copper. Ensure the flux activates at the solder temperature and clean residue after soldering if required.
For lead-free copper, use a compatible flux that activates at your solder temperature and clean the residue afterward.
Can I reuse flux or should I apply fresh flux each time?
Always use fresh flux for each joint to ensure consistent oxidation removal and wetting. Old flux can oxidize and lose activity, leading to poor results.
Use fresh flux for each joint to maintain wetting reliability.
Is it safe to use a propane soldering setup on copper plumbing?
Propane can be used for copper plumbing, but keep heat controlled to avoid overheating copper fittings and causing damage. Follow plumbing codes and use appropriate torches for the diameter and thickness.
Propane can be used for copper plumbing with careful heat control and proper safety practices.
Watch Video
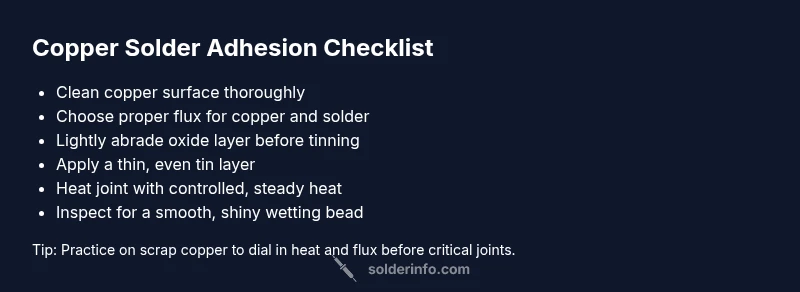
Top Takeaways
- Prepare and clean copper thoroughly before fluxing.
- Choose the right flux for copper and alloy, then apply a thin layer.
- Control heat to promote wetting without oxidation.
- Tinning copper helps establish a reliable path for solder.
- Inspect joints and rework as needed for a glossy, even bead.