Solder Sticking to Iron Instead of Board: A Practical Troubleshooting Guide
Struggling with solder sticking to the iron instead of the board? This guide covers quick checks, diagnostics, and a safe step-by-step fix to restore clean joints and prevent recurrence.

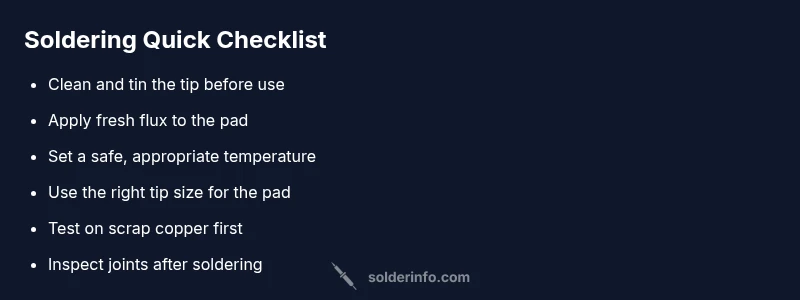
According to SolderInfo, the most common cause of solder sticking to the iron instead of the board is a dirty or overheated tip and lack of flux. Quick fixes: clean and tin the tip, use fresh flux, set the iron to the correct temperature, and use proper tip geometry before re-soldering. If oxidation remains, clean with brass sponge, re-tin, and apply flux to the pad. Avoid excessive heat.
Symptom snapshot: solder sticking to the iron instead of the board
When you attempt to make a joint, you notice the solder beads cling to the iron tip rather than flowing onto the copper pad or component lead. The result is cold joints, bridged pads, or a dull, unreliable connection. This symptom can creep up when the tip is oxidized, the flux has dried out, or the iron is running too hot for the task. In practice, you’ll often see a shiny bead form on the tip and little to no wetting on the board. The key to turning this around is improving the tip condition and ensuring proper heat transfer to the pad. As the SolderInfo team notes, a well-tinned, clean tip and adequate flux are your first line of defense against this problem.
Why the board matters: focusing heat where it should land
Solder needs to wet the copper surface and form a reliable joint. If the iron transfers heat too aggressively to the tip or if the flux isn’t present where the pad is, you’ll get solder sticking to the iron instead of the board. The pad should be hot enough to melt solder quickly without degrading the surrounding traces. When you see solder sticking to the iron, re-check the tip, flux, and temperature, then re-test on a scrap pad before attempting the actual joint.
Primary suspects and how to verify them
The most common culprits are a dirty or oxidized tip, insufficient flux, and an iron temperature that’s either too high or too low for the solder you’re using. Corrosion on the iron can form a barrier to heat transfer, causing the solder to cling to the tip. A contaminated pad or flux residue on the board can also prevent proper wetting. Start by inspecting the tip under light, cleaning it, and testing on a spare copper patch. If the issue persists, move through the diagnostic steps outlined later in this article and consult the diagnostic flow.
Bench setup and the right mindset for a fix
A clean, well-lit workspace with a properly sized tip makes a big difference. Prepare flux or an active rosin flux core solder, a brass sponge or tip tinner, and a damp sponge for quick cleaning. Keep acetone or isopropyl alcohol handy for quick tip cleaning, but avoid leaving pads with solvent residues. The process should feel deliberate: clean, tin, flux, apply heat, flow solder, inspect, and re-tin. Consistency beats brute force here, and a calm, methodical approach yields better joints.
Quick checks you can perform now (no disassembly required)
- Inspect the iron tip for oxidation; if dull or discolored, clean and re-tin.
- Clean the pad and component leads with isopropyl alcohol and dry thoroughly.
- Verify you’re using the correct flux for your solder type.
- Test a scrap pad to ensure the combined tools work before proceeding to the actual board.
- Confirm the iron temperature isn’t set too high; too much heat can burn flux and drive solder away from the joint.
These checks address the most common causes and can often fix the problem without additional steps.
When to escalate and seek help
If the issue persists after performing the quick checks and a thorough tip cleaning, consider seeking help from a more experienced technician or a local electronics repair service. Persistent joint issues can indicate deeper problems with the PCB, such as damaged copper traces or pad lifting, which may require professional assessment and repair.
Safety and best practices while troubleshooting
Always unplug the iron when inspecting the tip, never touch the hot element, and work in a well-ventilated area when using flux. Wear eye protection if there’s a risk of splashes, and avoid applying excessive force on components. Keep a dry, lint-free cloth nearby for quick cleanup and never reuse contaminated flux on the board. Following these safety precautions helps prevent accidents and accidental damage to your work.
Steps
Estimated time: 60-90 minutes
- 1
Inspect and clean the tip
Power off and unplug the iron. Wipe the tip on a damp sponge, then use a brass sponge or tip tinner to remove oxidation. Dry the tip completely before proceeding.
Tip: Keep the tip clean throughout the process to improve heat transfer. - 2
Re-tin the tip
Apply a small amount of fresh solder to the tip and spread it evenly to form a shiny, protective coating. This helps with heat transfer and prevents oxidation during the next lift.
Tip: Tin the tip frequently during long sessions to maintain performance. - 3
Prepare the pad with flux
Apply a thin, even layer of flux to the pad and component lead. Flux reduces surface tension and helps solder wet the surface.
Tip: Flux should be fresh and not dried out; old flux loses performance over time. - 4
Position and apply solder
Place the tip to the pad and apply solder to the joint quickly, allowing it to flow onto the pad, not to the tip. Remove the heat immediately once a good joint wets the pad.
Tip: Avoid feeding solder directly to the tip; aim for surface wetting instead. - 5
Inspect the joint
Check for a shiny, smooth fillet with no cold joints or bridging. If needed, reflow the joint with a small amount of flux and re-apply solder.
Tip: A good joint should wet the pad and form a clean fillet. - 6
Clean up and store tools
Wipe the tip and store the iron safely. Clean-up flux residues from the board using isopropyl alcohol after cooling.
Tip: Proper storage reduces oxidation and extends tip life.
Diagnosis: Solder sticks to iron instead of board
Possible Causes
- highDirty or oxidized tip
- highInsufficient flux on pad
- mediumIncorrect temperature for solder type
- lowFlux/chip residues on board
Fixes
- easyClean and re-tin the tip with flux
- easyApply fresh flux to the pad and component lead
- easyCheck and adjust iron temperature to appropriate level for your solder
- easyTest on a scrap pad before working on the actual board; re-tin tip after cleaning
Quick Answers
Why does solder stick to the iron instead of the board?
The most common causes are an oxidized or dirty tip, insufficient flux, and improper heat. Cleaning, tinning, and applying flux usually resolves the issue.
Common causes are a dirty or oxidized tip, not enough flux, and wrong heat. Clean and tin the tip, apply flux, and re-test.
What quick checks should I perform right away?
Inspect the tip, clean and re-tin it, apply fresh flux to the pad, and test on a scrap pad to verify wetting before proceeding.
Check the tip, clean and re-tin, apply flux, and test on scrap.
Lead-free solder: does it change my approach?
Lead-free solder typically requires higher heat and good flux. Use a properly heated iron and ensure pads are clean to promote wetting.
Lead-free can need higher heat and good flux for proper wetting.
How can I prevent this from happening again?
Maintain a clean tip, use flux, select the right tip size, and avoid overheating. Regular tip maintenance reduces recurrence.
Keep the tip clean, flux ready, and avoid overheating for prevention.
When should I replace the tip?
If the tip remains oxidized after cleaning and tinning, or can’t wet solder, replace the tip to restore performance.
If it won’t tin or wet, replace the tip.
Watch Video
Top Takeaways
- Inspect and clean the tip before every soldering session
- Use fresh flux and re-tin the tip regularly
- Match temperature to solder type and pads
- Test on scrap material before board work
- Keep safety top of mind during troubleshooting