Solder Won’t Stick to Board: Urgent Troubleshooting Guide
Urgent how-to guide for why solder won't stick to a board, with quick fixes, diagnostic flow, step-by-step actions, safety tips, and prevention to get reliable joints fast.

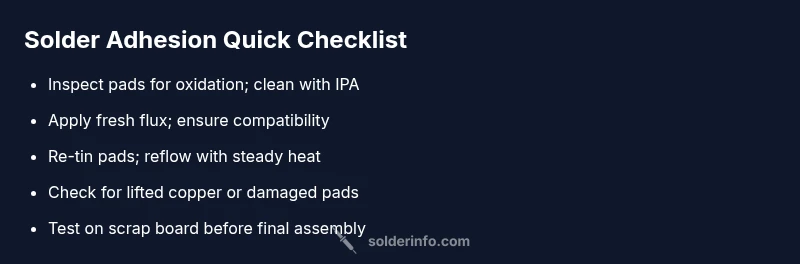
According to SolderInfo, when solder won't stick to a board, the most common culprit is pad oxidation or insufficient flux. Start by cleaning the pads, applying fresh flux, and ensuring proper heat control. If the joint still beads or rolls off, follow the diagnostic workflow in the body for quick fixes and safe next steps.
Why solder won’t stick to board
Solder adhesion failures are among the most frustrating problems a hobbyist or professional can face. When solder refuses to wet the copper pads, you’re not just fighting a stubborn joint—you’re risking cold joints, intermittent connections, and failed assemblies. The root cause is almost always a combination of surface oxidation, poor cleaning, and improper flux or heat management. In many cases, a quick surface prep and fresh flux can rescue a project in minutes. The key is to treat the pads as your wettability surface and respect the chemical mechanics of solder wetting. Remember, a reliable joint requires clean metal, compatible flux, and sufficient heat for wetting without overheating the substrate. As you troubleshoot, keep safety in mind: work in a well-ventilated area and wear eye protection when fluxes and solder fumes are present. The SolderInfo team emphasizes controlled steps and testing wetting before applying more solder.
Common causes at a glance
Many soldering problems boil down to a few recurring causes: oxidation on copper pads, contaminated surfaces (finger oils, dust, or soap residues), expired or incompatible flux, and insufficient heat or dwell time for proper wetting. Some boards may have solder mask residues that interfere with wetting; others suffer from lifted or damaged pads that can never wet properly. Additionally, using the wrong flux or flux that has degraded over time reduces wettability and can create unreliable joints. A quick diagnostic mindset is to fix the easiest variable first—surface cleanliness and flux—before changing the solder or iron settings. SolderInfo Analysis, 2026 emphasizes the importance of surface preparation and flux integrity as leading factors in wetting reliability.
Surface prep and PCB cleanliness
Preparation is the foundation of a successful solder joint. Start by inspecting the pads under good light and removing any visible oxidation or contaminants with lint-free swabs and 99% isopropyl alcohol. For stubborn oxide, a gentle mechanical abrade with a clean fiberglass pen or scouring pad can help; avoid aggressive abrasion that could lift copper. After cleaning, dry the board completely and re-apply flux. The goal is to present mirror-smooth copper surfaces that wet evenly when heated. If you’re working with boards that have lead-free finishes, be mindful that their higher melting points may demand a slightly longer dwell time and a properly heated iron tip to ensure complete wetting.
Flux selection and application
Flux is the mediator of wetting. Choose a flux compatible with your solder alloy and the electronics application. Rosin-based fluxes are common for electronics, while water-soluble fluxes require thorough cleaning afterward. Do not reuse flux from a previous job; expired or contaminated flux loses acidity and wetting capability. Apply a thin, even coat to the pad and around the component lead. If you’re reworking a joint, add flux to both the pad and the solder to prevent rapid oxidation during heating. Always work with fresh flux and avoid exposing flux to air for extended periods, which degrades its performance.
Solder choice and wetting
The solder alloy and core flux influence wetting dramatically. For electronics, rosin-core or no-clean flux wires are common choices; avoid flux types not intended for PCB work. If you’re using lead-free solder, ensure your flux is compatible and that you allow slightly more heat time to overcome the higher melting point. When attempting to wet a pad, place the tip at the pad’s edge and feed solder slowly to the joint, not directly onto the pad. Proper wetting occurs when the solder flows smoothly with minimal force, forming a shiny, conical joint rather than a ball or lumpy blob. If a pad remains unmoved after heating, you likely need to re-clean or re-tin the pad surface.
Temperature, tip condition, and technique
Iron temperature and tip condition are critical to successful wetting. Use a clean, tinned tip and maintain a steady heat that reaches the pad surface quickly without scorching flux. A dull or oxidized tip will fail to transfer heat effectively, causing poor wetting. Use a slightly angled approach to bring heat into the pad and component lead together, not directly onto the surface. Maintain a brief dwell time to avoid overheating the copper and any solder mask. Tidy joints should flow, wet, and form a classic fillet; if you see dull, grainy, or grainy-looking joints, reassess flux choice, pad cleanliness, and temperature.
Diagnostic flow you can follow
Begin with the simplest checks: cleanliness, flux, and basic heat. If you still observe poor wetting after cleaning and fluxing, test a separate test pad with fresh flux and solder to confirm whether your iron temperature is appropriate. If the test pad wets but the original pad doesn’t, inspect the original pad for oxidation or damage. If oxidized, repeat the cleaning and flux process; if damaged, consider board repair or replacement. When in doubt, consult a professional for critical boards.
Prevention: best practices for future soldering
Prevention beats cure. Always clean boards and components before soldering, store flux and solder properly, and calibrate your iron to a stable temperature suitable for the alloy in use. Use a good quality flux and ensure you have a clean, static-free workspace. Regularly inspect tips for wear and replace them when they no longer tin well. Finally, practice on test coupons to build wetting confidence before tackling sensitive assemblies.
Steps
Estimated time: 30-45 minutes
- 1
Prepare workspace and tools
Set up a clean, well-lit workspace. Gather a clean flux, PCB cleaner, lint-free swabs, a properly rated flux-citted iron, and lead-free solder. Ensure ventilation when using fumes. Have a loupe or magnifier handy for pad inspection.
Tip: Lay out pads to be worked on a separate, isolated area to avoid cross-contamination. - 2
Inspect and clean pads
Inspect the pads under magnification for oxidation or residue. Clean with IPA and a lint-free swab; if oxidation persists, lightly abrade with a fiberglass pen. Dry thoroughly before fluxing.
Tip: Never scrub too hard; you can remove copper if you over-abrade. - 3
Apply flux and tin pads
Apply a thin, even coat of flux to both the pad and the component lead. Lightly tin the pad with a small amount of solder to improve wetting. Ensure flux is still active before proceeding.
Tip: Keep flux away from the component body to prevent wicking into sensitive parts. - 4
Check iron temperature and tip
Verify the iron temperature is appropriate for the solder alloy and that the tip is clean and tinned. A dull, oxidized tip reduces heat transfer and wetting.
Tip: Use a conical or chisel tip that matches the pad size for better heat transfer. - 5
Reflow the joint with proper technique
Place the tip at the pad edge and feed solder slowly to the joint, not directly on the pad center. Allow the solder to flow smoothly and form a concave fillet. Remove heat promptly when wetting is complete.
Tip: Avoid long dwell times that overheat the pad and solder mask. - 6
Inspect and rework if needed
Inspect the joint with a loupe. If dull or cracked, reapply flux and reflow. Re-tin and re-clip if necessary to ensure reliability.
Tip: Compare to a known good joint; aim for a shiny, smooth, mushroom-like shape. - 7
Final cleaning and testing
Wipe away flux residue with IPA if using water-soluble flux; allow to dry completely. Test continuity and mechanical integrity before powering the board.
Tip: Test on a sacrificial board or pad to verify wetting before applying to a critical circuit.
Diagnosis: Solder won't wet or adhere to PCB pads; joints bead, roll off, or remain dull despite heating.
Possible Causes
- highPad oxidation or contamination on copper pads
- highInsufficient or degraded flux causing poor wetting
- mediumDirty board surface or improper cleaning before soldering
- lowIncompatible or expired flux for electronics
- mediumOverheating pad leading to oxidation or pad lifting
Fixes
- easyClean pads thoroughly with lint-free swabs and 99% IPA, then re-apply fresh flux
- easyRe-tin exposed copper pads and reflow the joint with controlled heat
- mediumSwitch to a flux compatible with your solder alloy and test wetting on a scrap pad
- easyVerify iron temperature and tip condition; ensure tip is clean and properly tinned
- hardIf copper pads are lifted or the board is damaged, seek professional repair or board replacement
Quick Answers
Why won't solder stick to my board?
Common causes include oxidation, dirty surfaces, and insufficient flux. Address these in order, testing after each fix.
Common causes are oxidation, dirt, and not enough flux. Try cleaning and fluxing before re-soldering.
Should I pre-tin copper pads before soldering?
Pre-tinning can improve wetting if done carefully; ensure you don’t create excessive solder on pads that might bridge.
Pre-tinning can help wetting when done lightly; avoid creating large solder blobs.
What flux should I use for electronics?
Choose rosin-core or no-clean flux designed for electronics; avoid acidic or overly aggressive flux with delicate boards.
Use rosin-core or no-clean flux designed for electronics.
What temperature should I set my iron to when soldering PCB?
Set the iron to a temperature appropriate for the solder alloy you’re using; avoid overheating to protect the board and mask.
Use a temperature suitable for your solder and avoid overheating.
My pads are oxidized; can I save them?
Lightly abrade and clean oxidized pads, then re-tin and test wetting. If oxidation recurs, review flux and contamination sources.
Gently clean and re-tin; if it keeps happening, reassess flux and cleanliness.
Is it safe to heat the board directly for all components?
Yes, but avoid prolonged heating on sensitive components and heat-sensitive features; use proper technique to minimize risk.
Heat carefully and avoid overheating sensitive parts.
Watch Video
Top Takeaways
- Clean pads before soldering
- Use fresh, compatible flux
- Control heat and avoid overheating
- Re-tin pads if needed and test wetting
- Seek professional help if pads lift or board is damaged