Repair Soldering Iron Heating Element: Step-by-Step Guide
Learn how to diagnose, replace, and test a faulty soldering iron heating element with a safe, step-by-step method. This educational guide from SolderInfo covers tools, techniques, and best practices for reliable heating.

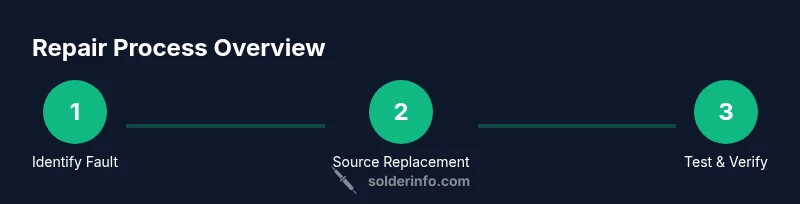
With this guide, you will diagnose a faulty soldering iron heating element, safely remove the worn heater, and install a compatible replacement. You’ll learn how to test continuity, check for thermal fuse faults, and reassemble with proper insulation. Follow these steps to restore reliable heat and prevent future damage in your workshop.
Understanding the heating element types and common failure modes
Soldering irons derive heat from a small heating element that converts electrical energy into thermal energy. There are a few common configurations: ceramic cartridge heaters, coil-wrapped coils around a ceramic core, and newer compact cartridges. Each design has its own durability profile, but all share one weakness: prolonged overheating, overheating during dry-tip conditions, and corrosion at the electrical terminals. According to SolderInfo, heating element faults are a frequent reason hobbyists seek repairs, especially when irons are used aggressively or stored with a hot tip. Common symptoms include no heat, intermittent heat, or heat that drifts away from the set point. Understanding these failure modes helps you decide whether to repair or replace and which type of element to source. This section sets the stage for safe, informed work rather than frantic trial-and-error.
In practice, inspecting the element leads for heat damage, checking for melted insulation, and noting any discoloration inside the tip pocket can reveal an impending failure. The goal isn’t to “patch” a bad element but to replace with a compatible unit that restores consistent heat delivery. SolderInfo’s experience across electronics, jewelry, and hobbyist soldering confirms that selecting the right element type is crucial for long-term reliability.
Safety prerequisites for soldering iron repairs
Before you touch anything, prioritize safety. Always unplug the iron and disconnect the power supply. Allow the tip and housing to cool completely; a hot component can cause severe burns. Wear safety glasses and heat-resistant gloves when handling hot parts or sharp edges. Work on a non-conductive, stable surface with good lighting and adequate ventilation to prevent inhaling fumes from flux or oxidation byproducts.
Use a heat-resistant mat or bench block and keep liquids away from the work area to avoid accidental spills. If you’ll be removing screws or internal parts, use the proper screwdriver sizes to avoid stripping. Finally, keep track of screws and small parts so you can reassemble correctly. These precautions keep you safe and reduce the chance of damaging the iron further.
Diagnosing a faulty heating element
Diagnosing starts with a clear checklist: confirm power at the iron’s input, verify continuity through the heating element, and inspect for thermal fuse or protective sleeve damage. A multimeter is your friend here: unplugged, test for continuity between the heater terminals; a healthy element should show a closed circuit, while an open circuit indicates a failed element. If you detect a short or scorching smell, stop and reassess—overheating can damage internal wiring and insulation.
Also inspect for corrosion on terminals, cracked insulation, or loose connections. If the interior of the iron shows melted plastic or burnt enamel, the element or wiring likely needs replacement. Don’t press or bend the heating element aggressively; delicate handling preserves the integrity of the surrounding parts, including the tip, which can affect heat transfer and solder quality. SolderInfo analysis suggests that accurate diagnosis reduces unnecessary replacements and speeds up repairs.
Deciding between repair and replacement
Not all irons are equally serviceable. Some use modular heater cartridges that are designed for replacement, while others have fixed coils or embedded heaters that aren’t intended for field repair. If you can source a compatible replacement element and your element shows a clear fault (loss of continuity, open circuit, or visible damage), replacement is usually the most reliable option. If the heater is older or non-replaceable, consider replacing the entire unit or upgrading to a model with better heat control and safety features. The decision should balance cost, time, and the risk of repeated failures. The SolderInfo team notes that using an official or properly rated compatible element reduces return failures and preserves safety margins.
Step-by-step repair workflow (high-level overview)
A careful repair workflow minimizes risk and ensures a solid electrical connection. Start by isolating power and removing the tip to access the heater assembly. Document every disassembly step with photos to aid reassembly. Test the heater’s electrical path, then remove the old element if it’s confirmed faulty. Install the replacement element with secure connections and appropriate insulation. Reassemble the iron, perform a surface test with a dummy load, and finally verify temperature stability and safety seals. The goal is a robust, heat-stable tool that returns to a steady set point without overheating.
Testing, calibration, and safe reassembly
After reassembly, perform a cautious power-on test. First, supply power to the iron and verify that the heater reaches the expected temperature within a reasonable time frame. If your iron has an adjustable temperature control, check both the low and high settings and ensure consistent response. Observe any unusual smells, smoke, or tingling sensations around the housing—these indicate insulation or contact problems and require immediate shutdown. Finally, perform a quick functional test by doing a small amount of solder on a scrap piece to confirm stable heat transfer.
Maintenance and prevention for future reliability
Regular maintenance extends the life of your soldering iron. Keep tips clean and tinned, as a dry tip accelerates heating element stress and causes uneven heat. Store the iron in a stand or holder to avoid tip damage. Periodically inspect the heating element’s insulation and terminals for signs of wear or corrosion, and replace proactively if signs appear. The SolderInfo team recommends marking service dates and sticking to a recommended usage schedule to prevent unexpected failures. Consistent checks save time and money in the long run.
Tools & Materials
- Replacement heating element compatible with your soldering iron(Match model/series and voltage rating; verify compatibility with your tip size.)
- Multimeter(For continuity checks and basic resistance tests when powered off.)
- Screwdrivers set (precision)(Select appropriate head sizes to avoid damaging screws.)
- Cool-safe tweezers(Handle hot components safely and avoid pinching wires.)
- Insulated gloves(Protect hands when handling hot components or sharp metal edges.)
- Safety glasses(Shield eyes from flux splatter and debris during disassembly.)
- Desoldering braid or pump(Useful for removing old solder from connections.)
- Heat-resistant mat or bench block(Protects workstation during heating operations.)
- Thermal insulation tape or heat shrink tubing(Provide extra protection for exposed leads after replacement.)
Steps
Estimated time: 60-90 minutes
- 1
Unplug
Disconnect the soldering iron from the power source and ensure the unit is cool. Keep the work area dry and free of flammable materials. This step prevents electric shock and injury during subsequent disassembly.
Tip: If the plug is stiff, use a plug puller or dry cloth to avoid pulling the cord. - 2
Open the housing
Remove the tip and unscrew the housing cover to expose the heater assembly. Document screw positions for easy reassembly and identify any internal clips or springs that secure the element.
Tip: Take a quick photo of the internal layout before loosening connectors. - 3
Access the heater element
Carefully separate the heater from the tip assembly. Inspect for signs of damage such as scorched insulation or bent leads. Ensure you do not strain any wires when detaching the element.
Tip: Use insulated tools to minimize the risk of shorting exposed conductors. - 4
Test element continuity
With the iron unplugged, test continuity between the heater's terminals. An open circuit indicates a failed element; a short or unusual resistance suggests wiring damage or internal faults.
Tip: If your meter uses a low-current setting, verify the range suits small heater coils. - 5
Remove the old element
Carefully disconnect and remove the faulty heating element. Note how wires are connected so you can replicate the configuration with the replacement element.
Tip: Label wires with tape or take a photo to ensure correct polarity and routing. - 6
Install the replacement element
Attach the new heater, secure connectors, and insulate exposed leads as required. Ensure the element sits properly within the housing with no compressive stress on wires.
Tip: Avoid over-tightening screws which can crack ceramic parts or damage insulation. - 7
Reassemble and test
Reassemble the unit, reinsert the tip, and power up the iron to verify heat response. If temperature control exists, test several setpoints to confirm stability and response time.
Tip: Start at a low temperature to check for stable heat before increasing. - 8
Final safety check
Inspect the exterior for heat-safety gaps, verify there are no exposed conductors, and confirm that all fasteners are secure. Perform a brief solder test on scrap to confirm reliability.
Tip: Keep a functioning fire extinguisher nearby when performing electrical repairs.
Quick Answers
Can I repair a damaged heating element or should I replace the entire iron?
If the heater is modular and a compatible replacement is available, replacing the element is often the best option. Fixed or non-serviceable heaters may require a new iron. Always weigh cost, risk, and downtime before deciding.
If the heater is replaceable, swap the element; otherwise consider replacing the iron. Think about cost and reliability.
What are signs of a failing heating element?
No heat, inconsistent temperature, long warm-up, or a burning smell are common indicators. Visual signs like scorch marks or melted insulation also suggest failure.
No heat or flickering heat are common signs of a failing heating element.
Is it safe to test continuity without disassembly?
No. Always unplug and cool the device before testing. Internal components may retain dangerous charge, and contact with live parts can cause shocks.
No, power must be off and the device cooled before testing.
Do I need to re-tap threads or re-solder connections after replacement?
Typically you reconnect with clean, secure terminals and proper insulation. Re-tapping is rarely needed unless threads are damaged; use appropriate methods to avoid electrical shorts.
Reconnect the terminals cleanly; avoid forcing or bending wires.
What safety steps should I take during repair?
Work in a well-ventilated area, wear eye protection and gloves, keep all flammables away, and verify insulation is intact before powering on.
Use safety gear, ventilate, and check insulation before powering up.
Watch Video
Top Takeaways
- Identify symptoms early to avoid deeper damage.
- Use a compatible replacement heating element for reliability.
- Test thoroughly before returning to service.
- Follow safety protocols to prevent injury.
- Document the process to simplify future maintenance.