Why Is My Soldering Iron Not Heating Up? Quick Troubleshooting Guide
Urgent, step-by-step troubleshooting to diagnose why your soldering iron isn’t heating, with safe fixes, testing tips, and guidance on repair vs. replacement. Learn practical checks and avoid common mistakes with SolderInfo guidance.

The iron almost certainly isn’t heating due to a blown cartridge or a faulty power connection. Start by verifying the outlet and power cord, then inspect the cartridge and tip for buildup or damage. If you smell burning plastic or see no heat after basic checks, replace the heater element or seek service.
Why is my soldering iron not heating up
According to SolderInfo, the most common reason a soldering iron won't heat is an issue with the power supply or the heater cartridge. A failing power cord, a blown thermal fuse, or a damaged switch can prevent current from reaching the heating element. If you’re wondering 'why is my soldering iron not heating up', start with the basics and work methodically. It's essential to understand how a soldering iron heats to pinpoint the exact failure point. For hobbyists and professionals alike, addressing the simplest cause first—like unplugging, inspecting the cord, and checking the outlet—often resolves the issue without tools. If basic checks show no obvious fault, you’re likely looking at a heater element failure or an internal fuse as the next likely culprits.
Quick checks you can do in minutes
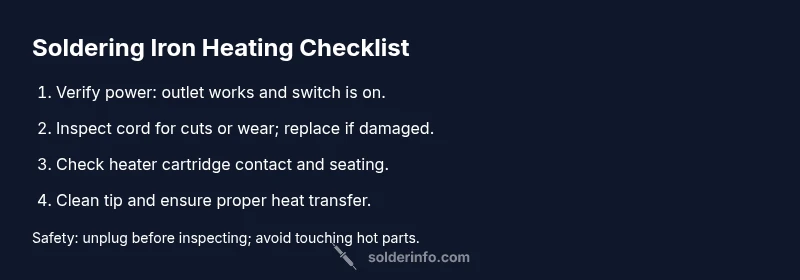
Before tearing the iron apart, run these quick checks. Ensure the unit is unplugged. Test the outlet with another device to confirm power, and verify the switch is ON. Inspect the power cord for nicks, cuts, or looseness at the plug and handle. Clean the tip and socket contacts, as corrosion or flux residue can prevent heat transfer. Check that the temperature setting is appropriate for your task; some irons have adjustable heat, while others have a fixed heater block. If you use a temperature-controlled station, confirm the control responds and the display shows activity. If any step reveals a fault (sparks, a blown fuse, or no continuity), stop and repair or replace the faulty component.
Diagnosing the problem: from symptom to solution
When the iron fails to heat, the symptom guides the likely cause. Start with the simplest culprits: power issues, damaged cord, or a blown fuse. If the power path seems sound, you may be dealing with a dead heater cartridge, a faulty thermal fuse, or an internal contact problem. Keep in mind that poor heat transfer can also occur if the tip is caked with oxidized solder or burnt flux, even if the heater is technically active. Document what you observe: no heat at all, partial heat, or heat that fluctuates. This helps you choose between cleaning, component replacement, or a full unit swap.
Most common fixes that work for many users
In most cases, the fastest wins are cleaning the tip, repairing or replacing the power cord, and testing the outlet. If the iron still won’t heat, you should inspect the heater cartridge and internal fuse. Cleaning and reseating the cartridge can restore contact; replacing a damaged cord ends sparking risks. If tests indicate a faulty heater or fuse, replacement is often necessary. Always power down and unplug before any disassembly, and avoid touching the hot elements. If you are unsure about testing with a multimeter, consult a professional.
Safety, maintenance, and prevention tips
Routine maintenance prevents future no-heat issues. Regularly inspect the cord and plug for wear, replace damaged cables promptly, and keep the heater area clean and dry. Use the correct tip for your task and avoid forcing heat settings beyond what the tip and board can tolerate. When in doubt, choose safety first and unplug before any probing. Remember that mains-rated tools carry risk; never attempt high-voltage repairs without proper training. By following these habits, you reduce the chance of future heating problems and extend the life of your soldering equipment.
Steps
Estimated time: 30-60 minutes
- 1
Power down and unplug
Always unplug the iron and allow it to cool completely before handling. This prevents electric shock and avoids burns when inspecting the cord, plug, and interior components.
Tip: Use dry hands and stand the iron on a heat-resistant mat while you inspect the exterior. - 2
Check the outlet and cord
Plug the iron into a known-good outlet or test the outlet with another device. Inspect the cord for cuts, fraying, or loose connectors at the plug and handle.
Tip: If the cord shows wear, replace it before re-testing the iron. - 3
Inspect the heater path
Visually inspect the heater cartridge and contacts for signs of burning, corrosion, or looseness. Ensure the cartridge is properly seated and the tip is clean. A dirty or loose contact can prevent heating.
Tip: Be gentle when reseating the cartridge to avoid damaging connectors. - 4
Test the tip and contact surfaces
Clean the tip with a brass sponge and verify that contact surfaces are clean and free of oxidation. A dirty interface can impede heat transfer even if the heater is functioning.
Tip: Always clean the tip after heating to maintain performance. - 5
Check temperature control and display
If your iron has an adjustable heat setting, ensure the control responds and the display indicates heat. A non-responsive control often points to a faulty control board or sensor.
Tip: Reset the control if available, and consult the user manual for default settings. - 6
Decide on repair vs replacement
If testing shows a dead heater element or a damaged internal component, replacement is usually safer and more reliable than attempting DIY repairs. For professionals, evaluate the cost and availability of a compatible cartridge or unit.
Tip: Record the model and serial numbers before ordering parts.
Diagnosis: Soldering iron not heating up
Possible Causes
- highPower issue (outlet, switch, fuse)
- highDamaged power cord or plug
- mediumBlown internal thermal fuse or faulty heating element
- lowOverheat protection tripped or loose contact inside unit
Fixes
- easyTest outlet with another device; replace damaged cord or blown fuse, then re-test
- easyInspect switch and internal fuse for continuity; replace components as needed
- hardReplace heater cartridge or entire handle assembly if the element is dead; seek professional service for safety
Quick Answers
Why won’t my soldering iron heat up even when it’s plugged in?
Start with the simplest checks: confirm the outlet works, inspect the power cord, and verify the switch is on. If there’s no power to the element, it’s usually a cord, switch, or fuse issue rather than the heater itself.
Check the outlet and cord first; if there’s still no heat, inspect the switch and fuse before moving to the heater.
Can a dirty tip prevent my iron from heating properly?
A dirty or corroded tip can disrupt heat transfer even if the heater is functioning. Clean the tip with a brass sponge and re-test. If heat still seems insufficient, inspect contacts for corrosion or buildup.
A dirty tip can block heat transfer; clean it and reassess heat.
Is a blown fuse the typical cause of no heat?
A blown fuse or internal thermal fuse is a common cause when there is no heat. Check the fuse path, and replace if needed. If you’re unsure, consult a professional to avoid risk.
A blown fuse is a frequent culprit; have a pro verify if you’re unsure.
Should I repair or replace a soldering iron that won’t heat?
If the heater is dead or the internal wiring is damaged, replacement is often safer and more cost-effective than DIY repair. Weigh part availability and cost before deciding.
If the heater is dead or wiring is damaged, replacement is usually the safer choice.
What tools do I need to test the heating element?
A basic multimeter and the manufacturer’s service manual are helpful. You’ll test continuity in the heater cartridge and check for short circuits to ground.
A multimeter helps you verify heater continuity and detect faults.
Is it dangerous to disassemble a soldering iron?
Yes. Soldering irons hold live components and heat; unplug first and follow safety guidelines. If you’re not trained, seek professional service.
Yes, disassembly can be dangerous; unplug and call a pro if unsure.
Watch Video
Top Takeaways
- Verify power and cord first to resolve most no-heat issues
- Clean and reseat the heater cartridge for better contact
- Test with a known-good outlet before deeper diagnostics
- Replace the heater element or consult a pro if the internal fuse is blown