Solder Iron Not Working: Troubleshooting Guide
Diagnose and fix a solder iron not working with practical steps: power checks, tip care, temperature control, safety reminders, and maintenance to prevent downtime.

Most often a solder iron won't work because of a power issue, a damaged plug, or a worn tip that can't transfer heat. Start by verifying the power outlet and switch, inspect the cord for exposed wires, and test the tip for corrosion or oxidation. If needed, clean or replace the tip and recheck the temperature setting.
Why the solder iron not working
According to SolderInfo, the most common reasons a solder iron not working are power issues, worn or dirty tips, or a tip that can't transfer heat due to oxidation. SolderInfo Analysis, 2026 shows that miscalibrated temperature controls and dirty tips account for the majority of downtime in hobbyist setups. Understanding these failure modes helps you prioritize checks quickly and avoid wasted time. When your iron fails, the goal is to isolate whether the problem is electrical, thermal, or a tip condition before you replace parts. This section walks through the typical failure modes and how to verify them with minimal tools. By focusing on the root cause, you’ll reduce downtime and keep projects on track.
Safety and preparation before troubleshooting
Safety first: unplug the device and let it cool before handling the tip or any internal components. Use eye protection if you’re cleaning a hot iron, and work in a ventilated area if you’re using solvents to clean the tip. Have a clean workspace with a non-slip mat, a heat-resistant surface, and a container for any small parts. A quick safety checklist helps prevent accidents and ensures you won’t rush the repair.
Check power supply and outlet health
The first and simplest checks are power-related. Ensure the power switch is on, the power cord is firmly seated in the brick or wall outlet, and that the outlet isn’t controlled by a wall switch you forgot about. If you have another working device, test it on the same outlet to confirm the circuit is live. A tripped GFCI or a blown fuse in the circuit can mimic a non-working iron. If you use a power strip, test with a direct outlet to rule out strip failure. If the outlet is fine, move on to the iron’s own cord and plug.
Inspect and care for the tip
Tip condition is one of the leading causes of poor heat transfer. A corroded, oxidized, or dirty tip cannot heat efficiently or wet solder properly. Remove the tip carefully according to the manufacturer’s instructions, and inspect for pitting, deformation, or heavy oxidation. Clean a carbonized tip with a damp sponge or brass tip cleaner, then re-tin the tip with fresh solder. If the tip is damaged beyond cleaning, replace it with a compatible tip for your iron. Temperature consistency often improves after a successful tip restoration.
Temperature control and calibration
If the iron heats but doesn’t reach the expected temperature, the issue may be the temperature control, calibration, or the thermocouple inside the handle. Check the setpoint against the actual temperature with an inexpensive thermocouple or compatible thermometer if available. Ensure there’s no air gap between the heater element and the tip that could cause slow heating. If your unit allows calibration, perform it following the manual. In some cases, a faulty control circuit or aging heater element can drift over time and may require professional service or replacement.
Cleaning, storage, and preventative maintenance
After each session, clean the tip and wipe away flux residues. Proper storage reduces oxidation and tip degradation; keep the iron in a stand and store tips in a dry, labeled container. Use rosin-core solder of the correct diameter and avoid overheating the tip during use, which accelerates wear. Regular maintenance reduces downtime; scheduling a quick weekly check can prevent longer outages during critical builds. The more you standardize your routine, the fewer surprises you’ll face when your iron is needed next.
When to replace parts vs discard
Not all issues are repairable. If the heating element is dead or the temperature control module is failing and you notice frequent, unrecoverable temperature drift, replacement is often more economical than repair. A worn-out tip or degraded insulation can also render an otherwise functional iron unreliable. In many hobbyist setups, investing in a new mid-range iron with compatible tips saves time and money in the long run. Always verify compatibility with your current station and accessories before buying.
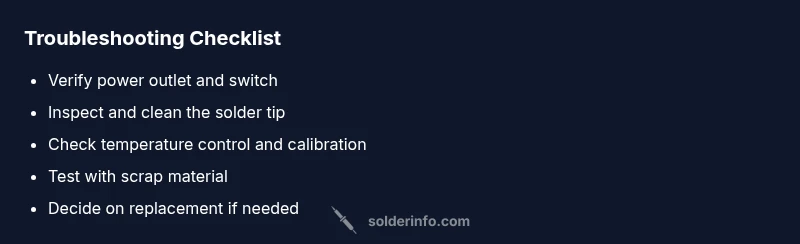
Steps
Estimated time: 30-60 minutes
- 1
Power and safety prep
Unplug the iron and place it on a heat-resistant mat. Visually inspect the power cord for cracks or exposed conductors. Reconnect only when you’re sure the outlet is live and the iron is cold. This prevents electric shock and further damage.
Tip: Always use a dedicated stand and never rest a hot tip on bare surfaces. - 2
Check outlet and power source
Plug in a known-good device to confirm the outlet is supplying power. If the outlet tests negative, try a different outlet or circuit. If other devices work, the issue may be with the iron’s plug or internal power contact.
Tip: Avoid using power strips when testing hot tools; direct outlets reduce variables. - 3
Inspect and clean the tip
Remove the tip per manufacturer instructions and inspect for oxidation, pitting, or bending. Clean with a damp sponge or brass cleaner, dry well, then re-tin with fresh solder. Reassemble and attempt a test heat.
Tip: Do not over-tin; a thin layer is enough to reestablish heat transfer. - 4
Test temperature control
Power the iron, let it reach a steady temperature, and verify it matches the dial setting with a thermometer if available. If the tip never reaches the target, calibration or a faulty sensor could be at fault.
Tip: If calibration isn’t available, use a mid-range setting and confirm stable heating. - 5
Re-test and observe
Solder a small joint on scrap copper; observe if heat transfer is consistent and the solder flows well. If performance remains poor, the heater element may be aging or an internal fault exists.
Tip: Keep scrap metal handy to avoid wasting real components. - 6
Decide on replacement
If the iron is several years old or shows repeated failures, compare repair costs to a replacement iron with compatible tips. Replace only if the cost-benefit favors it and safety isn’t compromised.
Tip: Choose a model with readily available compatible tips and a solid warranty.
Diagnosis: Solder iron won't heat or maintain temperature
Possible Causes
- highPower supply issue (outlet, switch, chord)
- highDamaged or worn tip causing poor heat transfer
- mediumTemperature control or calibration drift
- lowInternal heater element or control circuit failure
Fixes
- easyTest outlet with another device; verify switch positions; inspect cord for damage
- easyClean or replace the tip; re-tin; ensure good heat transfer from heater to tip
- mediumCalibrate or adjust the temperature control if available; verify setpoint matches measured temp
- hardIf heater element or control circuit is faulty, replace iron or seek professional repair
Quick Answers
Why won't my solder iron heat up at all?
Start with the power supply: test the outlet, switch, and cord for damage. If the outlet is fine, inspect the plug and internal contacts. Clean or replace the tip if necessary and try again. If heat still won’t come, the heater element may be faulty and require replacement.
Check power, inspect the plug, clean or replace the tip, and test again. If it still won’t heat, the heater element might be faulty.
My tip looks clean but solder won’t melt.
A clean tip is essential, but heat transfer can fail if the tip is oxidized on the inside or if the solder isn’t compatible with the iron. Re-tin the tip, ensure correct solder alloy, and verify the iron reaches the target temperature. If problems persist, replace the tip.
Clean, tin the tip, confirm you’re using compatible solder, and recheck the temperature. Replace the tip if needed.
Is it safe to continue using a damaged power cord?
No. A damaged power cord can cause electric shock or fire. Do not use the iron until the cord is repaired or replaced. If you’re unsure, consult a qualified technician.
A damaged cord is dangerous. Stop using it and replace or repair the cord before continuing.
What temperature should I set for typical work?
Set the iron to the lowest effective temperature for the solder you use and the work you’re doing. Avoid overheating, which accelerates tip wear and can damage components. If your iron has no calibration option, start at a conservative mid-range setting and adjust as needed.
Use a low to mid temperature suitable for your solder and work, and avoid overheating.
How often should I replace the tip?
Tip life depends on usage, cleaning frequency, and alloy. Replace when the tip shows significant wear, corrosion, or loss of heat transfer. Keep spare tips available to minimize downtime.
Replace tips when worn or corroded; keep spares handy.
Why does my solder joint look dull or gray?
A dull joint often indicates insufficient heat, poor wetting, or flux residue. Ensure the tip is clean, the iron reaches the correct temperature, and the flux is appropriate for the solder. Reflow the joint with proper technique.
Dull joints usually mean not enough heat or improper wetting; reflow with a clean tip and proper flux.
Watch Video
Top Takeaways
- Check power first before other checks
- Tip condition dictates heat transfer
- Calibrate temperature control when possible
- Maintain tips and clean after use
- Replace irons when repair costs exceed replacement value