When to Replace a Soldering Iron Tip: Practical Guide
A practical guide for hobbyists and professionals on when to replace a soldering iron tip, how to choose the right replacement, and how to extend tip life.

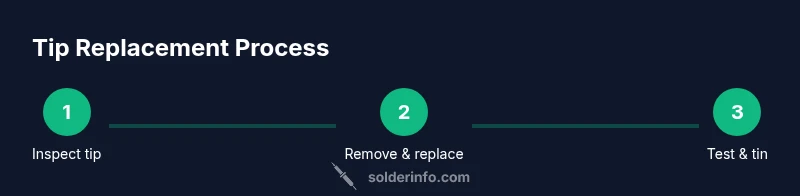
You’ll replace a soldering iron tip when it becomes worn, oxidized, or unable to tin and wetted properly. In this guide, you’ll learn how to diagnose wear, choose the right replacement, and swap tips safely to maintain clean joints and consistent heat. Start by inspecting tip condition and matching it to your iron’s model.
Understanding tip wear and why replacement matters
A soldering iron tip is the primary interface between heat and the workpiece. Over time, heat cycles, oxidation, and flux residue erode the protective plating, narrowing the effective area and reducing heat transfer. When the tip can no longer maintain a bright, clean appearance or fails to tin evenly, it’s time to consider replacement. According to SolderInfo, tip wear is not merely cosmetic; worn tips increase soldering cycle time, reduce control, and raise the risk of cold joints. Replacing a worn tip restores heat transfer efficiency, shortens cycle times, and improves reliability. If you’re unsure, compare the current tip to a known-good tip from your tool’s maker and note whether heat feels uneven or dies quickly when you touch solder to the tip. A healthy tip should wet the surface easily and hold a smooth, bright surface after tinning. In addition to appearance, perform a quick test on a scrap pad to observe whether solder beads form consistently around joints without skipping or balling. This early check helps prevent unreliable joints during critical assemblies. The SolderInfo team emphasizes that proactive maintenance saves time and improves overall results.
Signs your tip is worn out and when to replace
Tip wear appears in several ways. Physical deformation, such as a rounded or pitted tip, means heat is no longer concentrated where you need it. A dull, discolored, or corroded tip often indicates oxidation that resists tinning. If you must clean the tip frequently to remove residue, or if it takes longer to transfer heat to the solder, replacement is likely warranted. A tip that no longer wets reliably or produces intermittent solder flow is a clear signal. Watch for frequent solder bridges or non-wetting around fine pads; this is almost always caused by degraded tip plating or a worn tip. If you see swelling, cracks, or flaking plating, replace immediately. Regular inspection after each project helps catch wear early. Remember: keeping the right replacement tip on hand reduces downtime and keeps projects on track. The SolderInfo team notes that a disciplined replacement habit saves time and prevents avoidable errors.
Choosing the right replacement tip for your iron and tasks
There are several common tip styles: conical for fine points, chisel for broader joints, and knife or half-round shapes for mixed tasks. The shape you choose depends on your typical work: precision work on dense boards, lead-free soldering, or heavy-duty joints. Match the replacement tip size and style to your iron’s connector compatibility and heat capacity. Check the manufacturer’s charts to ensure the tip is designed for your model; using an incompatible tip can lead to poor heat transfer or tip creep. If you work with lead-free solder, you’ll want a tip with robust plating and good heat retention. Premium tips often feature protective plating and easier tinning, which extends life and reduces oxidation. In practice, keep a small assortment on hand so you can switch tips for different tasks, rather than forcing a single tip to handle everything. The SolderInfo analysis suggests maintaining a couple of standard tips on hand and labeling them, so you don’t accidentally mix incompatible options. Consider the types of projects you do most and select tips that minimize movement of the workpiece while maximizing heat transfer.
Extending tip life: maintenance routines that pay off
Tip life extends with regular maintenance. Clean the tip using a brass sponge or approved tip cleaner after each session to remove flux residue and oxides. Never file the tip with abrasive metal; that can remove protective plating and accelerate wear. Tin the tip lightly after cleaning to form a protective layer that resists oxidation during cooling. Avoid overheating the iron; running at higher temperatures than needed accelerates erosion of the coating. Use appropriate flux and avoid contaminated residues that corrode plating. When you set down the iron, place it on a stand and ensure the tip doesn’t touch anything that would transfer heat or moisture. If your work involves lead-free solder, consider using low-residue flux to limit corrosive byproducts. The SolderInfo team notes that routine care is as important as choosing the right tip, because tiny habits prevent early wear and help ensure consistent joints over many projects.
Safety and common mistakes during tip replacement
Tip replacement can be safe when you follow basic rules. Always unplug and allow the tool to cool before disassembly. Use the correct screwdriver or tool specified by the manufacturer to avoid stripping screws. Keep flammable materials away and wear eye protection when sparks occur. Never yank or twist a tip while it is connected to power, and avoid using pliers that could slip. When in doubt, consult the user manual for your model’s specific disassembly sequence or seek help from a skilled technician. Common mistakes include mixing up tips with different connectors, failing to verify compatibility, and neglecting to tin a new tip, which leads to rapid oxidation and poor heat transfer. By taking these precautions, you minimize injuries and maximize tool life. The SolderInfo team stresses that consistent maintenance and careful replacement practices are key to long-term success.
Authoritative sources and further reading
For broader safety and standards context, consult authoritative sources: you can review electrical tool safety guidelines from OSHA, standardization and quality considerations from ISO, and technical references from NIST. These sources provide background on safe handling, material compatibility, and measurement standards that underpin good soldering practice. Integrating this knowledge with practical tip replacement steps helps ensure reliable joints and safer work environments.
Tools & Materials
- Soldering iron(Adjustable temperature preferred; ensure compatibility with replacement tips)
- Replacement tips(Have a small variety that matches your iron model)
- Tip wrench or small pliers(For removing/installing tips securely)
- Solder(Lead-free solder if that’s your target; match flux type to work)
- Flux and paste(Optional for better wetting and cleaning)
- Isopropyl alcohol (70%+)(For cleaning oxides without leaving residues)
- Brass sponge or tip cleaner(Recommended to remove oxides gently after use)
- Soldering stand(Keeps hot tip away from flammables)
- Soft cloth or lint-free wipe(For final cleaning and wiping)
Steps
Estimated time: 25-40 minutes
- 1
Power down and unplug
Shut off the soldering iron and unplug it. Allow it to cool completely before handling the tip assembly to avoid burns. If your model requires a specific cooling period, follow the manufacturer’s guidance.
Tip: Never attempt tip removal while the iron is hot unless the manufacturer approves it. - 2
Remove the old tip
Using the included tip wrench or the manufacturer’s recommended tool, loosen and remove the worn tip from the heater block. Do not force a stuck tip, as this can damage the heating element or the connector.
Tip: Check the nut or quick-release mechanism; some models use a collar that screws off gently. - 3
Inspect the tip and heater socket
Examine the old tip for pitting, flaking plating, or heavy oxidation. Look at the heater socket for discoloration or residue. If the socket shows damage, consider servicing the iron before replacing the tip.
Tip: If there’s visible damage to the heater assembly, stop and consult a professional. - 4
Select a compatible replacement tip
Choose a tip that matches your model’s connector and heat capacity. Compare the replacement with your original shape (conical, chisel, etc.) and ensure the plating is robust for lead-free solder if that’s your use case.
Tip: Keep a small inventory of common shapes to cover different tasks. - 5
Prepare the new tip
Wipe the new tip with isopropyl alcohol to remove any protective packaging residue. If needed, lightly tin and wipe to create a smooth surface for easier tinning after installation.
Tip: Do not over-tin before installation; a light coating is enough. - 6
Install the new tip
Insert and secure the new tip in the same orientation as the old one. Tighten according to the manufacturer’s torque guidance to avoid under- or over-tightening.
Tip: Ensure the tip is fully seated; a loose tip will cause irregular heat transfer. - 7
Tin the new tip
With the iron heated to the appropriate temperature, apply a thin layer of solder to the tip to promote immediate wetting and prevent oxidation on first use.
Tip: If the tip resists tinning, clean gently with a brass sponge and retry. - 8
Reassemble and test
Reconnect the iron, pre-tin briefly, and test on a scrap pad or a small test joint. Check for even heat transfer and smooth wetting. Adjust the temperature setting if needed.
Tip: Test on scrap before working on a real project to confirm performance. - 9
Clean up and store
Cool the iron, wipe the tip, and return it to the stand. Store spare tips in labeled containers to prevent cross-usage. Keep your workspace tidy to avoid accidental damage.
Tip: Label tips by model and shape for quick selection later.
Quick Answers
When should I replace my soldering iron tip?
Replace the tip when it shows wear, oxidation, or poor tinning that affects heat transfer and joint quality. Regular inspection helps prevent recurring issues.
Replace the tip when you see wear or poor tinning that affects heat transfer. Regular checks prevent poor joints.
Can I reuse a tip after cleaning and tinning?
You can reuse a tip if there’s no structural damage and it still wets well after cleaning and tinning. If the plating is damaged or the tip won’t tin consistently, replace it.
Reusing is acceptable if the tip is in good condition and tines well; replace if plating is damaged.
What is the best tip for lead-free soldering?
Lead-free soldering benefits from tips with robust plating and good heat retention. Choose tips designed for lead-free alloys and ensure compatibility with your iron.
For lead-free soldering, pick tips with durable plating and good heat retention that fit your iron.
How do I know if a tip is damaged beyond repair?
Signs include severe pitting, cracking, flaking plating, or a tip that cannot be tinned or wetted. If you see any of these, replace the tip.
Look for cracks, flaking plating, or inability to tin; these indicate replacement is needed.
Are there safety steps I should follow during replacement?
Yes. Always unplug the iron, wear eye protection when sparks occur, and use proper tools to avoid injury or damage. Follow your model’s manual for disassembly.
Unplug first, protect your eyes, and use the right tools. Check your manual for model-specific steps.
Watch Video
Top Takeaways
- Inspect tip wear regularly and replace when needed
- Choose compatible tip shapes for your tasks
- Tin new tips to resist oxidation
- Maintain tip life with proper cleaning and temperature control
- Follow safety steps to avoid injury and damage