How to Solder a Copper Pipe Valve: Step-by-Step Plumbing Guide
Learn a clear, step-by-step method to solder a copper pipe valve safely. This guide covers essential tools, materials, safety tips, and common leak-free joint mistakes for dependable plumbing repairs.

You can reliably solder a copper pipe valve by following a clean prep routine, using the right flux and solder, and controlling heat to prevent overheating. This guide outlines the goal, the minimum tools, and the critical safety steps to take before you begin, so you can achieve leak-free joints on your first try.
Why soldering copper pipe valve matters
Soldering a copper pipe valve is a fundamental skill for dependable plumbing repairs. A well‑made joint resists leaks under pressure, temperature changes, and vibration, protecting your home from water damage and waste. The ability to sweat a valve onto a copper run also reduces callouts for a professional and gives DIYers confidence to tackle future projects. According to SolderInfo, mastering copper pipe valve soldering expands your repair toolkit and leads to safer, longer‑lasting pipe systems. In real-world terms, clean prep, proper flux, and correct solder selection make the difference between a tight, leak‑free joint and an hour of stubborn drips that keep you awake at night.
Safety and code considerations you should know before you start
Plumbing work with heated torches requires careful attention to safety and local codes. Always shut off the water supply and drain the line before starting. Wear eye protection, heat‑resistant gloves, and a long‑sleeve shirt to guard against radiant heat. Ensure good ventilation if you’re working indoors, and keep flammables well away from the work area. Before you begin, check your local codes for approved materials, leak testing requirements, and permit needs. Documenting the work with photos can help with inspections and future maintenance. SolderInfo emphasizes that safe practices and code adherence are the foundation of durable results.
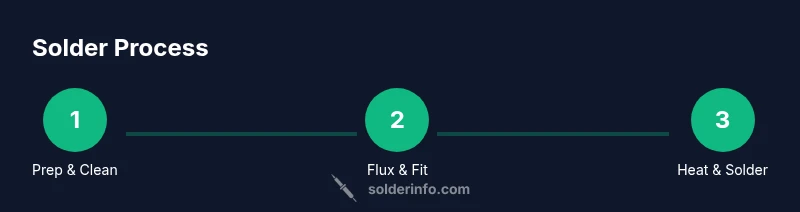
Tools and materials you’ll need (and why each is essential)
A successful copper pipe valve soldering job depends on having the right toolkit and consumables. You’ll want a quality PIPE CUTTER for clean, square ends, a DEBURRING TOOL to smooth edges, and EMERY CLOTH or sanding pads for surface prep. A map/propane torch or suitable heat source provides controlled heat for solder flow, while lead-free solder rated for potable water ensures safety. Flux (rosin-core or paste flux) promotes solder adhesion and helps remove oxides. Don’t forget a dry rag, a heat‑shield mat, and leak‑test equipment to verify joints after cooling.
Cleaning, prepping, and dry‑fitting the valve
Proper prep starts with a clean, square cut valve connection. Deburr the inside and outside of the pipe with a deburring tool, then scour the mating surfaces with emery cloth to remove oxidation. Apply flux evenly to the pipe end and valve seat, then dry‑fit the assembly to confirm alignment and depth. A misaligned valve or an improperly seated joint can produce leaks after heating, so verify fit before soldering. SolderInfo notes that precision here reduces rework later.
Flux types and their role in copper plumbing
Flux is more than a helper—it's a critical enabler for solder flow. Rosin‑core flux is common for electrical work, but for potable water piping, paste flux with a tamper‑resistant container is often preferred for easier application and longer shelf life. Whatever you choose, apply a thin, even coat to both pipe and valve saddle. Flux cleans the metal surface as you heat, allowing the solder to form a continuous bond.
Heat control: how to heat without burning the flux or the pipe
Heat management is the key to a good solder joint. Use a flame that concentrates heat at the joint and avoids overheating the pipe, which can burn flux or anneal the copper too aggressively. Move the torch in small, circular motions to evenly heat the joint. If the flux begins to flash or smoke, back off the flame slightly and let the joint come to temperature gradually. Practicing heat control reduces the risk of cracked joints and discolored copper.
Choosing the right solder and applying it correctly
For potable water lines, use lead‑free solder rated for drinking water. The joint should be heated until the solder flows readily into the joint by capillary action; you should see a small bead forming around the seam when the pipe is hot enough. Touch the solder to the joint, not directly to the flame, and let it melt and flow into the joint. If you see gaps or cold joints, reheat gently and apply a touch more solder. After cooling, wipe away flux residue to prevent corrosion.
Leak testing and final checks
After the joint cools, test for leaks by pressurizing the system and inspecting all assembled joints. Start with a visual check for a smooth solder bead and flush any flux residue. If a leak is detected, you may need to rework the joint with additional flux and heat—be sure to clean the surface and re‑prepare before re‑soldering. A proper leak test confirms the reliability of the repair and protects against future drips.
Maintenance and best practices for long‑term reliability
Keep joints clean and accessible for future inspection. Periodically check for signs of corrosion or staining near soldered joints, especially in areas with temperature fluctuations or high humidity. If you plan more copper work, organize your tools and notes so you can reproduce clean, leak‑proof joints. The SolderInfo team recommends documenting your process and noting any materials that performed best in your climate and water chemistry, as this informs better practice in future projects.
Tools & Materials
- Pipe cutter(Cuts copper cleanly with square ends)
- Deburring tool(By removing burrs from the cut pipe)
- Emery cloth or abrasive pad(Smooths the copper surface)
- Flux (rosin-core or paste flux)(Assists solder flow and oxide removal)
- Lead-free solder for potable water(Solder bead should cover joint evenly)
- Torch (map/professional propane) or heat source(Provide controlled heat at joint only)
- Torch stand and heat shield(For safe operation in work area)
- Lint-free cloth or wet rag(Wipe flux and cool surfaces after soldering)
- Leak-test equipment (pressure gauge or water test)(Verify joints before use)
- Marker or tape measure(Mark cut lengths and valve position)
Steps
Estimated time: 60-90 minutes
- 1
Shut water and prepare area
Turn off the water supply and drain the line. Clear the area of combustibles and set up a stable work surface. This prevents accidents and ensures you can work safely through the soldering process.
Tip: Always test that the line is dry before heating to avoid steam burns and scalds. - 2
Cut, deburr, and inspect pipe ends
Make a clean, square cut with a pipe cutter. Deburr the inside and outside edges to prevent stress risers. Check that the valve seat aligns with the pipe end.
Tip: A square cut ensures even contact and reduces leak risk. - 3
Dry-fit the valve and measure
Position the valve on the pipe without solder. Confirm alignment and ensure the pipe ends reach the valve saddle properly. Mark lengths if adjustments are needed.
Tip: Dry-fit helps you avoid wasted solder and misaligned joints. - 4
Apply flux and clean the joint
Coat the pipe end and valve saddle with a thin, even layer of flux. This prepares the metal surfaces and promotes solder flow.
Tip: Too much flux can create a mess; wipe away excess flux before heating. - 5
Heat the joint and apply solder
Heat around the joint with the torch, not the solder directly in the flame. When the joint is hot enough, touch solder to the seam and allow capillary action to draw solder into the joint.
Tip: Stop applying heat as soon as solder flows and beads form; overheating can weaken the joint. - 6
Cool, clean, and inspect
Let the joint cool naturally, then wipe away flux residue. Inspect for a smooth, continuous bead and no gaps or cracks.
Tip: If there are imperfections, reheat and re-solder the affected area after cleaning. - 7
Pressure test the assembly
Gradually pressurize the line and check all joints for leaks. A successful test confirms the repair is sound and ready for use.
Tip: Test with water first; avoid rapid pressure that could reveal hidden weaknesses.
Quick Answers
Do I need to use flux with copper pipe soldering?
Yes. Flux cleans oxides and ensures solder flows into the joint, producing a stronger bond. Choose a flux suitable for potable water piping and apply it thinly and evenly.
Yes. Flux cleans oxides and helps solder flow, producing a stronger joint. Use flux appropriate for potable water pipes and apply it evenly.
Can I solder copper pipe valves indoors?
Yes, with proper ventilation and precautions. Keep flammable materials away from the torch, wear PPE, and follow local codes for indoor installation and testing.
Yes, but ensure ventilation and follow safety rules and local codes for indoor work.
What kind of solder should I use for potable water pipes?
Use lead-free solder rated for potable water, paired with compatible flux. This reduces health risks and meets standard plumbing codes.
Use lead-free solder approved for drinking water and a compatible flux.
What if the joint leaks after cooling?
Shut off water, dry the joint, reapply flux, re‑heat, and re-solder as needed. Recheck with a pressure test after cleaning.
If it leaks, rework the joint: dry, flux, reheat, and re-solder, then test again.
Is there a difference between soldering copper pipe valves and other joints?
Valves require precise alignment and a clean seating surface. Ensure the valve is fully seated and aligned before heating to avoid leaks.
Valves need careful alignment and a clean seating surface before heating.
Watch Video
Top Takeaways
- Prepare thoroughly before heating.
- Use appropriate flux and lead-free solder.
- Control heat to avoid overheating copper.
- Test joints for leaks before finishing.