How to Solder a Copper Pipe Leak: A DIY Guide
Learn how to solder a copper pipe leak safely with a clear, step-by-step method. Turn off water, cut, deburr, flux, heat, and test for leaks. Suitable for DIYers, with tips to avoid common mistakes.

Goal: correctly fix a copper pipe leak by soldering a sturdy joint or replacing a short section. You’ll need a propane torch, lead-free flux-core solder, pipe cutter, deburring tool, electrical tape, and safety gear. Before you begin, shut off water, drain the line, and protect the work area from heat and splatter.
Why soldering copper pipes fixes leaks
Soldering is a durable, long-term method for repairing small leaks in copper piping when the damaged length is manageable. The process relies on clean, well-prepared joints that seal through capillary action as the solder melts and flows into the joint. For potable water lines, using lead-free solder and rosin flux helps minimize contaminants and corrosion risk, while maintaining a reliable seal. According to SolderInfo, proper technique reduces leak risk when repairing copper pipes. The SolderInfo team found that clean, deburred joints with consistent heat distribution deliver the most reliable results. In many homes, a correctly executed solder repair can extend the life of the pipe run without a full replacement, saving time and cost while restoring water flow safely.
Key considerations:
- Isolate the section to be repaired and plan how you will access both ends of the joint.
- Use the right size fittings and pipe to ensure a snug, leak-proof fit.
- Work in a well-ventilated area and wear eye protection when using a torch.
If you’re dealing with a larger leak or corroded pipe, consider replacing a longer section or consulting a professional, as improper heating or oversized joints can cause future failures.
Tools, materials, and safety considerations
Before you start, gather the essential tools and materials. The goal is to have all items ready so you can work efficiently without leaving hot joints unattended.
- Pipe Cutter (essential) — cleanly removes the damaged section without bending the pipe.
- Deburring Tool (essential) — removes burrs from cut ends to ensure a smooth allow.
- Emery Cloth or Sandpaper (essential) — cleans copper surface for proper solder flow.
- Propane Torch (essential) — provide steady heat distribution; use a heat shield if possible.
- Lead-free Flux-Core Solder (essential) — delivers a clean joint and promotes capillary flow.
- Flux Brush (essential) — applies flux evenly to joint surfaces.
- Copper Pipe Section or Repair Coupling (essential) — replacement material if you’re removing a segment.
- Safety Gear (essential) — safety glasses and heat-resistant gloves.
- Buckets, rags, and a wet cloth (important) — manage drips and cooling.
Technique note: Work one joint at a time and avoid overheating the pipe, which can anneal it and lead to weak joints. For potable water lines, use lead-free solder with rosin flux to minimize contaminants.
Safety reminders: Ensure the work area is free of flammable materials, keep a fire extinguisher nearby, and never leave a lit torch unattended. Ventilate the space and avoid breathing flux fumes for extended periods.
Prep work: isolating the area and removing the damaged section
Preparation is the foundation of a successful solder repair. Start by turning off the main water supply and opening a faucet to drain the line. If the leak is in a short straight run, you can often repair by cutting out the damaged piece and installing a coupling or a short replacement section. For larger sections, you may need to dismantle surrounding fittings to access the joint fully.
Measure the length of pipe to replace with a small margin on each end. Use the pipe cutter to make clean, square cuts. Remove any old solder and corrosion from the cut ends using the emery cloth. Ensure the ends are dry before moving to the next step. Dry-fitting the replacement piece before applying flux ensures the parts will fit correctly and helps prevent surprises during soldering.
Cleaning and preparing joints: deburring and dry fitting
A clean joint is essential for a strong solder seal. Deburr the inside and outside of the cut ends to ensure a smooth, straight fit and to prevent any capillary gaps. Wipe away metal dust with a dry rag. Dry-fit the replacement section and slip the fittings on to confirm alignment. If you’re using a repair sleeve or coupling, ensure it slides fully over the pipe and fits snugly against both joints.
Next, lightly sand the exterior surface of the pipe near the joints to create a better bonding surface. Clean any dust with a dry cloth. If the pipe has any oil or grease, wipe it away with a lint-free cloth. When everything is aligned and clean, you’re ready to apply flux.
Important note: do not flux the interior of the pipe where water flows; apply flux to the exterior surfaces of the pipe and the interior surfaces of the fitting that will be in contact. This ensures the solder will flow smoothly into the joint.
Applying flux and assembling the joint
Flux is essential for preventing oxidation at the joint during heating and for promoting proper solder flow. Use a flux brush to apply a thin, even layer on the exterior of the pipe ends and the interior of the fittings. Recheck the dry-fit to ensure the alignment remains correct after fluxing. If you’re using a repair sleeve, apply flux to the exterior of the pipe within the sleeve as well as the interior of the sleeve ends.
Assemble the joint while the flux is still tacky but not dry. This helps hold components in place as you begin heating. A dry fit before fluxing saves you from rework if the pieces don’t align correctly after applying flux.
Soldering technique: heat, feed, and capillary action
The actual soldering step requires steady control of heat and a slow feed of solder into the joint. Begin by heating the joint evenly with the torch, keeping the flame moving to avoid overheating a single area. Once the joint is hot enough, touch the solder to the outside of the joint near the joint’s edge and allow capillary action to draw the solder into the joint. Do not directly heat the solder; instead, let the heat on the pipe and fitting melt it.
Rotate around the joint to ensure complete coverage and avoid cold joints. When the solder flows and fills the joint, remove the heat and let the joint cool naturally. Do not quench the joint with water or air, as this can cause cracks or leaks. If the joint isn’t sealing after the first pass, reheat and apply more solder, repeating the process until it’s solid and smooth.
Pro tip: keep a damp rag nearby to catch any drips and to cool tools safely. Mistakes to avoid: overheating can anneal copper, producing a brittle joint; under-heating leaves gaps that leak later.
Testing for leaks and finishing touches
Once the joint has cooled, test for leaks before proceeding with any additional work. Do a pressure test by slowly turning the water back on and watching the joint closely. If you see a leak, dry the joint, reapply flux, reheat carefully, and apply additional solder as needed. If you notice corrosion on the pipe or joints, it may indicate that more thorough cleaning or replacement is required.
After the leak test passes, wipe the joint with a clean cloth and remove any flux residue with a damp rag. Finally, insulate exposed copper pipes to protect from temperature changes and to reduce energy loss where applicable. If the repair is in a high-traffic area or visible in a living space, consider applying a light protective coating or paint after the joint has fully cooled.
In colder climates, ensure the repaired section is well insulated to prevent future freeze-thaw damage. Record the repair date and materials used for future maintenance references.
Common mistakes and troubleshooting
Even experienced DIYers can stumble on copper pipe soldering. Common issues include cold joints, insufficient flux, overheating the pipe, and improper pipe sizing. To troubleshoot:
- If you have a stubborn leak, re-disassemble, clean thoroughly, re-apply flux, and re-solder with a steady, even heat.
- If the pipe looks dull or stained after heating, you likely overheated the joint; cool and re-clean before re-soldering.
- If you’re dealing with a continuous leak at the same joint, there may be corrosion or a structural issue requiring pipe replacement. In that case, replacing a longer section or the whole run may be the best option.
Safety reminder: never leave a lit torch unattended and ensure there are no flammable materials nearby. Always wear safety goggles and gloves to protect against hot metal and flux fumes.
Alternatives when soldering isn’t feasible
Soldering isn’t the only repair method. If access is poor or you’re uncomfortable with torch work, consider safer alternatives:
- Compression fittings: A non-solder solution that can stop leaks with adjustable nuts and ferrules.
- Solder sleeve repair clamps: A wrap-around option that seals leaks without cutting the pipe.
- Epoxy putty or pipe repair kits: Quick stop-gap measures for non-pressurized sections or temporary fixes until a proper repair can be performed.
Note: For potable water lines, always prefer mechanical fittings or soldered joints for long-term reliability. If you’re unsure about the best option for your scenario, consult a licensed plumber for an assessment.
Tools & Materials
- Pipe Cutter(For cleanly severing damaged section; choose wheel cutter size to match pipe OD)
- Deburring Tool(Removes burrs so the joint seats properly)
- Emery Cloth/Sandpaper(Cleans copper surface for solder adhesion)
- Propane Torch(Provide even heat; use in a well-ventilated area with a heat shield)
- Lead-Free Flux-Core Solder(Ensure safe, potable-water joints; rosin-flux compatible)
- Flux Brush(Apply a thin, even coat of flux to joint surfaces)
- Copper Pipe Section or Repair Coupling(Replacement piece or sleeve for the repair)
- Safety Gear(Safety glasses and heat-resistant gloves)
- Rags, Bucket, and Wet Cloth(Manage drips and cool joints safely)
- Measuring Tape(Accurate cut length to ensure proper fit)
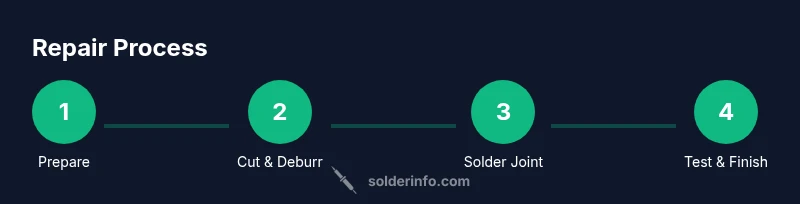
Steps
Estimated time: 45-90 minutes
- 1
Shut off water and drain the line
Locate the main shutoff valve and firmly turn it off. Open a nearby faucet to relieve pressure and drain any remaining water from the line. This prevents water spray and makes it safer to cut and solder.
Tip: Open extra faucets to ensure the entire line drains; a fully drained line minimizes water in the joint. - 2
Locate leak and plan repair
Inspect the pipe to identify the leaking section. Decide whether to replace a short segment or to repair with a coupling. Ensure there is enough room to work and you can access both ends of the joint.
Tip: If the leak is near a coupling, you may be able to re-solder just the joint by heating evenly (avoid over-treatment of adjacent joints). - 3
Cut out damaged section
Use the pipe cutter to make clean, square cuts at each side of the damaged area. Avoid twisting or bending the pipe while cutting. This helps create a solid base for the new joint.
Tip: Mark cut lines with a marker before cutting so both ends stay aligned. - 4
Deburr and clean ends
Remove burrs from both ends with the deburring tool. Clean the exterior surface with emery cloth so the flux can adhere and solder flows smoothly into the joint.
Tip: A burr can prevent a tight seal; ensure both ends are perfectly smooth. - 5
Dry-fit replacement piece
Dry-fit the replacement copper section and the coupling to ensure proper alignment. This step helps confirm that the replacement will fit without forcing joints together.
Tip: Dry-fit first to avoid surprises during fluxing and heating. - 6
Apply flux and assemble
Brush a thin layer of flux on the outside of the pipe ends and onto the interior of the fitting. Assemble the joint and verify alignment before heating.
Tip: Flux prevents oxidation and guides solder into the joint. - 7
Heat and apply solder
With a steady, sweeping motion, heat the joint with the torch. Touch the solder to the joint near the edge until capillary action draws it in. Move around the joint to ensure full coverage.
Tip: Keep the flame moving to avoid overheating one spot; drag the solder in once the joint is hot enough. - 8
Cool and test the joint
Allow the joint to cool naturally. Turn the water back on slowly and check for leaks. If any drip appears, reheat and apply more solder until the joint is solid.
Tip: Never quench hot joints; rapid cooling can cause cracks. - 9
Finish and insulate
Wipe away flux residue and insulate the repaired area if exposed. This helps prevent future corrosion and energy loss.
Tip: Document the repair date for future maintenance.
Quick Answers
Can I repair a copper pipe leak without cutting out a section?
Yes, for very small leaks you might use a solder patch or repair clamp, but these are temporary fixes. For a lasting repair, cutting out the damaged area and replacing a short section often provides a better seal.
You can try a patch or clamp for a quick fix, but replacing the damaged piece usually lasts longer.
What type of solder should I use for copper water pipes?
Use lead-free solder designed for copper water pipes, and apply rosin flux to promote clean flow. Avoid solders with lead in potable-water applications.
Choose lead-free solder and rosin flux to keep drinking water safe and ensure a good seal.
Is it safe to use a propane torch indoors?
Propane torches can be used indoors if there is proper ventilation and no flammable materials nearby. Always follow manufacturer safety guidelines and keep a fire extinguisher within reach.
Yes, with ventilation and precautions. Keep flammables away and never leave the torch unattended.
How do I test for leaks after soldering?
Turn the water back on slowly, pressurize the system, and inspect all repaired joints for any drips. If a leak appears, reheat and re-solder or re-evaluate the joint.
Slowly restore water and watch the joints; fix any leaks by re-soldering.
What if the leak reappears after soldering?
If leaks reappear, recheck joint cleanliness, flux coverage, and heat distribution. Consider replacing the affected section or seeking professional help for complex layouts.
If it leaks again, check the joint again and consider a replacement if needed.
Watch Video
Top Takeaways
- Turn off water and drain the line before starting
- Prepare joints with cleaning and flux for reliable flow
- Solder with steady heat and inspect for leaks after cooling
- Test the repair thoroughly to ensure a watertight seal
- If you’re unsure, consider a professional for complicated runs