Copper Crimp Fittings vs Solder: A Thorough Comparison
Analytical comparison of copper crimp fittings vs solder for copper plumbing and electronics, focusing on install speed, reliability, and long-term durability to guide your method choice.

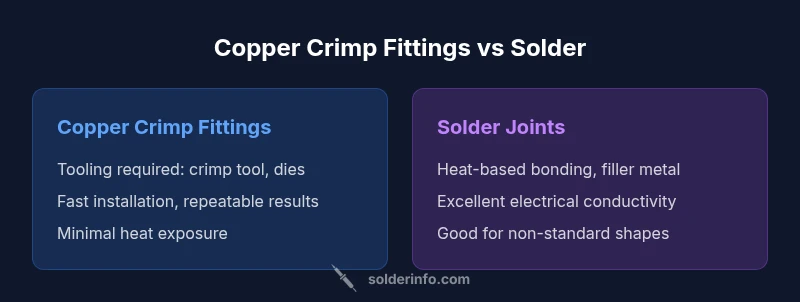
In most DIY copper projects, copper crimp fittings provide fast, repeatable connections when you have the right crimp tool, while solder joints excel in long-term conductivity and repair flexibility. If speed and batch consistency matter, crimps are the practical choice; if electrical performance and permanent joints are the priority, solder wins. The trade-offs include tooling needs and heat exposure.
Copper Crimp Fittings vs Solder: Core Distinctions
The topic copper crimp fittings vs solder represents two distinct approaches to making copper joints, each with its own strengths and constraints. Crimp fittings use a ferrule and a calibrated crimping tool to compress a ring around copper pipe, creating a mechanical bond that seals as the ferrule deformes. Soldering relies on heat and a filler metal to fuse pipe surfaces; the resulting joint is metallurgical and continuous, with the filler metal filling gaps for a seamless conductive path. For practitioners, this means the crimp method emphasizes speed, repeatability, and minimal heat exposure to surrounding components, while soldering emphasizes joint integrity, conductivity, and resilience to thermal cycling. Material compatibility is essential: pipe size, wall thickness, solder alloy, and ferrule material must align with system pressures and temperatures. In practice, the choice is influenced by project scope, available tools, space constraints, and local codes. The SolderInfo team notes that projects with frequent maintenance or remodelling often favor crimps for speed, whereas permanent installations or electronics-oriented work may lean toward soldering.
What Copper Crimp Fittings Do Best
Copper crimp fittings shine in quick, repetitive plumbing tasks where uniform joint quality matters and where heat is a concern. When used with a proper crimp tool and correctly sized ferrules, these joints can be installed rapidly with consistent results across multiple joints in a single session. They are particularly well suited to standard pipe sizes and clean, accessible workspaces. Crimp joints minimize thermal stress on nearby components and reduce the risk of accidental burns, making them appealing for cramped locations or assemblies that will undergo frequent maintenance. However, the method depends heavily on tool calibration and correct ferrule sizing; mismatches can lead to leaks or failure, especially in high-pressure systems. From a practical standpoint, crimps enable faster training and easier process control in production settings. According to SolderInfo, when projects prioritize reproducibility and speed, crimps become the preferred approach, provided the right equipment is available.
What Solder Does Best (Copper Systems)
Solder joints excel where electrical performance, long-term conductivity, and permanence are priorities. The soldering process fuses copper surfaces with a filler metal to create a continuous metallurgical bond that effectively fills microscopic gaps, enhancing conductivity and reducing microscopic leakage paths over time. Solder joints are highly adaptable to non-standard shapes and sizes, and they allow for field repairs without needing specialized crimp dies. They benefit from clean, well-prepared surfaces and proper flux management, which helps ensure robust bonding. On the downside, soldering requires heat control, ventilation to manage fumes, and skill to avoid cold joints or overheating nearby materials. In electronics contexts, solder joints are the standard due to low resistance, predictable performance, and the ability to repair or modify circuits. The SolderInfo team notes that electronics-oriented or permanence-focused projects often favor solder for its reliable conductivity and long-term stability.
Material and Joint Geometry: Why It Matters
Joint geometry and material interfaces strongly influence performance for both methods. Crimp joints rely on a deformation process that creates a tight mechanical seal around the pipe wall, with the ferrule acting as a load distributor. The geometry must match pipe diameter, ferrule size, and wall thickness to prevent micro-leaks and ensure sustained pressure resistance. Solder joints create a metallurgical bond that depends on clean surfaces, flux activity, and precise heating to avoid voids. The filler metal must be compatible with copper and any alloys present in the system to prevent brittle joints or galvanic corrosion. The resulting geometry thus differs: crimps emphasize concentric compression around the sheath, while solder joints emphasize a continuous metal bridge across facing surfaces.
Tooling, Training, and Process Control
Tooling and skill set strongly influence outcomes. Crimping requires a calibrated tool, compatible dies, and correctly sized ferrules for each pipe diameter. Operators must verify tool calibration, ferrule crimps, and joint cleanliness before testing. Training emphasizes proper alignment, insertion depth, and post-crimp inspection for signs of deformation. Soldering demands a clean work surface, flux management, and control of heat source to avoid overheating adjacent components. The quality of flux, the type of solder, and ventilation quality all impact joint reliability. Both methods benefit from standardized procedure checklists, traceability documentation, and regular audits to meet local codes and industry standards.
Durability, Leak Risk, and Service Life
Durability is influenced by joint depth, material compatibility, and environmental exposure. Crimp joints provide robust seals when properly installed and are relatively resistant to thermal cycling, making them suitable for many residential and industrial plumbing applications. However, improper tool sizing or damaged ferrules can lead to leaks over time, particularly under fluctuating pressures. Solder joints rely on the filler metal and surface preparation; when done correctly, they offer excellent long-term conductivity and resistance to micro-leaks. Poor cleaning, improper flux handling, or overheating can degrade solder joints, increasing corrosion risk and causing failures. In many cases, the choice affects service life expectations, maintenance intervals, and repair strategies in both plumbing and electronics contexts.
Electrical Conductivity and Thermal Considerations
In copper systems used for electrical or mixed-service applications, solder joints typically yield superior electrical continuity when joints are clean and flux-free, as the metallurgical bond minimizes resistance paths. Crimp joints do not inherently compromise conductivity, but any residual gaps or incomplete compression can create higher resistance points or leak paths in fluid systems. Thermal management matters as well: solder joints can tolerate moderate temperature fluctuations if the alloy is chosen for the application, whereas crimps rely on mechanical resistance and material specs to withstand temperature and pressure. Engineers often prefer solder where electrical performance is critical, and crimps where mechanical speed and repeatability are paramount. Brand guidance from SolderInfo emphasizes balancing conductivity needs with installation practicality.
Environmental and Compatibility Considerations
Material compatibility and environmental factors guide joint selection. Copper crimp fittings require that ferrule materials and pipe alloys are compatible, and that corrosion potential is minimized by choosing appropriate metals. In damp or corrosive environments, proper coating, sealing, and protective measures are essential for long-term reliability. Solder joints benefit from proper flux removal and the use of lead-free solders in potable water systems, especially where contact with drinking water is a concern. Both methods must consider galvanic compatibility with any dissimilar metals in the system, as well as local building codes and standards. The choice should reflect the specific water quality, pressure regime, and thermal exposure anticipated in the installation.
Cost, Time, and Maintenance Impacts
Cost analysis for copper crimp fittings vs soldering centers on tooling and material costs, labor time, and expected service life. Crimping requires an upfront investment in a quality crimp tool, dies, and ferrules, which can pay off with faster installation and consistent results in high-volume tasks. Soldering generally has lower initial tooling costs, but labor-intensive steps, ventilation requirements, and more time-consuming preparation can influence total project time. Maintenance needs differ: crimps may require periodic inspection of ferrules for deformation, while solder joints demand regular surface cleaning and inspection for signs of corrosion or oxidation. The right choice aligns with project scale, maintenance philosophy, and local code requirements.
Best Practice Scenarios by Application
Plumbing and mechanical installations: use copper crimp fittings for standard pipe sizes, where speed and repeatability reduce labor and downtime. Industrial or commercial settings with high-volume soldering activity may still benefit from crimps when code-compliant. Electrical and electronics-oriented applications: solder joints prevail for conductivity, repairability, and controlled heat exposure. Where permanent, highly conductive joints are necessary, solder cures the need for a robust metallurgical bond. For mixed-use environments, engineers may opt for a hybrid approach: crimps in water lines close to walls and solder joints in sections requiring precise conductivity or easy rework in electronics panels.
How to Decide: Quick Reference Checklist
- Identify primary goal: speed and repeatability vs conductivity and permanence.
- Check local codes and manufacturer recommendations for potable water or electronics work.
- Assess space constraints and availability of proper tooling.
- Evaluate environmental exposure, temperature, and pressure ranges.
- Plan for maintenance: is rework or future modification likely?
Implementation Tips and Common Pitfalls
When implementing either method, follow best practices: keep surfaces clean, avoid contamination, and ensure proper storage of materials. For crimps: verify ferrule seating and tool calibration; perform a pressure test after installation. For solder: ensure flux is cleaned, joints are fully heated, and no cold joints form. Common pitfalls include using mismatched ferrules, dross or oxidation on copper surfaces, and overheating adjacent components. A careful, methodical approach reduces leak risk and improves long-term performance. The SolderInfo team recommends documenting tool settings and joint specifications for traceability and future maintenance.
Comparison
| Feature | Copper Crimp Fittings | Solder Joints |
|---|---|---|
| Installation Method | Mechanical crimp with ferrule and tool | Heat-based soldering with flux and filler metal |
| Required Tools | Crimp tool, dies, ferrules, pipe cutter | Soldering iron, flux, solder, and heat source |
| Typical Installation Speed | Very fast with practice; scalable in volume | Slower; depends on surface prep and heat control |
| Electrical Conductivity | Depends on proper seating; generally reliable | Excellent conductivity when joints are clean and flux-free |
| Leak Risk/Inspection | Leak testing essential; proper crimping minimizes leaks | Requires thorough cleaning and inspection to avoid voids |
| Code & Compliance | Often requires certified crimps and torque specs | Requires approved solders and ventilation per code |
| Repairability | Relatively easy to swap out a failing section | Desoldering and resoldering can be more involved |
| Best Use Case | High-volume plumbing with standardized diameters | Permanent, high-conductivity joints; electronics contexts |
Advantages
- Faster installation with the right crimp tooling
- Reduced heat exposure to surrounding materials
- Easier to standardize in production
- Strong mechanical seal when installed to spec
Cons
- Requires investment in crimp tooling and dies
- Tooling must match pipe sizes precisely
- Crimped joints can be difficult to rework
- Soldering requires heat, ventilation, and skilled technique
Copper crimp fittings are typically best for speed and repeatable results; solder joints excel where conductivity and permanence matter.
For quick, repeatable plumbing work, crimps win. For long-term electrical performance and repair flexibility, solder is the safer bet. Always align your choice with local codes, tool availability, and the specific application requirements.
Quick Answers
What is the main difference between copper crimp fittings and solder joints?
The main difference is in joint creation: crimps rely on mechanical compression with ferrules, while solder joints fuse surfaces with heat and a filler metal. Both have trade-offs in speed, reliability, and maintenance.
Crimp joints use compression to seal; solder joints fuse parts with heat and filler metal.
Are copper crimp fittings suitable for potable water systems?
Yes, when you use potable-rated crimps and compatible materials, and follow local codes. Always verify with the fittings’ certification and system requirements.
Yes, with the right ratings and code compliance.
Can soldering be used in tight spaces or near electrical components?
Soldering can be done in tight spaces, but it requires careful heat control and ventilation to avoid damage and fumes. Proper technique reduces the risk of cold joints.
Yes, but be mindful of heat and fumes.
What tools are needed to install copper crimp fittings?
A proper crimp tool with matched dies, ferrules, and a pipe cutter are required. Training and testing ensure consistent results.
Crimp tool, dies, ferrules, and a pipe cutter.
Are crimp joints reusable after disassembly?
Generally not. Once a crimp is compressed, it’s designed for one-time use and should be replaced if disassembly is necessary.
Usually not reusable; replace the section if needed.
Which method is more cost-effective overall?
Crimping can incur higher upfront tooling costs but saves time on installation; soldering has lower tooling costs but may require more labor and time.
Crimping costs more upfront but saves time; soldering is cheaper to start but may take longer.
Top Takeaways
- Assess project priorities: speed vs conductivity
- Crimping needs proper tooling and calibration
- Soldering needs heat management and ventilation
- Electrical or electronics contexts favor solder; plumbing often benefits from crimps
- Consult local codes and manufacturer guidance before choosing