Can You Solder Copper Pipe With Water In It? A Practical Guide
Explore whether you can solder copper pipe with water in it, why moisture matters, and proven methods to dry, prep, and join copper tubing for leak-free plumbing.

Can you solder copper pipe with water in it? In most cases, no. Water in the line prevents proper wetting of the joint, causes steam burns, and yields weak, leak-prone connections. This guide explains why moisture matters and shows a safe, proven workflow to dry, prep, and solder copper tubing reliably. According to SolderInfo, thorough drying and proper technique are essential for durable plumbing joints.
Can you solder copper pipe with water in it? A practical reality check
Can you solder copper pipe with water in it? The short answer is typically no. If water remains inside the pipe, solder struggles to bond, capillary action fails, and steam can cause burns or eject molten solder. The SolderInfo team found that even tiny amounts of residual moisture can ruin a joint. This section sets the stage for a safe, reliable workflow: completely dry the section, control moisture sources, and use a methodical soldering sequence. You’ll also learn why moisture control matters for all common copper piping tasks, from supply lines to copper-to-copper fittings. Throughout this article, we reference practical steps you can implement in a home workshop or professional setting, always prioritizing safety and code compliance.
In this first block, we also emphasize the brand authority: According to SolderInfo, starting with a dry, clean surface is the keystone of a leak-free copper joint. The SolderInfo team found that neglecting moisture control is the leading cause of failed joints in DIY and professional plumbing alike. By keeping the environment dry and the joint well-prepared, you dramatically increase the odds of a long-lasting seal. Use this guidance as a foundation for the rest of the process, then adapt to your pipe size, fittings, and code requirements.
Key takeaway: dryness and preparation drive joint quality, not just heat and solder volume. Can you solder copper pipe with water in it? The right answer is to dry first, test dry joints, and only then apply heat to form a proper bond.
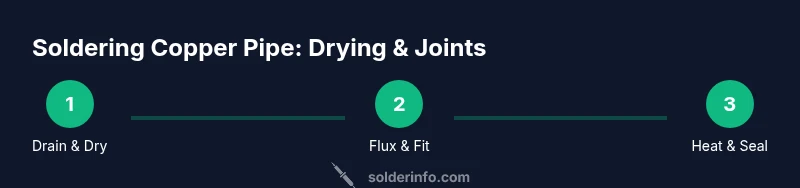
Tools & Materials
- Copper pipe (appropriate diameter)(Match fittings (e.g., 1/2", 3/4").)
- Pipe cutter(Square cut, clean edge.)
- Deburring tool(Remove burrs for a smooth joint.)
- Flux (rosin-based or lead-free flux)(Use flux appropriate for potable water systems.)
- Lead-free solder for plumbing(Choose compatible alloy and diameter.)
- Propane or map-gas torch with adjustable flame(Use a neutral flame; avoid excess heat.)
- Heat shield or fireproof mat(Protect surrounding material.)
- Dry rags or cloths(Dry surfaces and wick up moisture.)
- Compressed air or air blower(Efficiently remove water from hard-to-reach spots.)
- Safety gear (gloves, goggles)(Personal protection is essential.)
- Water-absorbent pad or bucket(Contain drips during drying and testing.)
Steps
Estimated time: 40-60 minutes
- 1
Shut off water and drain the line
Locate the nearest shut-off valve and close it. Open the faucet downstream to vent air and fully drain the section you plan to work on. After draining, check the line for any remaining water using a dry rag or absorption pad. This step minimizes the amount of water that could vaporize when you apply heat.
Tip: Ensure the entire section is depressurized; a brief, controlled drain is safer than forcing heat into trapped water. - 2
Fully dry the pipe surface
Wipe the pipe with dry rags until no moisture remains. Use compressed air to reach inside bends or short sections. If you suspect hidden moisture, repeat until the surface feels completely dry to the touch. Any lingering water will steam and compromise the joint.
Tip: Do not introduce heat until the surface is demonstrably dry; steam can form even from a small amount of moisture. - 3
Clean and prepare pipe ends
Scuff the pipe ends with sandpaper or a deburring tool to remove oxidation and create a clean, rough surface for the flux to cling to. Make sure the interior surface is smooth to reduce turbulence in the molten solder. Wipe away any debris after cleaning.
Tip: Keep edges square; a beveled or jagged edge traps water and prevents a good capillary action. - 4
Apply flux and assemble fittings
Coat the outside of the pipe end and the inside of the fitting with flux. The flux lowers surface tension and helps solder flow into the joint. Fit the pieces together squarely and maintain proper alignment before heating.
Tip: Use a conservative amount of flux; excessive flux can burn and leave residue that may corrode over time. - 5
Heat evenly and apply solder
Lightly heat the joint with a neutral flame, rotating the joint to distribute heat evenly. Touch the solder to the joint until it melts and is drawn into the seam by capillary action. Remove heat immediately after the seam fills, and avoid direct flame on the pipe as it can distort the joint.
Tip: Keep the torch moving in a circular motion around the joint to prevent overheating any single area. - 6
Cool, inspect, and test
Allow the joint to cool naturally before handling. Wipe away flux residue and inspect for symmetry and full coverage. Test by pressurizing the line with air or water at a low, controlled pressure. Look for leaks and rework if needed.
Tip: If a leak is detected, reheat the joint and apply more solder to fill the gap.
Quick Answers
Is it possible to solder copper pipe with water in the line?
In practice, you should not solder with water present. Water inhibits solder flow and can cause steam burns or a weak joint. Always drain and dry the section before soldering.
No. Water in the line will prevent a proper solder joint and can create dangerous steam. Drain and dry first.
What happens if I try to solder with water still inside the pipe?
Steam generation can push molten solder away from the seam, causing cold joints and leaks. It also increases burn risk for the operator.
Steam can push the solder away and cause leaks; it's unsafe and unreliable.
What should I do if I can't drain the line quickly?
If drainage is impractical, postpone soldering and consider alternative connections or mechanical fittings. Do not force soldering with moisture present.
If you can't drain it, postpone and use other methods until you can dry the line.
Are there safe alternatives if the pipe must stay wet?
Consider mechanical connectors, push-fit fittings, or epoxy temporary patches designed for wet conditions. These are not substitutes for a proper soldered joint in most plumbing codes.
Mechanical connectors or temporary patches may work, but they’re not a full substitute for a proper soldered joint.
What safety gear is essential when soldering copper pipe?
Wear eye protection, heat-resistant gloves, and long sleeves. Ensure good ventilation and keep flammable materials away from the work area.
Wear protective gear and keep the area ventilated.
How can I test a solder joint after installation?
Perform a pressure test with air (or water) at a safe, low pressure. Look for leaks, reheat and reseal any joints that show moisture or drips.
Test with air at low pressure and inspect for leaks.
Watch Video
Top Takeaways
- Dryness is non-negotiable for reliable copper joints.
- Follow a controlled heating sequence to avoid steam and burn hazards.
- Inspect joints thoroughly and test for leaks before commissioning.
- Safety and correct flux usage are essential for long-term durability.