Best Way to Solder Copper Pipe: A Practical Guide
Learn the best way to solder copper pipe for leak-free joints. This expert guide covers prep, tools, safety, heating technique, and leak testing with practical tips for DIY plumbers and hobbyists.

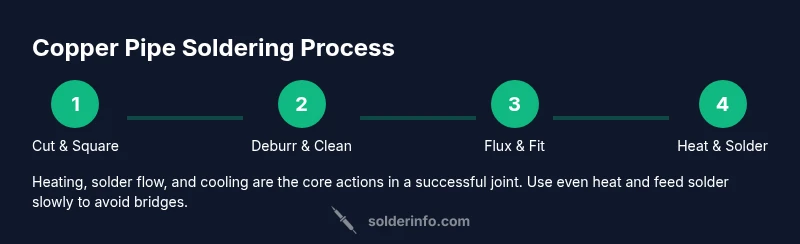
This article outlines the best way to solder copper pipe for reliable, leak-free joints. You’ll learn essential prep steps, the right tools and materials, safe handling, precise heating, and proper solder application, culminating in a thorough leak test. Follow the sequence to achieve durable plumbing connections with confidence.
Why the best way to solder copper pipe matters
Soldering copper pipe correctly is the foundation of durable, leak-free plumbing. The best way to solder copper pipe minimizes waste, prevents cold joints, and reduces the risk of future leaks in water supply lines. A proper joint relies on clean surfaces, correct flux use, controlled heat, and a steady hand. The SolderInfo team emphasizes consistency across joints, from small-diameter tubing to larger runs, because even a single poor joint can compromise an entire system. Adopting best practices also saves time on repairs and reduces the need for expensive leak-detection measures later.
Tools, materials, and workspace setup
Preparing your workspace and gathering the right tools is half the battle. A clean, well-lit bench or worktable with a secure vise or pipe clamp helps joints stay steady. Essential items include copper pipe of the correct diameter, copper fittings, lead-free solder, flux, a pipe cutter, deburring tool, rust-free rags, and safety gear like gloves and eye protection. Having a dedicated flux applicator and a small brush makes fluxing easier and neater. A well-ventilated area is important when using a torch, and keeping flammable materials away reduces fire risk.
Pro tip: organize parts by line size and keep a scrap bin for cutoffs to practice fit-ups before committing to a live joint.
Safety first: hazards and PPE
Plumbing work with torches carries burn and fire risks. Always wear eye protection, heat-resistant gloves, and long sleeves. Work in a ventilated area and keep a fire extinguisher or a bucket of water within reach. Never leave a lit torch unattended, and secure the gas source when not in use. If you’re soldering in tight spaces, consider a heat shield or a flame arrestor to protect nearby materials. Soldering lead-free alloys is safer for potable water lines, but you still need to prevent overheating that could damage fittings or burn the flux.
Surface prep and flux selection
Clean, dry surfaces are non-negotiable for a successful solder joint. Cut the pipe square with a pipe cutter, deburr the inside and outside of the cut ends, and remove all oxidation. Apply flux to the pipe end and the fittings’ insides to promote capillary action and prevent oxidation during heating. The flux also helps rinse away debris, which contributes to a cleaner joint. Using the right flux for copper and potable-water applications is essential for a durable connection and to pass leak tests.
Heating technique and solder application
Heat the joint evenly with a steady, small flame at the base of the fitting. Avoid direct flame on the solder; instead, let the heat travel through the pipe and fittings until the flux sizzles and the joint glows slightly. Touch solder to the joint from the opposite side; capillary action will draw it into the gap. Remove the heat as soon as the solder fills the joint, and allow it to cool undisturbed. Overheating can burn flux, degrade joints, and create brittle connections.
Finishing, testing, and cleanup
After cooling, wipe away excess flux with a damp cloth to prevent corrosion and staining. Inspect each joint for a smooth, continuous bead with no gaps. Perform a leak test by slowly pressurizing the system or using a soapy water test around joints to look for bubbles. If any leaks appear, reheat the joint and apply solder again as needed. Clean joints with a rag, store tools, and document any non-typical issues for future maintenance.
Common mistakes and how to avoid them
Common mistakes include dirty surfaces, insufficient flux, overheating, and rushing the cooling phase which leads to weak joints. Avoid using excessive solder, which can create bridges that trap debris. Don’t grip the pipe while hot; let it cool naturally. Finally, ensure you’re using lead-free solder suitable for potable water to keep joints safe and compliant. Following a deliberate sequence helps you avoid these pitfalls.
Troubleshooting leaks: what to do if it fails
If a joint leaks, stop using the line and isolate the section. Recut and deburr the pipe if the joint shows persistent issues. Clean the surfaces again, re-flux, and reheat with even heat, feeding solder as needed. In some cases, replacing the fitting or reworking a longer run is necessary for reliable performance. Persistent leaks may indicate larger defects in the pipe or a mismatch in pipe sizes; re-check the specifications and rework as required.
Tools & Materials
- Copper pipe (1/2(Select correct diameter and schedule; measure length before cutting)
- Copper fittings (elbows, tees, couplings)(Soldered fittings for potable-water lines)
- Lead-free solder (tin-based alloy)(Ensure suitability for potable water)
- Flux for copper piping(Flux paste or liquid; use compatible with lead-free solder)
- Propane or MAPP gas torch(Flame control for even heating)
- Pipe cutter(Clean, square cuts; avoid wobble)
- Deburring tool(Deburr inside/outside cut ends)
- Dry rag or cloth(Wipe flux and dust; keep joints clean)
- Safety gloves and eye protection(Protect hands and eyes during heating)
- Vise or pipe clamp(Keeps pipe steady during soldering)
- Heat shield or nonflammable mat(Protects surrounding materials)
Steps
Estimated time: 60-90 minutes
- 1
Cut and square the copper pipe
Measure the required length, cut with a pipe cutter, and check for square ends. A precise cut ensures the fitting seats properly and reduces gaps that could leak. Verify alignment before assembly.
Tip: Use a fresh blade and keep the cut perpendicular to the pipe axis. - 2
Deburr and clean the cut ends
Remove burrs from the pipe interior and exterior. Clean surfaces prevent oxidization, which can weaken the joint and hinder solder flow.
Tip: Run the deburring tool around the edge until it’s smooth. - 3
Dry-fit the joint
Assemble the pipe and fittings without solder to check fit and alignment. Fine-tune if the joints don’t slide together snugly yet resemble a seamless line.
Tip: Ensure enough room for flux and solder capillary action. - 4
Apply flux to joints
Coat the pipe ends and inside fittings with flux to promote capillary action and prevent oxidation during heating.
Tip: Apply a thin, even layer; too much flux can complicate cleanup. - 5
Heat evenly and bring to temperature
Apply heat to the joint evenly, starting at the pipe body and moving toward the fitting. The flux should sizzle slightly as you approach working temperature.
Tip: Keep the flame moving to avoid overheating one spot. - 6
Feed solder into the joint
Touch the solder to the joint’s heated area and allow capillary action to draw it into the gap. Do not melt the solder directly in the flame.
Tip: Feed gradually and avoid overfilling. - 7
Cool and clean joints
Let the joint cool naturally, then wipe away excess flux and inspect the bead for uniform coverage. A good joint is smooth and bright.
Tip: Do not wipe immediately while hot; wait for cooling. - 8
Test for leaks and finalize
Pressurize the line and check for leaks. If needed, rework suspicious joints with re-flux, reheating, and additional solder.
Tip: Use a gentle pressure test first before full-system testing.
Quick Answers
What is the best way to solder copper pipe?
The best way to solder copper pipe is to cut square, deburr, flux, heat evenly, and feed solder through the joint from the opposite side. This creates a strong, leak-free connection when cooled and tested.
Cut square, deburr, flux, heat evenly, apply solder, then test for leaks.
Can I use a soldering iron for copper pipe joints?
A handheld soldering iron generally cannot reach the necessary heat for copper pipe joints. A propane or MAPP torch is standard for residential plumbing and plumbing-grade joints.
Usually not; you’ll need a torch to reach the right heat.
Do I need flux for copper pipe soldering?
Yes. Flux cleans the metal, prevents oxidation, and enables capillary action so solder flows into the joint smoothly. Without flux, joints may leak or fail.
Flux is essential for clean, lasting joints.
What solder should I use for potable water copper pipes?
Use lead-free solder designed for plumbing. It provides a safe, durable joint and is required by most codes for potable water systems.
Lead-free plumbing solder is the standard for water lines.
How do I test a copper pipe joint after soldering?
Seal the system and pressurize gradually, then inspect for leaks with water or a soap-bubble test at joints. Rework any leaking joints with flux and solder as needed.
Test each joint for leaks using water or bubbles.
Watch Video
Top Takeaways
- Cut square and deburr for clean starts
- Flux and even heat are critical for capillary filling
- Test joints before putting system under pressure
- Use lead-free solder for potable water lines
- Cooldown joints naturally and inspect for uniform beads