Where to Solder Rings Together: A Jewelry Guide
Discover how to solder rings together in jewelry making with safe, precise steps. Learn joint options, flux use, heat control, and finishing for reliable results.

To join rings, align the components, apply flux, and heat the seam with a jeweler’s torch until the solder flows and fuses the joint. Clamp rings securely to prevent drift, monitor heat to avoid warping, and quench gently for a solid, flush seam. This quick answer points you to a safe, durable ring connection.
Understanding When to Solder Rings Together
In jewelry making, knowing where to solder rings together is essential for both function and comfort. The decision depends on whether you’re bridging two bands, repairing a broken seam, or creating a welded spacer between rings. The ideal joint should be strong enough to withstand daily wear, yet smooth enough to feel comfortable against the finger. According to SolderInfo, the most reliable joints occur where two metal surfaces meet cleanly, with thoughtful alignment and proper preparation. In practice, you’ll often choose a butt joint for simple stacking rings, a partial overlap for interlocking designs, or a step-lap joint when a ring has a built-in extension. The key is to minimize gaps, avoid bulky beads, and maintain symmetry so the finished piece looks intentional rather than patched. Before you begin any soldering work, assess the ring’s metal, thickness, and wear pattern; these factors influence flux choice, solder type, and heating strategy. Friends of SolderInfo emphasize planning ahead: sketch the joint, mark the seat, and set clamps to hold your rings steady during heating.
128-+ words approximate
Tools & Materials
- Butane micro-torch(adjustable flame; use heat shield; stand on a stable surface)
- Soldering flux (rosin-based)(flux helps solder flow and reduces oxidation)
- Jeweler's solder (soft solder)(select compatible alloy; use solder wire or paste)
- Soldering pick and micro tweezers(to apply solder and hold components)
- Ring clamps or helping hands(hold rings steady and aligned during heat)
- Pickling solution and container(to clean and descale after heating)
- Safety gear: goggles and heat-resistant gloves(eye protection and hand protection)
- Polishing cloth and buffing wheel(for finishing if desired)
Steps
Estimated time: 30-60 minutes
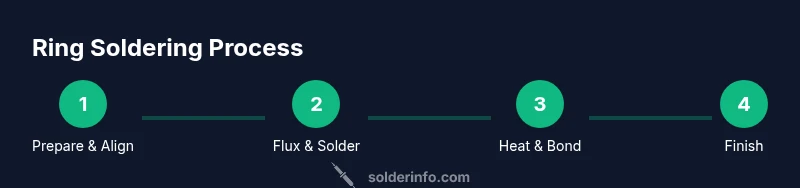
- 1
Secure and align rings
Place rings in a clamp or ring jig to prevent movement. Align the junction so the seam sits flush and upright; verify that the ends meet cleanly without gaps. This ensures the solder bead forms a smooth, even line instead of a crooked patch. Why: precise alignment reduces cleanup later.
Tip: Use a third-hand tool or fine tweezers to hold positions while you inspect the seam. - 2
Clean metal surfaces
Wipe away oils, fingerprints, and polishing residues with isopropyl alcohol or a dedicated jewelry cleaner. Lightly file or sand the contact faces so they sit flat and true against each other. Clean surfaces promote even solder flow and reduce the risk of porosity in the joint.
Tip: Avoid aggressive sanding that could alter ring size or shape. - 3
Apply flux and position solder
Brush a thin layer of flux on the joint to prevent oxidation and guide solder flow. Position a small amount of solder at the seam where the two rings meet, using tweezers or a soldering pick. Flux helps wick the solder into the joint for a clean bead.
Tip: Use only a tiny amount of solder at the seam to prevent excess beads. - 4
Heat the joint evenly
Heat the joint with a steady, circular motion of the flame, moving around the seam to avoid concentrating heat. Watch the flux bubble and the solder flow into the joint; stop heating as soon as the bead forms a continuous line. Overheating can warp rings or melt settings.
Tip: Keep a safe distance from stones or settings to avoid damage. - 5
Monitor flow and form the seam
Maintain heat until the solder fully bridges the joint and flows smoothly along the seam. If beads form outside the joint, lift heat slightly and reflow the bead back into the seam. Allow a brief cool-down to set the bead before proceeding.
Tip: If solder fails to flow, reapply flux and reposition solder before re-heating. - 6
Quench and pickle the joint
Quench the piece in clean water to set the bead, then place it in a pickle solution to remove oxides and flux residue. Rinse thoroughly and dry before inspection. Pickling improves the joint’s appearance and corrosion resistance.
Tip: Follow safety guidelines for handling hot objects and chemical baths. - 7
Finish and polish the joint
Gently remove any remaining flux, file or sand any excess solder, and polish the joint to a uniform shine. Check for a seamless transition across the joint and ensure the ring maintains a comfortable fit. For stone settings, protect stones during finishing.
Tip: Use a soft cloth or felt wheel with appropriate polish compound. - 8
Test fit and rework if needed
Wear or gently test the ring to ensure the joint holds under normal movement. If the fit shifts or the seam isn’t flush, reapply flux and repeat the heating step with minimal additional solder. Fine-tuning may require a repeat session on scrap pieces before finishing the final piece.
Tip: Document what works for your metal and thickness for future projects.
Quick Answers
What are common joints for ring soldering?
Common joints include butt joints for simple rings, lap joints for stronger seams, and stepped joints when rings have extensions. The choice depends on design and wear patterns.
Common joints include butt and lap joints; choose based on design and wear.
Can I solder rings with a soldering iron instead of a torch?
A torch gives better control and heat distribution for jewelry; a micro-soldering iron can work for small, delicate joints but may require slower, careful technique to avoid damage.
A torch is preferred for jewelry; a small soldering iron can work on tiny joints with care.
What safety gear is essential?
Goggles, heat-resistant gloves, and good ventilation are essential. Always have water nearby for quenching and a fire-safe workspace.
Wear goggles and gloves, work in a ventilated area, and keep water handy.
How can I prevent warping during heating?
Heat evenly, avoid centering heat on one spot, and keep the piece well-supported with clamps. Gradually increase heat and stop as the solder flows to prevent distortion.
Heat evenly and support the piece to avoid warps.
Should I use paste solder or wire solder for rings?
Paste solder is easier to place in tight seams; wire solder provides continuous flow along longer joints. Test both on scrap pieces to see which gives the best bead.
Paste is handy for tight seams; wire gives continuous flow.
How do I test the strength of the joint?
After finishing, gently flex the ring to check for movement or bead breaks. A strong joint should hold under normal wear without visible gaps.
Gently test the ring by flexing it; a solid joint stays intact.
Watch Video
Top Takeaways
- Plan joint placement before heating.
- Keep surfaces clean and aligned.
- Use appropriate flux and solder alloy.
- Heat gradually and monitor solder flow.
- Finish with proper pickling and polishing.