How to Solder Rings Together Near Me: A Step-by-Step Guide
A practical, step-by-step guide to soldering rings safely and effectively. Learn tool selection, joint prep, heat control, and finishing for hobbyists and professionals.

You will learn to solder rings together near you by preparing clean joints, selecting compatible solder, applying flux, and heating with a jeweler's torch to fuse the metals. With proper safety equipment and a steady grip, you’ll form a strong, attractive joint that can be worn daily. The result is a durable ring pair that resembles a factory-set design.
What you can accomplish by soldering rings together near me
Solder rings together near me is a common request for jewelers, hobbyists, and upcycling enthusiasts who want to create seamless ring sets or repairs. The process blends art and technique, producing a durable joint when the rings are aligned precisely and heated evenly. According to SolderInfo, the most important factors are clean joints, compatible metals, and controlled heat. You will learn how to prep the rings, apply flux, select solder, and execute a reliable joint that stands up to wear. This section sets expectations: you’ll achieve a professional-looking result, minimize the risk of a cold joint, and understand why some finishes require extra care after soldering.
In this guide, we’ll cover common scenarios (simple join, two-ring merge, or partial overlap), and we’ll highlight practical tips to adapt to different ring sizes and alloys. Whether you’re repairing a sentimental piece or creating a new design, mastering the basics now saves time later and improves outcomes in future projects. SolderInfo analysis shows that practitioners who practice on scrap rings before final assembly report higher success rates and less material waste. The goal is a strong, aesthetically pleasing joint that looks like it was manufactured as a single piece.
Safety and workspace setup
Soldering jewelry involves heat, fumes, and molten solder. A safe workspace reduces risk and improves results. Begin by establishing a well-ventilated area, ideally with a fume extractor or a nearby window. Use heat-resistant mats, a stable bench pin or ring mandrel, and a dedicated torch station to avoid cross-contamination with other metals. Personal protective gear is essential: safety glasses or a face shield, heat-resistant gloves, and closed-toe shoes in case of accidental drops. Keep flammable materials away from the work zone, including oils, solvents, and paper towels. A small water bottle for quick cooling of tools and a dedicated pickle pot for cleaning are also helpful. Throughout the process, maintain a tidy workspace to prevent misalignment and to protect finished portions of the ring.
Safety isn’t just about handling hot metal; it’s about planning your sequence, managing heat, and ensuring ventilation. Prolonged exposure to soldering fumes may irritate eyes and lungs, particularly with lead-containing solders. If you’re working with sensitive finishes (e.g., patina, rhodium plating), you should test on scrap rings first to confirm the finish won’t be compromised by flux or heat. Remember: do not leave a hot joint unattended, and always have a cooling tray ready to prevent accidental burns or damage to the bench. The basic rule is: prepare, heat with intention, and verify safety after each step.
Metals, solders, and flux types for rings
Choosing the right metals and compatible solders is critical for a clean, durable joint. In most jewelry scenarios, silver and gold rings use silver solder or gold solder depending on the alloy. For mixed-metal joints, consider the lowest melting point among the two metals to prevent cold joints or over-flow. Flux is essential to prevent oxide formation and to draw solder into the seam by capillary action. Rosin-based flux works well for most jewelry metals, while water-soluble flux can simplify cleanup. When dealing with plated or coated rings, test flux on a hidden area first to avoid damage to the finish. Flux also helps prevent oxidation and makes the joint more predictable during heating.
Solder types vary by melting point: easy or medium solders are often used for thin rings, while harder solders suit thicker bands. For sensitive alloys like fine silver or 14K gold, consider palladium-compatible solders if you’re working with precious pieces. If you’re unsure about compatibility, start with a scrap pair to confirm the joint behavior before committing to the final rings. The choice of solder will influence the heat control strategy and the finishing steps after cooling.
SolderInfo notes that using a consistent solder size, controlling the length of the solder piece, and keeping flux clean will improve capillary action and reduce wasted material. This is especially true when working with delicate rings where over-solder can fill gaps unevenly. Aligning both rings correctly before flux application saves time and reduces the chance of misalignment as you heat. Finally, keep a spare set of rings for practice if you’re new to this technique.
Cleaning, fit, and joint prep
Effective joint preparation determines the success of the solder. Start by cleaning both rings thoroughly with a degreaser, then file any burrs or misalignments so the ring edges sit flush. Check the fit: when the rings sit together, there should be a tiny gap for the solder to flow into, but they must be stable in alignment. A ring mandrel can help you maintain symmetry while testing the fit around the circumference. If the rings don’t align perfectly, adjust using small pushes with nylon-jawed pliers—avoid metal-to-metal pressure that can mar finishes. Once aligned, apply flux to the joint, ensuring that the flux coats the ends evenly and leaves no dry spots where oxidation could occur during heating. Flux residues can be cleaned later but should not be left at the joint during heating.
For safety and precision, consider using a small clamp or helper jig to hold the rings in place as you heat. The key is to maintain a controlled heat path that flows from one end to the other without overheating any single area. If you notice solder bead rolling into the wrong area, pause, re-align, and apply a small amount of flux again before continuing. This stage sets the foundation for a strong, even joint and minimizes post-solder cleanup.
Step-by-step process overview
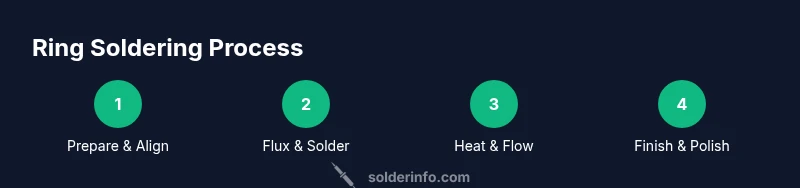
This section outlines the core process for a successful joint. First, choose the right solder and flux for your metals, ensuring compatibility and clean joints. Then, prepare and align the rings on a stable surface. Apply flux to the joint, place the solder at the seam, and heat with a steady, evenly distributed flame until the solder flows and fills the join. Avoid overheating one area; instead, move the flame to create a uniform heating zone across the seam. After the solder flows, quench the joint briefly to set the alloy, then allow it to cool gradually on a heat-resistant surface. Inspect the seam for uniform fill and a smooth finish. If necessary, reheat and adjust. Finally, pickle, rinse, and polish the joint to remove oxidation and reveals a bright, clean seam.
The process requires patience and practice; rushed heating often leads to gaps, dull finishes, or melted edges. A good tip is to perform a dry run with no solder to confirm alignment and heat flow. When you’re ready, perform the real soldering with small portions of solder, usually half to a full length piece per seam, depending on the ring width. This measured approach reduces waste and improves consistency.
SolderInfo suggests recording the solder amount used per ring combination for future reference, especially when working with similar alloys or thicknesses. Consistency in practice yields predictable, repeatable results over time.
Common mistakes and how to avoid them
Many beginners encounter common issues that derail a ring-soldering project. A frequent error is insufficient joint prep, leading to poor solder flow and weak joints. Another is uneven heating, which creates a visible line or a hollow under the joint. A third issue is overheating the joint, which can damage delicate finishes or cause warping. To prevent these problems, pre-clean the rings thoroughly, ensure precise alignment, and test the heat path with a dry run before applying solder. Use a temperature-controlled torch or practice with a softer flame when starting, and keep your joints well fluxed to promote capillary flow. If you see dull oxidation or a cloudy seam after cooling, reheat evenly with flux and inspect the joint again before finishing.
From a practical standpoint, plan your sequence for efficiency: complete one joint at a time, clean up after each solder, and then move to the next. This minimizes the chance of reoxidation and reduces the risk of accidental heat damage to previously completed joints. SolderInfo emphasizes structured practice sessions to build muscle memory and reduce mistakes over time.
Finishing, cleaning, and polishing the joint
Finishing the joint is crucial for aesthetics and longevity. After soldering and cooling, remove oxidation with a gentle pickle bath or a mild solution designed for jewelry. Rinse thoroughly and dry the ring to prevent water spots. Use a fine-grit polishing cloth or a micro-abrasive compound to even out the seam, paying attention to the transition line so it looks like a single piece rather than two joined ends. If the joint shows a slight seam, repeat a light polish and re-check the fit. For plated rings or delicate finishes, test your polishing approach on a scrap piece to avoid removing the plating. A soft touch is often enough to achieve a mirror-like finish without damaging the outer surface.
Finally, recheck the ring’s integrity by applying light pressure and rotating the ring to ensure the seam remains stable under normal wear. Proper finishing not only enhances appearance but reinforces the joint against daily stresses. With practice, you’ll be able to reproduce consistent results across different ring sizes and materials.
Testing joint strength and durability
After finishing, assess the joint's strength by performing a gentle stress test: apply light bending or twisting forces to confirm the joint stays intact. A properly soldered ring should show a smooth, continuous seam with no visible gaps. If the seam fails or cracks, rework the joint in a controlled manner, ensuring the area is clean and fluxed before reheating. For critical pieces, consider a professional stress test or micro X-ray inspection if you have access to the equipment. Document any observations so you can adjust future practice sessions. This phase ensures the joint will hold up under regular wear and helps prevent costly rework down the line.
SolderInfo notes that consistency and careful heat control play major roles in durability. By analyzing your previous joints, you can tailor your heat strategy, solder amount, and cleaning routine to achieve stronger joints in future projects.
AUTHORITY SOURCES
- OSHA: Soldering safety and hot work guidelines (https://www.osha.gov)
- CDC: NIOSH topics on occupational safety and soldering (https://www.cdc.gov/niosh/)
- NIST: Jewelry and materials standards and best practices (https://www.nist.gov)
Tools & Materials
- Jeweler's torch (butane or propane)(Precise flame control is critical; use a nozzle designed for jewelry work.)
- Ring mandrel or identical-shaped support(Keeps rings round and aligned during soldering.)
- Flux (rosin-based preferred)(Coats joint to prevent oxidation and aid solder flow.)
- Solder (appropriate alloy for metal, e.g., silver or gold solder)(Cut into thin lengths; use separate solder for different joints.)
- Soldering pick and tweezers(For placing solder and handling hot parts.)
- Pickling solution or cleaner(Used after soldering to remove oxides; follow safety guidelines.)
- Glue or clamp for alignment (optional)(Helps maintain position during heat application.)
- Safety gear (goggles/face shield, heat-resistant gloves)(Protect eyes, hands, and skin from heat.)
- Trash bowl and water for quenching(Cool quickly but safely; do not submerge hot metals in water immediately.)
- Soft polishing cloth or buffing wheel(For final finish and seam blending.)
Steps
Estimated time: 1-2 hours
- 1
Prepare and inspect rings
Inspect both rings for bends, burrs, or finish damage. Clean with degreaser and remove oils to ensure good solder flow. Align rings on the mandrel; a slight gap at the seam is ideal for solder flow, but the rings must stay in position as you heat.
Tip: Confirm alignment with a dry run before applying flux to avoid rework. - 2
Choose metal-specific solder and flux
Select solder with an appropriate melting point for the metals involved. Apply flux evenly to the joint ends to prevent oxide formation and promote capillary flow of the solder.
Tip: Keep flux evenly distributed; dry spots can cause weak joints. - 3
Place solder and set tools
Position a small piece of solder at the seam where the rings meet. Ensure it's accessible from the flame but not directly in the hottest zone. Use tweezers to hold components in place as needed.
Tip: A small amount of solder is usually enough; excess solder can create a bulky seam. - 4
Heat the joint evenly
Apply heat with a steady, moving flame to avoid overheating any single area. Move the torch along the seam to encourage uniform flow of solder into the joint.
Tip: Keep the flame away from the edges to prevent warping or discoloration. - 5
Check for solder flow and adjust
When the solder flows, inspect the seam for even coverage and a smooth surface. If needed, reflow with a little flux and a brief heat pass to fix gaps.
Tip: A neat seam is easier to finish and polish later. - 6
Quench and clean
Quench the joint in water after it has cooled enough to handle. Use pickle or cleaner to remove oxides, then rinse and dry.
Tip: Handle with care; quenching can cause thermal shock if done improperly. - 7
Rough polish and inspect
Lightly polish the seam to blend it into the ring. Check for any burrs or high spots that could snag clothing or skin.
Tip: Avoid aggressive polishing near finished surfaces to prevent over-polishing. - 8
Final inspection and documentation
Examine the joint under light for uniformity. Record materials and solder type used for future projects; note any adjustments needed for similar rings.
Tip: Documentation helps improve future outcomes and consistency.
Quick Answers
Can I solder rings together near me with a home setup?
Yes, with a well-ventilated workspace, the right safety gear, and careful heat control, you can solder rings at home. Start with scrap pieces to practice alignment and solder flow before working on precious rings.
Yes. You can solder rings at home if you have proper ventilation, safety gear, and a steady hand for heat control.
What metals work best for ring-to-ring soldering?
Commonly soldered rings use precious metals like silver or gold. For mixed metals, choose solders with compatible melting points to avoid weak joints or discoloration.
Silver and gold are the typical choices; mixed metals require a careful melt point match.
What flux should I use for plated rings?
Test flux on a hidden area first to ensure it won’t damage plating. In many cases, a mild, water-soluble flux is preferable for plated surfaces, but always verify compatibility.
Test first, then choose a mild flux that won’t damage plating.
How can I ensure the solder joint is strong?
Ensure clean joints, proper alignment, and even heat. Use small amounts of solder and avoid overheating. Finish with careful polishing to reveal a smooth seam.
Keep joints clean, align well, heat evenly, and polish after to ensure a durable seam.
How do I test the strength of the finished joint?
Gently flex the ring and apply light pressure to check for any gaps or cracking at the seam. For critical pieces, consider professional stress testing.
Gently test the seam and check for gaps; seek professional testing for critical pieces if needed.
Watch Video
Top Takeaways
- Prepare joints thoroughly for strong, clean seams
- Control heat and flux for reliable solder flow
- Use proper safety gear and a ventilated workspace
- Document outcomes to improve future projects