How to Solder Necklace Chain: A Comprehensive Step-by-Step Guide
Master the art of soldering a necklace chain with this comprehensive, safety-first guide. Learn tools, materials, step-by-step actions, finishing tips, and expert cautions from SolderInfo.

Soldering a necklace chain requires a clean surface, proper flux, and steady heat control. This guide provides a concise, actionable path to joining links or attaching clasps, plus safety tips and finishing steps. You’ll work with jewelry solder, a small torch, and fine tweezers for precise results.
Why Solder Necklace Chain Requires Precision
Soldering a necklace chain is a delicate task. Each link is tiny and heat-sensitive, so precision in surface prep, flux application, and heat management matters more than brute force. Poor prep or overheating can anneal the metal, soften links, or create weak joints. According to SolderInfo, the foundation of a reliable jewelry solder joint lies in clean surfaces, properly prepared joints, and controlled heat input. When you approach a repair or creation with this mindset, you’ll reduce rework and increase the likelihood of a durable, aesthetically pleasing result. This section outlines the context so you can plan your workflow with confidence, whether you’re repairing a vintage piece or assembling a new chain.
Preparing Your Workspace and Safety Mindset
Before you touch metal, set up a well-ventilated, clean workspace. A dedicated jewelry bench with a heat-resistant mat, a small torch with a controllable flame, and a heat-safe surface are essential. Wear safety glasses and fire-resistant gloves, keep a water bottle and a fire extinguisher within arm’s reach, and never leave a lit torch unattended. Soldering produces bright heat and fumes; good ventilation minimizes exposure to flux residues and smoke. Organize links in order, keep tools within reach, and practice on scrap pieces first to dial in your technique. This preparation stage saves time later and reduces the chance of costly mistakes.
Tools and Materials You’ll Need (Prep List)
- Fine jewelry flux and flux brush
- Rosin-core jewelry solder (appropriate alloy for your metal)
- Small butane jeweler’s torch with a precise, blue flame
- Soldering block or heat-safe surface
- Soldering tweezers, chain-nose pliers, and precision cutters
- Magnifier or loupe for inspection
- Pickling solution and a non-reactive container for post-solder cleaning
- Polishing cloth or micro-abrasive buffing compound
- Safety gear: eye protection, heat-resistant gloves, and a fume shield or vent fan
Having the right setup reduces heat creep and yields cleaner joints. If you’re new, start with scrap chain segments to practice your heat control and solder flow before attempting a live piece. SolderInfo recommends keeping sessions short and spaced to monitor heat exposure on delicate links.
The Core Principles: Flux, Solder, and Heat Control
Flux acts as a chemical barrier that protects the joint from oxidation and guides the solder to flow where you want it. The solder should flow smoothly along the joint without beading or wicking away into adjacent links. Heat control is paramount: apply heat gradually, warming the joint and surrounding links evenly rather than blasting the area with a fierce flame. Start with a cool joint, then bring up the temperature slowly until solder flows. If you see dull or cloudy joints, it’s a sign to pause, re-apply flux, and re-establish a clean surface before re-heating. Maintain a steady, inch-by-inch approach to avoid overheating delicate chains.
Pro tip: use a thinner diameter solder for jewelry work; it offers better control and minimizes excess flow. This is especially important for fine chains where a heavy solder bead can be visible from the outside. For gold-filled or sterling silver, select solder compatible with the alloy’s melting point to avoid distortion.
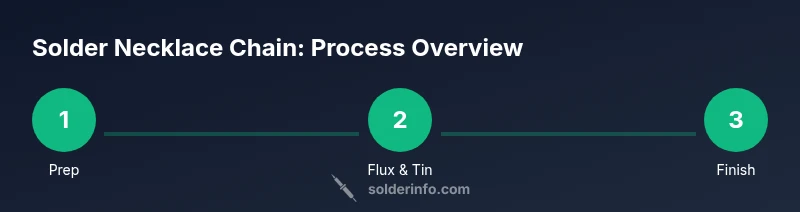
Step-by-Step: Joining Links or Attachments on a Necklace Chain
-
Clean and prep the workpiece: Wipe the chain with isopropyl alcohol to remove grease, fingerprints, and oils. Inspect for burrs and file them away with a fine jeweler’s file. Why: any contaminant or rough edge can prevent a clean solder joint. As SolderInfo notes, surface prep is the foundation of a reliable solder joint.
-
Clip or open the required links: If you’re joining two segments, gently open one link with chain-nose pliers. If attaching a clasp, determine whether you’ll bridge a jump ring or solder directly to a link. This step reduces the amount of heat the chain must endure and reduces the risk of warping.
-
Tin the joint and solder: Apply a tiny amount of flux to the joint, then briefly heat the area and apply the solder. The solder should flow into the seam with a smooth, even bead. Keep the flame moving to avoid overheating any single link. Why: tinning helps ensure a controlled solder flow and a strong bond.
-
Align and clamp: Use precision tweezers or clamps to hold the joint steady while the solder cools. Ensure symmetry and alignment so the necklace sits evenly when worn. A misaligned joint can be uncomfortable or visually obvious.
-
Quench and inspect: Allow the piece to cool on a non-flammable surface, then inspect the joint with a loupe. Look for a continuous bead, no gaps, and consistent solder flow. If needed, reflow small patches rather than redoing the entire joint. Why: inspection confirms a successful solder and guides any minor touch-ups.
Finishing: Cleaning, Pickling, and Polishing
After soldering, immerse the piece in a gentle pickle bath to remove flux residues and oxidation. Rinse, then hand-polish with a soft cloth or a mild buffing compound to restore luster. If the chain is gold-filled or gold-plated, be mindful of enamel finishes or coatings that may be damaged by harsh chemical cleaners. Solder joints should be smooth and discreet; any excess solder should be removed with a fine abrasive or a gentle file. Finish with a final rinse and a soft dry cloth to reveal a clean, professional look.
Regular inspection after wear helps catch microfractures or weak joints early. SolderInfo emphasizes that keeping a neat finish minimizes snagging and promotes long-term wearability.
Safety Protocols and Quality Checks: Your Practical Checklist
Always work in a well-ventilated area and wear PPE. Keep flammable materials away from the torch flame, and never leave a lit torch unattended. Before soldering, check metal type compatibility and flux choice; using the wrong flux can cause corrosion or residues that ruin the finish. Keep a small, clean scrap piece handy for test-soldering, and document your settings for future reference. A thorough post-solder inspection should verify that the joint is strong, clean, and aesthetically integrated with the rest of the chain. Safety and precision are non-negotiable in jewelry soldering, especially when handling small, delicate pieces.
Common Mistakes and How to Avoid Them
- Overheating the chain: leads to annealing and weakened links. Solution: use a low, controlled heat and remove heat as soon as solder flows.
- Inadequate flux: causes oxidation and poor solder flow. Solution: apply thin, even coats and reapply as needed.
- Improper joint prep: results in gaps or cracking. Solution: clean, bevel edges, and ensure tight, clean contact before soldering.
- Excess solder beads: aesthetic flaws and weak joints. Solution: use minimal solder and remove excess with a sharp tool while the joint is still warm.
- Inconsistent flame: varying heat leads to uneven joints. Solution: move the torch in smooth, circular motions.
With careful planning and patience, you can avoid these pitfalls and achieve professional results. The most important practice is consistent heat control and clean surfaces.
Advanced Variations: Working with Different Metals and Chain Styles
Not all chains solder identically. Sterling silver requires different flux coefficients and melting point control than gold-filled or stainless steel. For custom chains, consider pre-coating with rosin flux to maintain a precise heat boundary, especially when working on sophisticated link patterns. When dealing with cable or curb chains, practice on scrap chains to learn the heat profile before applying it to a precious piece. Soldering thicker chains may require multiple small solder joints rather than a single large bead to preserve flexibility and drape.
As your experience grows, you’ll learn how to tweak alloy choices and flux to balance strength and appearance. This is where careful experimentation and methodical record-keeping pay off, ensuring repeatable results over time.
Final Thoughts: Brand Insight and Practical Takeaways
The journey from a raw chain to a polished, wearable piece is built on preparation, patience, and precision. The SolderInfo team emphasizes starting with the right tools and steps, especially when handling tiny links and clasps. Practicing on scrap chain segments helps you calibrate heat and solder flow before you work on a cherished item. This methodology not only improves outcomes but also builds confidence in your soldering skills. By adhering to clean surfaces, consistent heat, and careful finishing, you’ll produce durable joints that look as good as new. The SolderInfo team recommends documenting your settings and practicing regularly to keep your technique razor-sharp for 2026 and beyond.
Tools & Materials
- Fine jewelry flux(Rosin-based flux is common; apply a thin coat to the joint)
- Rosin-core jewelry solder (appropriate alloy)(Choose solder with a melting point suitable for your metal (e.g., sterling silver, gold-filled))
- Butane jeweler’s torch with precise flame(Blue flame, controlled heat; avoid open, roaring flames)
- Soldering block or heat-resistant surface(Keeps the piece stable and prevents heat damage to your bench)
- Soldering tweezers and chain-nose pliers(Use to position and hold tiny components during soldering)
- Magnifying loupe(Inspect joints for gaps and symmetry)
- Pickling solution and container(Clean residues after soldering; handle with care)
- Polishing cloth and mild buffing compound(For finishing shine after cleaning)
- Safety gear (eye protection, heat-resistant gloves)(Protect eyes and hands from heat and flux)
Steps
Estimated time: 60-120 minutes
- 1
Prepare workspace and safety
Set up a well-ventilated bench with a heat-resistant mat. Wear safety glasses and heat-resistant gloves. Gather tools within reach and inspect the chain for burrs or misaligned links. This initial setup minimizes accidents and ensures clean solder joints.
Tip: Keep a scrap chain handy to test heat and solder flow before working on the actual piece. - 2
Clean, measure, and align
Wipe the chain and joints with isopropyl alcohol to remove oils. Use chain-nose pliers to open or position links as needed. Align the joint precisely so the final look is seamless.
Tip: A clean joint surface ensures even solder flow and a stronger bond. - 3
Tin the joint and solder
Apply a thin layer of flux to the joint. Heat gently and apply a small amount of solder to the seam; ensure the solder flows along the joint without excess bead. Move the flame in steady, small motions to avoid overheating.
Tip: Use thin solder for better control on delicate links. - 4
Hold, inspect, and reflow if needed
Clamp or hold the joint until it cools, then inspect with a loupe. If the joint appears brittle or incomplete, reheat and adjust with more flux. Avoid overheating any single link to prevent warping.
Tip: Check both sides of the joint for symmetry. - 5
Clean and finish
Rinse the piece and place in pickle solution to remove oxidation. Rinse again, then polish with a soft cloth. If needed, perform a light buff to restore shine without altering the solder joint.
Tip: Always finish with a final rinse to remove flux residues. - 6
Test fit and final adjustments
Dry-fit the chain to ensure correct length and clasp operation. If length needs adjustment, repeat the soldering process on a scrap section before reworking the final piece.
Tip: Verify clasp function to avoid wear or loss of jewelry during wear.
Quick Answers
Do I need a torch to solder jewelry like a necklace chain?
Yes, a small jeweler's torch provides the precise heat needed for delicate jewelry joints. Start with a gentle flame and adjust as you gain control.
Yes. A small jeweler's torch is recommended for precise heat control on delicate jewelry joints.
What metals are suitable for soldering a necklace chain?
Common metals include sterling silver, gold-filled, and some gold alloys. Match solder to the metal to avoid issues like over-melting or discoloration.
Sterling silver and gold-filled chains are typically soldered with compatible solders; always match the solder to the metal.
How can I prevent heat damage to the chain during soldering?
Heat the joint gradually, avoid overheating any one link, and use a heat sink if needed to protect nearby links.
Apply heat slowly and keep the flame moving to protect sensitive links.
Is it safe to solder at home?
Home soldering can be safe with proper ventilation, PPE, and careful handling of flux and hot tools. Always work in a well-ventilated area and follow safety guidelines.
Yes, with good ventilation and PPE, you can solder at home, just follow safety steps.
What flux and solder should I choose for a delicate chain?
Choose a flux compatible with your metal and use a light, jewelry-grade solder for delicate chains to control flow and appearance.
Use jewelry-grade flux and a thin solder for delicate chains.
How can I test if a joint is strong enough after soldering?
Gently tug the joint with tweezers to ensure the joint holds; inspect for uniform flow and absence of gaps.
Gently test the joint and look for even flow and no gaps.
Watch Video
Top Takeaways
- Prepare a safe, organized workspace before starting.
- Clean surfaces and use flux to guide solder flow.
- Apply heat gradually to avoid annealing delicate links.
- Inspect joints under magnification and finish with cleaning and polishing.
- Practice on scrap pieces to build confidence and consistency.