Solder TRRS Connector: A Practical How-To Guide
Learn how to solder a TRRS connector for audio devices with a practical step-by-step guide, safety best practices, and troubleshooting tips from SolderInfo.

This quick answer outlines how to solder a TRRS connector to a cable or PCB with clean, reliable joints. You’ll need a fine-tip soldering iron, rosin flux, lead-free solder, heat-shrink tubing, a desoldering wick, a multimeter for testing, and adequate ventilation. Follow the step-by-step instructions and safety tips in the body for solid results.
Understanding TRRS connectors and why soldering quality matters
TRRS stands for Tip-Ring-Ring-Sleeve, a four-pole connector used for stereo audio plus microphone signals in many modern headsets and portable devices. The wiring scheme can vary by manufacturer, but the common goal is to preserve each channel’s integrity without crosstalk or short circuits. Soldering quality matters here because the contacts are tiny, often masked, and exposed to flexing when plugged and unplugged. A sloppy joint can cause intermittent audio, a dead channel, or a short that damages devices. According to SolderInfo, meticulous technique and proper heat control are what separate durable joints from quick fixes that fail under strain. This section will help you understand the physics behind reliable joints and how to plan your approach before touching a hot iron.
Tools, materials, and safety basics
Before you start, gather the right tools and materials. Essential items include a fine-tip soldering iron with temperature control, lead-free rosin-core solder, flux (pen or paste), desoldering braid, heat-shrink tubing, wire strippers, a multimeter for continuity checks, and eye protection. Optional but helpful items are magnification aids, helping hands, and a thermal flux brush for applying flux precisely. Work in a well-ventilated area to avoid inhaling fumes. For TRRS work, keep a steady hand and a clean workspace to prevent bridging between adjacent contacts. Solder consistency and flux choice impact wetting and joint reliability, especially on small 3.5 mm four-pole connectors.
Preparing the wires and connector pins for a clean joint
Prepare each conductor by trimming to the same length and stripping a short jacket to reveal evenly exposed copper. Tin the exposed copper strands lightly, which helps the solder wet the wire smoothly once it’s attached to the connector pads. If you’re wiring directly to a plug, check the pinout for the TRRS you’re using and layout colors accordingly. For PCB-mounted TRRS connectors, verify pad size and spacing and consider pre-tinning the pads to speed up the final soldering step. Consistent wire length and clean insulation help maintain impedance and reduce mechanical stress on the joint.
Cleaning, tinning, and flux considerations for small pitches
Flux is your ally when working with compact connectors. Apply a thin film to each contact pad and the wire ends to improve wetting and reduce oxidation during heating. Tin both the wire ends and the connector pads lightly before joining them; this creates a solderable surface that requires less heat to form a solid joint. Avoid applying excessive flux, which can spread and cause dendritic bridging. After soldering, wipe away flux residue with isopropyl alcohol and a lint-free cloth or cotton swab to prevent long-term corrosion.
Soldering environment and technique considerations for TRRS
With a TRRS we’re dealing with very tight tolerances and fragile pins. Use a fine-tipped, temperature-controlled iron (typically around 350°C–380°C for lead-free solder, depending on your alloy and wire gauge) and quick, precise touches rather than long heat exposure. Favor short, deliberate contacts on each pad to prevent overheating the surrounding plastic housing. Hold the connector steady with a helping hand or jig, and keep the tip clean so it wets smoothly. If you see a dull or cloudy joint, reflow with a small amount of flux and a tiny amount of solder to rewet the surface.
Testing joints, troubleshooting, and insulation
After soldering, verify every connection with a multimeter for continuity between the intended wires and TRRS contacts. Look for bridged joints or shorted adjacent pins, which are common issues when working in tight spaces. If a joint looks suspect, reheat and apply a touch more solder, being careful not to damage the insulation. Once all channels test cleanly, slip on heat-shrink insulation to prevent shorts from movement and then reassemble the housing. A final plug-in test with a working headset or microphone confirms functional wiring across channels.
Selecting materials: lead-free solder and flux options for TRRS wiring
Choose lead-free solder for safety and compliance, and select a rosin-based flux that’s appropriate for electronics work. Flux assists wetting and reduces the risk of cold joints, but you must remove flux residues afterward to prevent corrosion. If you’re working with thin wires (24–28 AWG), a small-diameter solder wire minimizes heat input and improves control. For very fine pitches, consider flux-coated wire and micro tips, which help achieve reliable joints without excessive pressure.
Maintenance and longevity of TRRS solder joints
Mechanical strain is the enemy of a sturdy ground or mic contact. Use heat-shrink tubing at the wire-to-plug interface to provide strain relief, and consider adding a small DROP of epoxy if the cable will endure frequent bending (do not apply to the contact itself). Periodically inspect for hairline cracks along the insulation or signs of corrosion around the pad areas. Proper storage and careful use of the connector will significantly extend joint life, reducing the need for rework.
Common mistakes to avoid and how to fix them
Common mistakes include overheating the plastic housing, which can warp the connector; insufficient tinning leading to cold joints; and leaving flux residues that accelerate corrosion. Bridges between adjacent pins are another frequent issue, especially with four-pole TRRS. If you spot a bridge, quickly reheat the joint and use desoldering braid to remove excess solder before reflowing with fresh flux. Always double-check wire order against the device’s schematic before final assembly.
Tools & Materials
- Fine-tip soldering iron with temperature control(25–60W, adjustable temp; use a fine tip for precise contact)
- Lead-free rosin-core solder(0.6–0.8 mm diameter is comfortable for small pins)
- Rosin flux (pen or paste)(Pencil flux helps with precision; avoid excessive amounts)
- Desoldering braid (wick)(For removing excess solder and fixing bridges)
- Heat-shrink tubing(Multiple diameters; use for strain relief on each wire)
- TRRS connector (4-pole)(Cable or PCB-mounted version; verify pinout)
- Wire strippers(Fine jaws; precision stripping for small conductors)
- Small helping hands or vice(Stabilizes the component during soldering)
- Multimeter with continuity(Essential for verifying channels and no shorts)
- Isopropyl alcohol (70%+)(Clean flux residues after soldering)
- Safety glasses(Eye protection against hot flux and splashes)
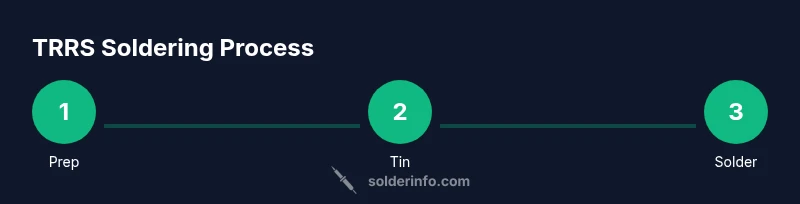
Steps
Estimated time: 45-75 minutes
- 1
Set up and inspect
Prepare your workspace, verify the TRRS pinout, and inspect cables and connectors for damage. Ensure good lighting and a stable platform. This step prevents rework caused by a simple misread of the wiring scheme.
Tip: Use magnification to confirm pin spacing before touching any pads. - 2
Cut and strip cable ends
Cut wires to the required length and strip a short jacket to expose copper. Keep each conductor length consistent to avoid uneven joints. Measure from the connector end to ensure alignment.
Tip: Stripping too much jacket increases chances of shorts; strip just enough to touch the pad. - 3
Tin exposed conductors
Apply a light coat of solder to each bare conductor. Tinning improves wetting and makes final soldering faster and more reliable. Do not over-tin; excess solder can create bridges.
Tip: Wipe the iron tip between wires to maintain clean wetting surfaces. - 4
Tin the connector pads
Apply a small amount of flux to each pad and tin them lightly. Pre-tinning the pads helps when you bridge wires to the four contacts. Make sure you don’t foul neighboring pads with excess solder.
Tip: Keep the tip clean; a dirty tip causes cold joints. - 5
Position wires to channels
Align each tin-covered wire with its respective TRRS contact. Use a helping hand to hold the connector steady while you transfer the wires into position. Double-check color order and channel mapping before soldering.
Tip: One wire at a time; prevent simultaneous heat on multiple pads to avoid bridging. - 6
Apply heat and solder joints
Touch the iron to the pad and wire junction briefly to form a solid bond. Remove heat as soon as you see a shiny solder fillet. Repeat for all connections, ensuring no shorts between adjacent pins.
Tip: Keep the joint small and clean to maintain impedance and insulation. - 7
Inspect and rework if needed
Inspect each joint with a magnifier for gaps, cold joints, or bridges. Reflow suspected joints with a tiny amount of flux and solder. If bridging occurs, use desoldering braid to remove excess solder and reflow again.
Tip: A quiet, close inspection reveals issues you’ll miss at a glance. - 8
Insulate and strain-relieve
Slide heat-shrink tubing over each wire and shrink it with the iron carefully. Add additional strain relief at the cable entry to prevent flexing from transferring to the solder joints. Re-test with a multimeter.
Tip: Do not apply heat directly to the plastic housing; focus on the insulation around each wire. - 9
Test continuity and function
Use a multimeter to verify continuity: each wire must connect to the correct TRRS contact with no shorts. Plug into a device to confirm audio and microphone paths operate as expected. Document any anomalies for rework if necessary.
Tip: Test with both microphone and audio signals if possible; some devices have lights indicating miswiring. - 10
Reassemble and final check
Reassemble the connector housing or casing, ensuring there is no pin movement. Do a final plug-in test and flex the cable gently to confirm the joint remains solid under typical use. Keep a small spare for future repairs.
Tip: Label the cable for future maintenance to avoid miswiring on reassembly.
Quick Answers
What is a TRRS connector and where is it used?
A TRRS connector (Tip-Ring-Ring-Sleeve) provides four conductors for stereo audio and microphone signals. It’s commonly used in headsets and portable devices. Proper soldering ensures reliable channel separation and microphone functionality.
A TRRS connector is a four-conductor jack used for audio and mic signals; it’s common in headsets. Proper soldering ensures each channel remains distinct and reliable.
Can you solder TRRS connectors to PCB pads or only to wires?
TRRS connectors can be soldered to PCB pads or directly to stranded wires. When wiring to cables, you must manage insulation, strain relief, and heat carefully to avoid damage. PCB mounting requires precise pad spacing and secure mechanical support.
Yes, you can solder TRRS to PCB pads or wires. Just take care with heat, insulation, and pad spacing.
What is the correct wire-to-contact order for a typical TRRS?
The order depends on the cable and device; always confirm the device’s pinout. A common approach is mapping left/right audio, microphone, and ground to the four contacts. Verify with a multimeter and the device’s documentation before final assembly.
Wire order varies by device, so verify the pinout first and test with a multimeter.
How do I test TRRS continuity after soldering?
Use a multimeter in continuity mode to check that each wire connects to the correct TRRS contact with no shorts to adjacent pins. Perform a live test with an audio device to confirm signaling through each channel.
Check each wire to its contact with a multimeter and test the whole assembly with a device.
Is lead-free solder safe for TRRS work and electronics?
Lead-free solder is standard for electronics and is safe when used with proper ventilation and flux management. Ensure proper reflow temperature to avoid damaging the connector housing.
Yes, lead-free solder is safe for electronics when you heat correctly and ventilate well.
What are common troubleshooting steps for TRRS soldering?
If you encounter a dead channel or noise, reflow nearby joints, inspect for bridges, clean flux residues, and re-test. Replace or re-route wires if insulation has been compromised.
Reflow questionable joints, check for bridges, and retest; replace wiring if insulation is damaged.
Watch Video
Top Takeaways
- Match each wire to its TRRS contact precisely.
- Tin wires and pads to improve wetting and joint quality.
- Use flux and heat control to avoid cold joints and bridges.
- Inspect joints thoroughly before insulation and testing.
- Apply strain relief to maximize joint longevity.