Solder Small Components: A Practical How-To Guide
Learn to solder small components with confidence. This comprehensive guide covers prep, flux, heat control, inspection, safety, and troubleshooting for electronics, jewelry, and DIY projects.

You will learn a reliable method to solder small components, with a focus on precise heat control, clean joints, and safe handling. This guide covers surface prep, flux choice, tinning tips, correct soldering technique, inspection, and common mistakes to avoid. Perfect for electronics, jewelry, and DIY projects.
Foundations for Soldering Small Components
Solder small components requires a blend of precision, patience, and proper technique. The smallest leads and pads are sensitive to heat, making control paramount. In this section we establish core principles: maintain a clean, well-lit workspace; use the right flux and solder; and plan a short, decisive contact with each joint. For hobbyists and professionals alike, the goal is reliable, repeatable joints that conduct well and last. Soldering small components is not about forcing heat; it’s about delivering just enough heat to wet the joint without overheating adjacent parts. By following deliberate steps and using appropriate PPE, you can minimize rework and maximize first-pass success. According to SolderInfo, mastering solder small components begins with clean pads, flux discipline, and steady hands.
Tools and workspace ergonomics matter for precision work. A magnifier or loupe helps you see tiny leads, while a stable bench and adjustable lighting reduce hand tremor and fatigue. Keep components organized in labeled trays, and pre-tin leads when appropriate to improve wetting. In electronics, jewelry, and plumbing contexts, the same fundamentals apply: plan the joint, prepare the surface, and apply heat in a controlled, graph-like motion to create a solid bond. This foundation sets the stage for high-quality work and fewer cold joints.
Tools & Materials
- Soldering iron with fine tip (e.g., 0.4-0.6 mm)(Choose a temperature-controlled iron; set to 320-350°C for lead-free solder.)
- Flux pen or liquid flux (rosin-based preferred)(Flux improves wetting and reduces oxidation.)
- Rosin-core solder (lead-free, 60/40 or similar)(Prefer 0.5-0.8 mm diameter for small components.)
- Magnification aid (loupe or microscope)(Helpful for inspecting tiny joints.)
- Solder wick or desoldering braid(For correcting excess or bridging.)
- PCB holder or helping hands(Keeps parts steady during soldering.)
- Isopropyl alcohol and lint-free wipes(Clean boards before and after soldering.)
- Anti-static mat and wrist strap(Protects sensitive components from ESD.)
- Ventilation or fume extractor(Soldering fumes are hazardous; ensure airflow.)
- Copper-tipped tweezers or fine pliers(Handle small components without warming nearby pads.)
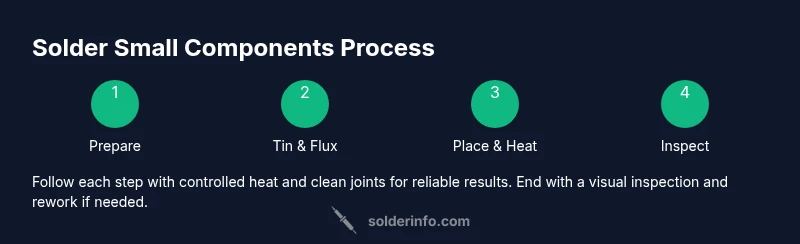
Steps
Estimated time: 60-90 minutes
- 1
Prepare workspace
Set up a stable work surface with good lighting. Ground yourself with an anti-static wrist strap and place a small tray for parts. Ensure ventilation is active to manage fumes.
Tip: Verify your iron is off before placing components to prevent accidental burns or shorts. - 2
Clean pads and apply flux
Wipe the board pads with IPA to remove oils. Apply a thin layer of flux to the pad and component lead areas to improve wetting and reduce oxidation during heating.
Tip: Flux is the secret to consistent joints on tiny leads; don’t skimp. - 3
Tin the iron and leads
Lightly tin the iron tip and the component leads with a tiny amount of solder. This creates a ready-wet surface and speeds up the wetting process when you touch the joint.
Tip: Avoid overheating the lead when tinning; a quick touch is enough. - 4
Position the component
Place the component on the pads, aligning leads precisely. Use tweezers to hold it in place while you prepare to make contact with the joint.
Tip: Take a moment to confirm alignment; misalignment can lead to bridge or cold joints. - 5
Apply heat and solder
Touch the iron to the joint area briefly and feed solder to the opposite side, allowing capillary action to draw solder into the joint. Remove heat as soon as the joint wets nicely.
Tip: Keep the iron tip clean and maintain a short, confident contact—avoid holding it on the joint too long. - 6
Inspect and cool
Allow the joint to cool naturally and inspect for a shiny, concave fillet. Look for excess solder, bridging, or a dull surface indicating poor wetting.
Tip: If you see a dull or cracked joint, rework quickly while warm to restore flow.
Quick Answers
What temperature should I use for lead-free solder on small components?
Lead-free solder generally requires higher tip temperatures than leaded solder. Start around 350°C and adjust based on the flux and component tolerance; avoid exceeding the component’s rated temperature to prevent damage.
For lead-free solder on small parts, start at about 350 degrees Celsius and adjust if needed, watching for signs of overheating.
How can I prevent bridges when soldering closely spaced pads?
Use a fine-tipped iron and apply solder to one pad at a time, maintaining a clean tip. Use flux wisely, and consider using solder wick to remove any excess immediately.
To prevent bridges, work one pad at a time with a fine tip and keep the tip clean; wick away excess if needed.
Is it necessary to tin leads before placing them on pads?
Tin leads slightly to improve wetting, but avoid excessive solder on long leads. This helps capillary action draw solder into the joint more reliably.
A quick tin on the leads helps them wet better, but don’t overdo it.
What are common signs of a cold joint?
A cold joint tends to look dull or grainy, may be crumbly, and often has poor electrical conductivity. Reflow with a clean, hot joint to fix it.
Cold joints look dull and may fail to conduct; reflow the joint with adequate heat.
Can I use the same flux for electronics and jewelry soldering?
Rosin-based flux is versatile for electronics and jewelry; avoid acidic flux for electronics as it can damage pads. Always follow manufacturer guidance.
Rosin flux works for electronics and jewelry; avoid acidic flux on electronics.
What safety precautions should I take when soldering small components?
Work in a well-ventilated area, use eye protection, and keep flammable materials away. Wear an anti-static wrist strap and keep fingers away from hot tips.
Soldering safety means good ventilation, eye protection, and anti-static precautions.
Watch Video
Top Takeaways
- Plan each joint before heating to reduce bridging.
- Flux and clean pads are essential for reliable tiny joints.
- Heat control is the biggest factor in successful soldering small components.
- Inspect every joint and rework promptly if needed.
- Safety and ventilation protect you during soldering tasks.