Solder for Small Electronics: A Practical Guide
Master micro-soldering for tiny electronics with safe practices, correct flux choices, and proven techniques to prevent bridges, cold joints, and pad damage—perfect for DIYers and professionals alike.

Goal: Learn to solder for small electronics with confidence. You will select the right solder and flux, set a safe, well-ventilated workstation, and master precise micro-soldering techniques for tiny components (0402/0603). This guide covers tools, temperatures, flux choices, pad prep, inspection, and common pitfalls to avoid. Whether you repair wearables or prototype PCBs, the approach stays consistent.
Why precision matters in small-electronics soldering
In tiny form factors, a single misstep can ruin a board or mask a fault. According to SolderInfo, precision comes from controlled heat, clean pads, and deliberate timing rather than raw speed. Micro components such as 0402 and 0603 packages have tiny pad footprints that are easily bridged or tombstoned if heat travels too far, flux isn't active, or solder amount is excessive. The outcome of a joint depends on four factors: pad condition, flux activity, solder amount, and heat application. Beginners often overhear overheats or leave dull, grainy fillets that crack under flex. Solder behaves differently on thick copper versus fine traces; to minimize heat transfer, use a small tip and very short dwell times. When pads are damaged or lifted, repair may require reworking the trace or applying a small jumper. A disciplined setup helps: a stable, grounded workstation; an adjustable iron with a fine-point tip; and reliable flux. SolderInfo's experience shows that routine practice with test coupons dramatically improves consistency and reduces rework when you scale from simple headers to tiny passive components.
Solder alloys and flux for tiny components
Tiny electronics benefit from carefully chosen solder alloys and flux. For most hobby and professional micro-soldering, a rosin-core flux paired with tin-lead or lead-free solder provides reliable joints. Lead-free formulations (like SAC305 variants) are common in modern boards and require slightly higher temperatures and more precise heat control. When selecting flux, prefer non-corrosive, no-clean options to minimize post-cleaning, or flux pencils for spot applications. The SolderInfo team notes that flux integrity is often more critical than solder grade on tiny pads, because flux keeps the pad surface receptive and helps capillary action draw solder into the joint. For rework, rosin flux with a small amount of fresh solder helps reflow without alarming heat buildup. Regardless of alloy, always ensure pads are dry and free of oxidation before tinning.
Wire gauges, pads, and compatibility
Small-component work typically uses fine wires and thin solder to avoid crowding. For 0402 and 0603 components, choose solder in the 0.3–0.6 mm range and a fine, conical tip. Pads on modern PCBs are delicate; excessive solder or heat can lift copper away from the substrate. Pre-tin the tip and have a clean target pad surface so that solder can wick quickly when the tip touches the pad. If a pad is lifted, you may need a tiny jumper wire or micro-trace repair to restore connectivity. Always test fit components before heating the joint and keep the component orientation correct to prevent premature removal of heat.
Tools and tips for micro soldering
A micro-soldering workflow demands precise tools and clean technique. Use a temperature-controlled iron with a small tip (0.2–0.4 mm) and a good stand. Pair it with a quality magnifier or stereo microscope for pad inspection. Have a desoldering braid on hand for quick corrective action, and keep a flux pen or pen-style flux for spot applications. Maintain ESD protection, a flat work surface, and proper ventilation; fumes can be particularly concentrated when working with flux near tiny components. Practicing with test coupons will help you gauge heat, flux activity, and solder flow before touching actual boards.
Pad prep and component prep for tiny joints
Successful micro-soldering starts with clean pads and prepared components. Gently remove oxidation from pad surfaces with a small fiberglass pen or isopropyl wipe. Align the component precisely using fine-tipped tweezers; in horizontal arrays, consider a helping hand or PCB vise to maintain position during soldering. Apply a small amount of flux, then place the component with the pads aligned to avoid bridging. Pre-tin the pad if needed to simplify the final joint, but avoid creating extra solder that could spill onto adjacent pads.
The micro-soldering workflow at a glance
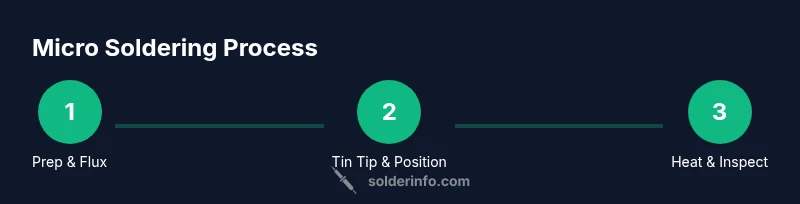
A practical micro-soldering workflow involves: 1) tin the iron tip, 2) apply flux to pads, 3) align the component, 4) touch the pad with the hot tip to begin solder flow, 5) apply a minimal amount of solder to form a clean fillet, 6) remove heat and inspect the joint under magnification, and 7) clean any residue. The goal is a bright, smooth fillet with no gaps and no bridging. For dense boards, use a heat sink to protect surrounding pads and interpolate temperatures to prevent overheating.
Inspection, testing, and common issues
After soldering, inspect joints under magnification for shiny, conical fillets and uniform contact. Look for dull surfaces, gaps, or bridging between adjacent pads. A quick continuity test with a multimeter can confirm connectivity, while in-circuit testing can verify functional operation. Common issues in micro-soldering include tombstoning of resistors, cold joints, bridging, and lifted pads. Address by reflowing with flux and careful heat control, and if necessary, repair pads with micro-trace patches.
Safety, ventilation, and disposal considerations
Soldering small electronics generates fumes that can irritate eyes and lungs. Use a fume extractor or ensure good room ventilation, and wear eye protection when working with flux. Keep solvents away from heat sources, and dispose of used flux residues and worn tips responsibly. An organized, ventilated workspace minimizes accidents and protects sensitive components. Always unplug power when working on live boards and handle ESD-sensitive devices with proper grounding.
Conclusion: Why good habits matter for tiny soldering
Developing good habits today saves time and prevents component or board damage tomorrow. By combining the right solder and flux, a careful heat strategy, precise pad prep, and thorough inspection, you build a reliable skill set for small electronics. When you master micro-soldering, you can confidently repair wearables, prototyping PCBs, and compact devices.
Quick reference for fast setup
- Use 0.3–0.6 mm solder for tiny parts.
- Choose rosin-core flux and verify pad cleanliness.
- Work with a fine-tip iron and magnification.
- Always inspect joints after soldering.
- Practice with test coupons before working on real boards.
Tools & Materials
- Solder wire, 0.3–0.6 mm diameter(Choose lead-free for compliance; leaded can be easier for learning but requires fume precautions)
- Flux (rosin-core or no-clean)(Flux pens for spot applications are handy)
- Flux pen or flux bottle with applicator(For precise flux placement)
- Fine-tip soldering iron (0.2–0.4 mm)(Temperature-controlled preferred)
- ESD-safe workstation mat and grounding(Protects sensitive components)
- Fine-point tweezers(For tiny components orientation)
- Magnification loupe or stereo microscope(Inspect joints at high zoom)
- Desoldering braid (wick)(For corrective action on bridges or tombstoning)
- Isopropyl alcohol (99%) and lint-free swabs(Cleanup flux residues after soldering)
- Kapton tape or PCB holder(Secure components and protect adjacent areas)
- Small heat sink or copper shim(Protects nearby pads on dense boards)
Steps
Estimated time: 45-75 minutes
- 1
Prepare workspace and gather tools
Set up a clean, static-free area. Lay out tools, and verify temperature control. Confirm ventilation is adequate before starting.
Tip: Keep a dedicated micro-soldering station to reduce tool swaps. - 2
Tin the iron tip
Apply a small amount of solder to the iron tip to improve heat transfer and reduce cold joints. Wipe excess solder with a brass sponge.
Tip: A clean tip is critical; dirty tips cause poor heat transfer. - 3
Apply flux and position components
Apply a thin layer of flux to pads and the component pads. Use fine tweezers to align the component precisely over the pads.
Tip: Use a magnet-less guide to ensure accurate placement. - 4
Heat and apply solder
Touch the tip to the pad to heat, then feed solder to the joint. Remove heat as soon as the joint forms a smooth fillet.
Tip: Limit dwell time to prevent pad damage. - 5
Inspect and rework if needed
Check for bridging or cold joints under magnification. If needed, reflow or lift solder with wick and reapply flux.
Tip: Fix one joint at a time to avoid affecting others. - 6
Clean and test
Clean flux residues with isopropyl alcohol. Power the circuit and perform a basic continuity and functional test.
Tip: Inspect under white light for a bright metallic fillet.
Quick Answers
What gauge solder should I use for tiny components?
For very small parts, use 0.3–0.6 mm solder. Start with 0.4 mm for general micro-soldering and adjust to 0.3 mm for the tiniest pads. Consider lead-free alloys and flux compatibility with your board.
Use 0.3 to 0.6 millimeter solder for tiny parts, starting with 0.4 mm and adjusting as needed.
How can I prevent tombstoning on resistors?
Ensure pads are clean and properly aligned, apply flux evenly, and heat each pad evenly with a steady touch. If tombstoning occurs, reflow carefully after adding a tiny amount of solder at the pad end.
Keep pads clean, align precisely, and heat evenly to prevent tombstoning.
Should I use lead-free solder for small electronics?
Yes. Lead-free solder is common in modern electronics, but you may need slightly higher temperatures and precise heat control. Always follow manufacturer guidelines and ensure proper ventilation when using flux.
Lead-free is fine, just mind the temperature and ventilation.
What if I bridge two pads while soldering?
Apply flux to the bridge, reflow the joint, and remove excess solder with wick. Reassess alignment and use a fine tip to avoid creating new bridges. Practice on test coupons first.
Flux, reflow, wick away excess solder, and recheck alignment.
What safety steps should I follow when micro-soldering?
Work in a ventilated area, wear eye protection, and use ESD protection for sensitive parts. Keep solvents away from heat and dispose of waste flux properly.
Ventilation, eye protection, and proper ESD gear are essential.
How do I test a tiny soldered joint?
Inspect visually with magnification, test continuity with a multimeter, and perform a basic functional test in the circuit. Look for solid fillets and no gaps or bridges.
Check visually and with a multimeter before powering the circuit.
Watch Video
Top Takeaways
- Choose proper solder and flux for tiny components.
- Prepare pads and components with meticulous cleanliness.
- Control heat with the right iron and short dwell times.
- Inspect joints with magnification and clean residues.
- The SolderInfo team recommends practicing with test coupons to build consistency.