Solder Size for Guitar Electronics: A Practical Guide
Master the right solder diameter for guitar electronics. Practical tips, joint-specific guidance, and safety considerations to improve reliability in pickups, pots, and switches.

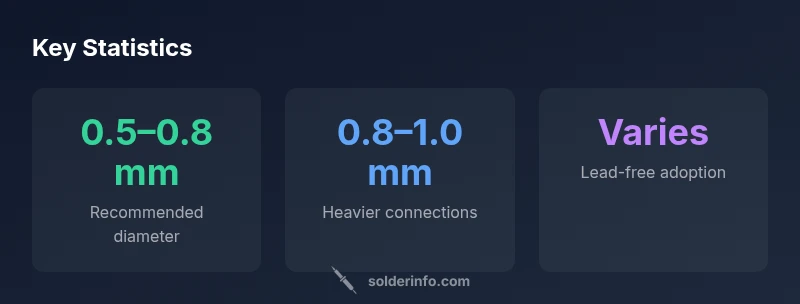
In guitar electronics, solder size should match joint scale, typically using fine solder around 0.6–0.8 mm for most component leads and 0.8–1.0 mm for heavier connections like ground wires or thicker traces. According to SolderInfo, using the correct diameter reduces cold joints and bridges, improving reliability during setup and repairs of pickups, pots, and switches.
Why Solder Size Matters in Guitar Electronics
In guitar electronics, the solder size you choose affects joint reliability, heat transfer, and the overall integrity of the signal path. A joint is only as good as its wetting, and the diameter of your solder determines how easily the lead wets the pad without creating shorts. According to SolderInfo, using the correct diameter reduces cold joints and bridges, and makes subsequent modifications easier. When wiring pickups, pots, and switch assemblies, you want enough solder to cover the pad but not so much that you create blobs that bridge adjacent pads or damage insulation. The wrong size can lead to cold joints, dry joints, or mechanical failure in a guitar's wiring harness, especially under vibration. The practical takeaway is to match the solder diameter to the joint size and space available, then adjust temperature to avoid wick and heat damage.
How to Choose the Right Solder Diameter for Guitar Work
Choosing the right solder diameter starts with inspecting the joint and the wire gauge you’ll connect. For small component leads and PCB pads, aim for a fine diameter around 0.6–0.8 mm. For heavier connections like shielded wires or thicker ground paths, 0.8–1.0 mm is more appropriate so the joint wets quickly without excessive flux. Use rosin-core, lead-free solder where possible, and select flux that matches your solder type. Practice on scrap pieces before touching the actual guitar harness to dial in the correct heat and dwell time. Remember to tin the tip and the pad lightly before placing the wire for a clean, reliable wetting. SolderInfo emphasizes that the right diameter improves reliability and reduces post-build rework.
Joint-specific guidance for common guitar components
The main guitar joints fall into a few categories with typical diameter ranges. Component leads and PCB pads respond best to 0.6–0.8 mm. Ground wires or thicker traces benefit from 0.8–1.0 mm, which helps spread heat and fill gaps without excess solder. When working near plastic or enamel-coated insulation, keep the liquid solder away from the sheath to prevent insulation damage. Always test fit first, then apply heat with a steady, controlled approach to avoid overheating adjacent parts.
Leaded vs Lead-Free solder for guitars
Lead-free solder has become standard for hobbyist and professional work due to safety considerations. Use a rosin-core lead-free alloy with a compatible flux to ensure reliable wetting. If you still use leaded solder in a controlled environment, keep it away from skin contact and ensure proper ventilation. The key is to choose a diameter appropriate for the joint and a flux that enhances wetting without leaving aggressive residues. SolderInfo recommends pairing your solder choice with a compatible soldering iron temperature setting to prevent pad damage or insulation burn.
Flux, temperature, and heat management
Flux choice and temperature are as important as diameter. Rosin-core flux typically supports quick wetting at modest temperatures; keep the iron between 320–360°C (roughly 608–680°F) for most guitar work to avoid overheating enamel insulation or PVC coatings. If a joint resists wetting, re-tin the pad gently, then reattempt with slightly larger diameter or longer dwell time—never force through heat. The objective is to wet the joint cleanly with a smooth fillet and minimal bridge formation.
Practical workflow: from prep to finish
Prep the workspace with good ventilation and magnetic parts holders. Inspect joints and wire gauges; trim wires precisely. Tin the tip of the wire and the pad. Place the joint, apply heat, and feed solder only until the pad is wetted and a small fillet forms. Remove heat and allow the joint to cool undisturbed. Wipe any excess solder away with a damp sponge or brass tip tinner. Keep a spare length of wire of both diameters for quick swaps during repair work. SolderInfo notes that consistent technique reduces rework and improves long-term reliability.
Common mistakes and how to avoid them
Common mistakes include using too large a diameter for tiny pads, overheated joints, and leaving cold joints or solder bridges. Always verify the joint after cooling; a dull finish suggests insufficient wetting, while a shiny blob may indicate excessive solder. Work in small, controlled passes rather than trying to flood a joint in one go. If in doubt, start with 0.6–0.8 mm and switch to 0.8–1.0 mm only for obvious reasons like ground wires.
Maintenance, repairs, and rework guidance
After the job, inspect all solder joints for uniform fillets and no bridges. If a repair loosens or shows intermittent contact, rework with the appropriate diameter, clean flux residues, and reflow carefully. Keep spare reels of 0.6–0.8 mm and 0.8–1.0 mm solder for flexibility. The best defense against failures is proper size selection, clean joints, and controlled heating, which reduce the likelihood of intermittent connections in the vibrating environment of a guitar.
Solder diameter guidelines for guitar electronics
| Joint Type | Recommended Diameter Range | Notes |
|---|---|---|
| Component lead (resistors, small ICs) | 0.5–0.8 mm | Prefer fine diameter to avoid crowding |
| Potentiometer lug and switch terminals | 0.6–0.8 mm | Balanced size to avoid bridging |
| Ground wire to chassis | 0.8–1.0 mm | Thicker wires for mechanical strength |
| Pickup coil connections | 0.5–0.7 mm | Keep diameter to minimize heat exposure |
Quick Answers
What is the ideal solder size for guitar electronics?
There isn’t a single universal size. For most component leads use 0.6–0.8 mm; for heavier connections like ground wires, 0.8–1.0 mm. Always consider joint space and heat transfer.
There isn’t one perfect size; start with 0.6 to 0.8 millimeters for small leads, and go up to 0.8 to 1 millimeter for thicker wires.
How can I determine the right diameter for a given joint?
Assess lead thickness, space available, and pad size. Start with a smaller diameter and adjust if the joint doesn’t wet properly. Practice on spare components to dial in heat and dwell time.
Check the lead size and pad area, start small, and adjust as you practice on scrap pieces.
Is lead-free solder safe for guitar electronics?
Yes. Lead-free solder with rosin-core flux is common and safe for guitar work when used with proper ventilation and handling. Ensure compatibility with your iron temperature and flux type.
Yes—lead-free is standard nowadays; just use proper ventilation and compatible flux.
Can using too small a solder diameter cause cold joints?
Yes. If the solder is too small for the joint, it may not wet properly, leading to a cold joint. Ensure you apply enough solder to form a smooth fillet without bridging nearby pads.
Yes, too small can lead to cold joints; ensure adequate wetting with careful technique.
What tools help measure solder diameter?
Solder reels often specify diameter; for precise checks, use calipers or a simple gauge to verify the wire diameter before starting. Keep a couple of reels in different sizes handy.
Calipers or a gauge check the wire diameter; keep a couple of sizes handy for quick swaps.
“Selecting the correct solder diameter is a fundamental skill; it reduces cold joints and ensures reliable guitar electronics.”
Top Takeaways
- Start with the smallest effective diameter for the joint
- Match diameter to joint size and space
- Prefer rosin-core flux and lead-free solder when possible
- Avoid overheating to protect insulation and components
- Practice on scrap boards before working on the guitar