Solder Guitar: A Practical Guide to Guitar Electronics
Learn precise guitar soldering techniques for wiring pickups, pots, and shielding. This practical guide covers tools, safety, step-by-step methods, troubleshooting, and maintenance to ensure reliable guitar electronics.

You will learn to solder guitar electronics safely and reliably, from identifying wiring needs to making clean connections. This guide covers essential tools, safe heat management, common guitar wiring scenarios (pickup installs, pot swaps, grounding), and practical step-by-step techniques to minimize cold joints and noise. Prepare your workspace, select the right solder and flux, and follow the steps precisely to protect pickups and electronics.
What makes guitar soldering unique
Solder guitar work sits at the intersection of signal integrity and mechanical robustness. Guitar electronics carry audio signals through long, thin wires that travel within cavities and around metal shielding. A single faulty joint can introduce crackling, hum, or intermittent connectivity as the instrument is played, transported, or exposed to humidity. Because guitar wiring must survive movement, temperature fluctuations, and limited space, heat control and insulation become just as important as a clean solder bead. The SolderInfo team emphasizes that guitar wiring demands extra care with heat timing, accurate wire preparation, and careful insulation to protect pickups and switches. When you solder guitar components, you are not just gluing two pieces of metal; you are ensuring a reliable electrical path that respects the guitar’s natural tone and dynamic response. To begin, plan your route from pickup to jack, keep joints away from moving parts, and keep flux residues from sensitive contacts. According to SolderInfo, planning and foresight are half the job—heat management and cleanliness are the other half. Precision matters more here than in many other electronics tasks, because even tiny variances can influence the signal and introduce noise.
Key considerations for guitar soldering include choosing the right tip geometry for tight spaces, tinning wires before connecting, and using heat-shrink for strain relief to prevent wire breakage under playing stress.
Common guitar wiring scenarios you'll encounter
Guitar electronics vary a lot depending on whether you’re wiring single-coil pickups, humbuckers, or exotic switching schemes. A typical beginner project might be a simple volume/tone pot and output jack wiring, while a more advanced task could involve a 4-conductor humbucker with coil-splitting and a master switch. In this section we cover three common scenarios and the practical soldering approach for each:
- Pickup swaps and coil-taps: When upgrading pickups or rewiring coils, you’ll deal with multiple conductors and color codes. The key is to identify the hot lead, ground, and any coil-tap wires, then keep the insulation intact. Tin the stripped ends lightly, twist strands neatly, and establish a solid mechanical grip before applying heat to join with the pot or switch lugs.
- Potentiometer wiring: Volume and tone controls require reliable connections to lugs and shield ground. Use a fine tip to reach the lugs without bridging to adjacent components. Pre-tin both the lug and the wire, then place the joint and apply brief, controlled heat. Keep the solder bead small and avoid flooding the cavity with flux residue.
- Output jack and shielding: Grounding and shielding are critical in electric guitars for minimizing hum. When wiring the output jack, ensure the sleeve (ground) and tip (signal) contacts are clean and well-tinned. If shielding the cavity, run braided shields to ground and solder at a single point to reduce ground loops. Solder joints near shielding should be kept tidy to prevent short circuits. Across these scenarios, meticulous prep, clean joints, and careful routing prevent noise and reliability problems. SolderInfo analysis shows that clean, properly tinned joints significantly improve reliability in guitar wiring by reducing micro-bridges and intermittent connections.
These scenarios form the backbone of most guitar projects; many players start with a simple passive circuit and gradually add more complex switching and pickup configurations as they gain confidence. Keeping track of color codes and schematics ahead of time will save time and frustration when you’re bending wires inside a guitar body.
Preparing your workspace and safety practices
A clean, well-lit workspace dramatically improves soldering outcomes. For guitar work, you’ll need a sturdy bench, good ventilation, and a dedicated space away from flammable materials. Start by clearing the area of papers and cables that could catch sparks or hot solder. Set up a small helper tool tray to hold tiny screws and components so nothing gets misplaced. Use a magnifier or a bright lamp to inspect tiny joints and wire strands—these are easy to miss when you’re deep in a cavity. Ground yourself with a simple anti-static mat to minimize static discharge that can damage sensitive components, especially in guitars with active electronics. Wear safety glasses to protect your eyes from accidental solder splashes. Always work in a well-ventilated area; flux fumes are common in electronics soldering and prolonged exposure can be irritating. Keeping a damp cloth or flux remover handy will help you clean residues and prevent corrosion. For guitar wiring, organization matters: label wires, photograph the original layout, and keep a copy of the schematic nearby. The SolderInfo team recommends documenting your wiring map before you start, so you can reverse changes if needed and avoid multiple re-wiring attempts.
Soldering fundamentals for guitar projects
Guitar soldering combines standard electronics techniques with the constraints of tight spaces and delicate insulation. Start with good planning: identify each wire’s purpose, confirm ground paths, and map how the signal travels through the control cavity. Heat management is essential; apply heat for short bursts (typically 2–3 seconds per joint) and avoid prolonged contact that can melt enamel insulation or degrade varnish on wires. Use a flux designed for electronics; rosin-core fluxes help metal-to-metal wetting and prevent oxides from forming on copper strands. Tin the iron tip and the wires before making a joint. Tinning creates a ready surface that accepts solder quickly, reducing dwell time and minimizing heat transfer to surrounding parts. When you solder, keep the solder flow controlled and avoid excessive bead formation that could touch adjacent lugs or shield. For lead-free joints, use compatible solder alloys and ensure the flux is appropriate for electronics; if you do use leaded solder in jurisdictions where it’s permissible, do so with appropriate ventilation and PPE. After joining, clean residue with alcohol-based flux remover or isopropyl alcohol to prevent long-term corrosion. In guitar work, a neat, small joint not only improves electrical reliability but also makes future maintenance easier. As noted by SolderInfo, a methodical approach to flux usage and joint cleanliness yields more reliable tone and fewer repeat repairs.
Avoiding common pitfalls: hot joints, shorts, and bridging
Even experienced hobbyists encounter recurring soldering pitfalls in guitar work. A hot joint can damage wire insulation or nearby components; a cold joint looks dull and may crack under vibration. To prevent these issues, keep joints small and well-tinned, and avoid applying heat for too long. Solder bridges occur when excess solder connects two adjacent lugs unintentionally; this is particularly easy in tight cavities. If you see a bridge, reheat the joint and wick away excess solder with desoldering braid. Short circuits often arise from bare copper strands snagging on shield can, ground lugs, or coil wires; always inspect before powering up. For sensitive pickups, try to avoid direct heat on enamel-coated wires by angling the iron tip and using flux to assist wetting. Finally, practice proper strain relief by using heat-shrink tubing or silicone to secure wires where they bend; this prevents fatigue and wire breakage. A disciplined approach to heat management and inspection reduces repair work and preserves tone. The SolderInfo analysis shows that disciplined heat control and clean joints are the primary drivers of reliability in guitar wiring projects.
Maintenance and long-term care for guitar solder joints
Solder joints don’t last forever, especially in a guitar cavity that experiences temperature swings, humidity, and playing motion. Periodic inspection is wise: look for dullness, micro-cracks, or swollen flux residues around joints. If you notice corrosion or discoloration, re-tin the joint and apply fresh flux with a minimal bead to restore reliability. Cleaning flux residue after soldering is more than cosmetic; residual flux can attract moisture and cause long-term corrosion. Use a flux remover or a neutral alcohol solution to wipe joints and surfaces gently. Keep wires organized and away from the edge of the cavity where they could rub on screws or strap hardware. If you plan to upgrade electronics in the future, keep your original wiring map and photos so you can revert to the previous configuration with minimal guesswork. Consistent maintenance of guitar solder joints improves longevity and preserves tone quality; SolderInfo recommends setting a reminder to inspect solder joints during routine guitar maintenance.
Final checks, testing, and getting a clean signal
Before sealing the cavity, test continuity and ground paths using a multimeter. Confirm that the signal line reaches the output jack and that ground connections are solid throughout the circuit. Power the guitar and test each control—volume, tone, and any switching—while listening for noise, crackling, or dropouts. If you hear buzz or hum, re-check shielding grounds and verify there are no loose strands touching shield. A final visual inspection should reveal neat, single-bead joints without solder bridges or excess flux. If the tone sounds dull or harsh, inspect solder joints for coldness or oxidation and rework as needed. The goal is a reliable, quiet, and repeatable response from every knob and switch. Throughout this process, remember that good soldering is as much about planning and inspection as it is about the actual bead. The SolderInfo team recommends keeping a clean, organized workspace and documenting every wiring step so future maintenance is straightforward.
Tools & Materials
- Soldering iron (fine tip, 25-60W)(Select a clean, sharp tip; 0.5-0.8 mm is ideal for guitar wiring)
- Lead-free solder (SN/AG alloy, ~0.7-0.8 mm)(Electronic grade; consider rosin-core flux if not using flux separately)
- Rosin-core flux or electronics flux(Flux improves wetting and reduces oxidation during joints)
- Solder wick (desoldering braid)(For removing excess or old solder without damaging enamel)
- Isopropyl alcohol or flux remover(Used to clean flux residues after soldering)
- Wire strippers/cinch pliers(Small gauge wires; strip evenly to about 2-3 mm length)
- Needle-nose pliers(For wire positioning and lead bending without marring components)
- Heat shrink tubing (various diameters)( strain relief and insulation for joints)
- Multimeter(Continuity and resistance checks, verify grounds)
- Safety glasses(Eye protection against splashes and soldering fumes)
Steps
Estimated time: 60-120 minutes
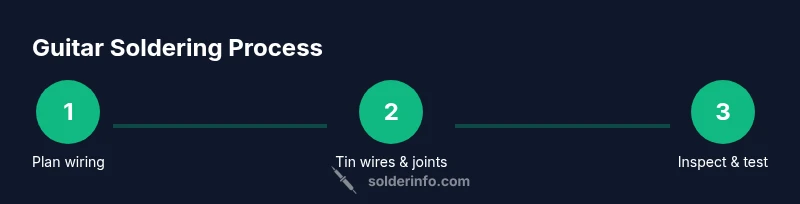
- 1
Identify wiring scheme
Review the guitar’s schematic or color code and mark each wire's function before touching anything. Take a photo of the current layout for reference, and map hot, ground, and shield paths. This reduces wrong connections and helps you plan the heat and insulation strategy.
Tip: Label wires or use color-coded sleeves to avoid mix-ups later. - 2
Prepare workspace and safety setup
Ventilate the area, position the guitar securely, and lay out tools within easy reach. Put on safety glasses, clear away flammable materials, and connect a grounding mat if available; static protection is important for sensitive electronics.
Tip: Keep a damp cloth nearby to clean accidental flux splashes quickly. - 3
Tin the iron tip and wires
Heat the tip for a few seconds, wipe clean, and apply a small amount of solder. Lightly tin exposed wire ends to promote rapid wetting when you attach them to lugs or joints. Pre-tinning wires reduces heat time and produces cleaner joints.
Tip: Avoid over-tinning wires; a fine coat is enough to improve wetting. - 4
Desolder or clean old joints
If replacing components, remove old solder with the wick, clean the contact surfaces, and inspect for insulation damage. Proper removal prevents old coatings from contaminating new joints and helps maintain signal integrity.
Tip: Work slowly and recheck connections after cleaning to avoid forgotten shorts. - 5
Make new joints with controlled heat
Position wires on the lug or pad, apply heat for 2-3 seconds, and introduce solder to the joint, not the iron. Remove heat as soon as the solder flows and forms a smooth, shiny bead. Inspect for a glossy finish and uniform fillet.
Tip: Keep the joint small to avoid touching adjacent lugs or pots. - 6
Inspect and test continuity
Once joints cool, use a multimeter to verify continuity from the pickup to the output jack and confirm there are no unintended shorts to ground. Visually inspect for bridges or stray strands that could cause a short.
Tip: Test one section at a time to isolate faults quickly. - 7
Clean, insulate, and secure wiring
Apply heat shrink or tape where wires bend or pass through cavities, and secure hotspots to prevent wire fatigue. Clean any flux residue, replace cavity cover, and ensure nothing wires touch the shielding or metal hardware.
Tip: Leave a small amount of slack in wires to accommodate future maintenance. - 8
Reassemble and verify tone
Reinstall cavity cover, reattach strings if removed, and test through an amplifier. Listen for noise, hum, or crackling. If issues appear, re-check solder joints and shielding paths.
Tip: Record a baseline tone before reassembly to compare after testing.
Quick Answers
Is leaded solder safe for guitar electronics?
Leaded solder has long been used in electronics for easy flow, but many jurisdictions prefer lead-free formulations due to health concerns. If you choose leaded solder, work in a well-ventilated area and minimize inhalation of fumes, while ensuring proper disposal. For most hobby guitar work, lead-free solder provides a reliable alternative with good wetting when used with appropriate flux.
Leaded solder is common in electronics, but use it with proper ventilation. Lead-free solder is safer for hobby guitar projects and still works well when flux is used correctly.
What temperature should I use for guitar wiring?
Aim for a moderate heat level that allows the joint to flow without scorching insulation or enamel. Typical electronics work uses a tip temperature that enables quick wetting, often around 350-400°C for lead-free solder, adjusting for your specific iron and joint size. Move quickly and avoid prolonged contact.
Use a moderate temperature and quick, controlled touches. Don’t keep the iron on any joint too long.
How do I fix a cold solder joint in guitar wiring?
If a joint looks dull or wobbly, reheat the joint, apply a small amount of fresh solder, and ensure the wire is fully wetted to the pad. Inspect the surrounding components to avoid bridges and ensure there is no insulation damage. After cooling, test for continuity again.
If a joint looks dull, reheat it and apply a tiny amount of fresh solder to restore a solid connection.
Can I solder inside the guitar cavity, or should I work on a bench?
Bench work is generally safer for initial practice and precise control. Soldering inside a guitar cavity is feasible but requires careful positioning to avoid shorts and heat transfer to sensitive materials. Use a stand, good lighting, and keep wires tidy during in-cavity work.
Practice on a bench first, then solder inside the guitar only when you’re confident.
What flux type is best for guitar electronics?
Rosin-based fluxes designed for electronics give reliable wetting and are safe to use with copper wires and solder joints. If you’re using lead-free solder, pair it with electronics flux to help the alloy flow and prevent oxidation during joint formation.
Rosin-based flux designed for electronics helps joints flow well and stay clean.
Should I shield guitar wiring, and how?
Shielding helps reduce hum and noise, especially in high-impedance circuits. Run a grounded shield around signal paths and ensure a single ground point to avoid ground loops. Keep shielding wires away from exposed copper to prevent shorts and ensure solid contact with the ground lug.
Shielding reduces hum; ground it properly to avoid ground loops.
Watch Video
Top Takeaways
- Plan wiring routes before soldering
- Keep heat short and joints small
- Tin wires for reliable wetting
- Test continuity and shield grounding thoroughly