Solder vs Crimp Speaker Wire: Practical Comparison
An analytical side-by-side guide comparing solder and crimp speaker wire connections, covering performance, durability, installation, and best-use scenarios for hobbyists and professionals alike.

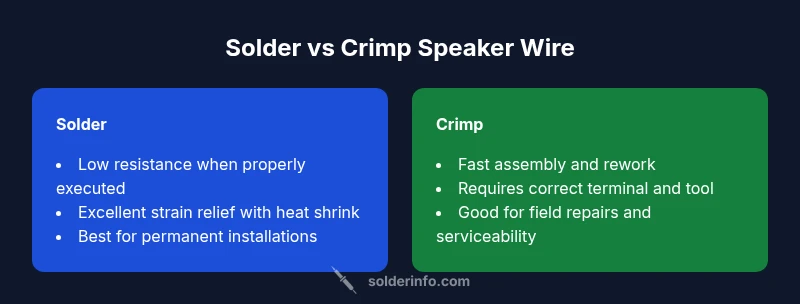
When wiring speakers, the choice between solder or crimp speaker wire connections matters for reliability, ease, and cost. In most hobby and professional settings, soldered joints offer the strongest, most repeatable electrical connection with better strain relief, while crimped connections excel for quick repairs and serviceability. For long-term durability, soldering has the edge.
Why solder or crimp speaker wire matters
In any audio installation, the connection between the amplifier and the speaker is the last link in the chain that determines how faithfully the signal travels from output to drivers. The method you choose—solder or crimp speaker wire—affects resistance, mechanical durability, and the ability to service or rework the system. For many DIYers and professionals, the goal is a repeatable, low-resistance joint that holds up under vibration, temperature swings, and connector fatigue. According to SolderInfo, the choice of connection technique often has a bigger impact on long-term reliability than the color of insulation or the gauge of wire alone. That is because the electrical and mechanical performance hinges on both the quality of the joint and the integrity of strain relief around the connection. In this article, we compare solder and crimp approaches across real-world scenarios, with practical guidance that helps you decide which path fits your project, your skills, and your budget. We’ll cover signal quality, durability, speed of installation, rework options, and best practices to minimize common failure points. When evaluating solder or crimp speaker wire options, practitioners weigh the significance of joint integrity against the time spent on assembly.
Electrical performance differences
Electrical performance is the primary driver behind choosing between solder or crimp speaker wire. A properly executed solder joint provides a continuous metal path with uniform cross-section and a predictable contact surface, which translates to stable resistance and minimal inductive anomalies at audio frequencies. Crimp connections, when paired with the correct terminals and a quality crimp tool, can achieve very low contact resistance as well, but their performance hinges on consistent tool calibration and the quality of the terminal itself. In practical terms, soldered joints tend to exhibit more repeatable results in the field when the wiring sees flexing or minor thermal cycling. Solder joints also tolerate minor surface oxidation better than some crimp interfaces, provided the joint is clean and well-fluxed. SolderInfo Analysis, 2026 notes that soldered joints often maintain stable connectivity under mechanical stress, which is valuable for wall-mounted or mobile audio setups where movement is unavoidable. For studio-grade installations, the risk of a loose seat in a crimp connector can become a more frequent concern if the tool is not correctly sized for the wire gauge. Regardless of method, a clean, flux-assisted joint with proper insulation is essential, and avoiding stray strands that could cause shorting is paramount.
Mechanical reliability and strain relief
Mechanical reliability is about how well a connection withstands movement, vibration, and accidental tugging. Solder provides excellent strain relief when you apply a deliberate amount of heat and ensure the solder flows to form a blob that surrounds the conductor and terminal. The result is a robust, shock-resistant joint, especially if heat shrink tubing is used to lock the area and protect against moisture intrusion. Crimped connections rely on a mechanical interlock between the terminal and the conductor. If the crimp is not squarely seated, or if the terminal chosen is inappropriate for the wire gauge, the joint can loosen with vibration or repeated bending. Crimps can be incredibly durable when performed with the correct tool and terminals, but they are highly sensitive to process variations. The SolderInfo Team emphasizes that accurate wire gauge selection, correct terminal size, and thorough insulation are essential for both methods to achieve long service life in loudspeaker cabling that may experience field use or automotive environments.
Installation speed and convenience
Speed of installation is often a decisive factor in selecting solder versus crimp. Soldering requires time for tinning, fluxing, heating, and cooling, plus the need for a steady hand to avoid cold joints. In contrast, crimping offers rapid assembly once the tools and terminals are set up. For quick installations or field work where time is critical, crimp connections can be far more practical, especially when you need to service or replace a pair of speaker wires on a single channel. However, the initial investment in a reliable crimp tool and a compatible terminal family should be considered. If you’re already invested in a soldering station for electronics projects, you might prefer soldering for a consistent, repeatable method across your audio and electronics work. In both cases, preparing the wire ends properly, choosing the right terminal, and applying a small amount of strain relief will dramatically reduce the chance of future failures.
Durability in different environments
Environment plays a significant role in deciding between solder and crimp. In humid or outdoor settings, robust insulation and sealed joints are critical. Solder joints, when properly insulated with heat shrink and an appropriate flux, can resist corrosion and moisture ingress more reliably than some basic crimp terminals. A crimped connection can be equally durable if the terminal is rated for outdoor use and is paired with weatherproof sleeves. In vehicle installations or marine applications where vibration and salt exposure are common, the combination of a good crimp with sealant or adhesive-lined heat shrink can offer strong resistance, but this requires careful selection of materials. Solder joints, though more time-consuming to produce, typically maintain integrity in environments where the joint is well-supported and strain-relieved. SolderInfo’s guidance suggests aligning your material choices with expected environmental conditions to minimize the risk of joint degradation over the life of the system.
Cost and tooling considerations
Cost and tooling influence the decision between solder and crimp more than many hobbyists realize. Soldering has a relatively low incremental cost per joint, since solder wire, flux, and a basic iron are inexpensive, and you may already own these tools for other hobbies. Crimping can be cost-effective in the long run if you are making many joints and will benefit from rapid assembly and rework. The upfront investment in a high-quality crimp tool, appropriate terminal sizes, and good heat-shrink is a significant consideration. However, crimp tools tend to last a long time with proper maintenance, and the per-joint cost can be lower when you perform many connector changes. For professionals who value serviceability and quick maintenance, crimping can be cost-effective in the field, while hobbyists who prize ultimate joint strength and durability may find soldering to be the better value over time, especially if you already own a soldering setup. As always, a proper plan for wire gauge, terminal type, and insulation choice will help you keep costs predictable and consistent across projects.
When to choose solder vs crimp
A practical decision framework begins with permanence and serviceability. If the installation is intended to be permanent or long-term, and you have the time to perform clean solder joints with proper fluxing and insulation, soldering generally yields the most reliable electrical connection and strongest strain relief. If the goal is quick assembly, frequent modifications, or field servicing where you might need to replace a speaker cable rapidly, a well-chosen crimp solution can provide faster turnarounds with acceptable durability. Consider the environment (indoor vs outdoor, humidity, vibration), the wire gauge, and the availability of tools when making your choice. In some setups, a hybrid approach works well: solder the primary joints for durability, then use crimp-and-heat-shrink as a repairable access point where serviceability matters most.
Tools, techniques, and best practices
Regardless of the method, there are best practices to maximize reliability. For soldering, always prepare the wire ends, apply the right flux, heat the joint consistently, and avoid overheating the conductor. Use heat shrink to seal the joint and reduce the risk of moisture ingress and mechanical wear. For crimping, ensure you have the correct terminal size, a calibrated crimp tool, and a clean cut on the wire. Practice on spare sections to calibrate crimp force and verify that the joint is fully seated and inspected. Always test continuity and resistance with a multimeter after completing a connection, and inspect for stray strands that could cause shorts. The SolderInfo approach emphasizes a methodical preparation, controlled workmanship, and meticulous insulation to achieve durable, high-quality speaker wire connections over the long term.
Comparison
| Feature | solder | crimp |
|---|---|---|
| Electrical Conductivity and Signal Integrity | Excellent with proper technique and flux | Very good when using the correct terminals and tools |
| Durability under Vibration/Movement | High with proper strain relief and solid joints | High when the crimp is correct and terminals are rated for the wire |
| Installation Speed | Slower; requires fluxing and heating | Faster; quick setup after equipment preparation |
| Rework and Repairability | Relatively easy to rework with a soldering iron | Crimps can be harder to modify; some terminals are not reworkable |
| Required Tools | Soldering iron, flux, solder, heat shrink | Crimp tool, appropriate terminals, heat shrink |
| Best Use Case | Permanent installations with high fidelity | Field repairs or quick-service scenarios |
| Cost and Consumables | Moderate cost; consumables are affordable | Lower per-connector cost, but tool investment is higher |
Advantages
- Potentially best electrical performance with proper technique
- Long-term durability with proper strain relief
- Good compatibility with common speaker terminals
- Clear rework paths when done correctly
Cons
- Requires more time and skill
- Overheating risk and potential for cold joints if rushed
- Needs separate tooling and consumables for large jobs
Soldered connections generally win for durability; crimping wins for speed and serviceability
Choose soldering for permanent installations and high signal fidelity. Opt for crimping when you need fast field service and easy, repeatable changes.
Quick Answers
Is soldering always better than crimping for speaker wires?
Not always. Soldering generally offers durability and signal integrity for permanent installations, but crimping can be preferable for quick repairs or field work where speed matters. The best choice depends on environment, skill, and the likelihood of future servicing.
Soldering is usually more durable for permanent installs, while crimping shines in field work where speed matters. The right choice depends on your environment and how often you’ll need to service the lines.
Can crimp connectors be as durable as soldered joints?
Yes, with the correct terminal for the wire gauge and a properly calibrated crimp tool, a quality crimp can be highly durable. The key is ensuring a snug, fully seated crimp and good insulation.
Crimps can be very durable if you use the right terminal and tool, and make sure the crimp is fully seated.
What tools do I need to crimp speaker wire?
You’ll need a quality crimping tool matched to your wire gauge, the appropriate terminals, cutters, and heat shrink for insulation. Practice with spare wire to ensure correct force and seating before working on a live system.
Get a crimping tool that fits your wire, the right terminals, and heat shrink; practice on spare wire first.
Should I tin the wires before crimping?
Tinning before crimping is optional. It can improve wetting in some scenarios, but a well-made crimp with proper heat may perform just as well without tinning. Follow the terminal manufacturer's guidance.
Tinning is optional; it can help in some cases, but a good crimp may work fine without it.
Are crimp connectors weatherproof for outdoor use?
There are weatherproof crimp connectors and sealed heat-shrink options designed for outdoor use. Choose ones rated for the environment and seal the joint to prevent moisture ingress.
Yes, there are weatherproof crimps; pair them with sealed heat shrink for outdoor use.
Is there safety risk when soldering near speakers or electronics?
Yes. Solder fumes should be ventilated, and hot tools should be kept away from flammable materials. Work in a well-ventilated area and wear eye protection while heating metal.
Soldering can be safe with good ventilation and proper precautions.
Top Takeaways
- Assess permanence before choosing method
- Soldering offers best long-term reliability
- Crimping provides quick repairs and easier rework in the field
- Use proper tools and insulation for both methods
- Test joints with a multimeter after finishing