Solder 3 Wires Together: Step-by-Step Guide
A practical, safety-focused guide to soldering three wires together. Learn preparation, tinning, joint formation, insulation, and testing for reliable connections in electronics, plumbing, and jewelry projects.

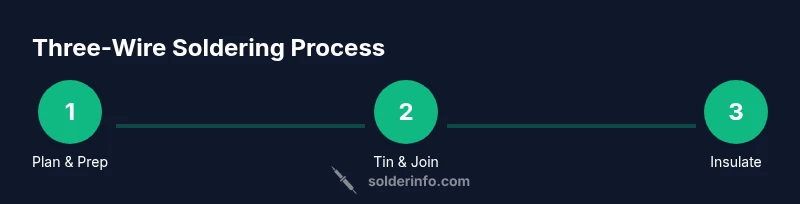
You will learn how to solder 3 wires together safely and reliably. This quick guide covers wire preparation, tinning, a strong three-wire joint, insulation, and testing. You’ll use lead-free, rosin-core solder, a clean iron, and proper flux to avoid cold joints and shorts. Follow the steps carefully to ensure a durable electrical connection in electronics projects, appliances, or jewelry repairs.
Why solder 3 wires together matters in practical builds
Three-wire joins are common in hobby electronics, automotive repair, and jewelry work. Soldering three wires together creates a single, robust node that can carry power, return, and a signal path. The reliability of this joint hinges on clean conductor ends, proper insulation, and a well-wetted solder surface. According to SolderInfo, the long-term performance of a multi-wire connection depends on consistent heat, fresh flux, and careful inspection. In many projects—from a simple LED array to a compact sensor module—the three-wire junction must remain intact under flexing, temperature changes, and occasional induction or interference. This section explains when a three-wire join is appropriate and what characteristics define a durable connection. A well-executed splice minimizes resistance, prevents loose strands, and reduces the chance of shorts caused by frayed insulation or stray conductors. Ultimately, you gain confidence to solder 3 wires together with predictable results and safe operation in electronics, plumbing, or jewelry contexts.
Think about color-coding: keep positive, negative, and signal wires distinct to avoid mix-ups. Plan the final routing so the joint sits in a sheltered, strain-relieved area. By understanding the fundamentals, you’ll be ready to tackle three-wire soldering with consistent quality and a safety-first mindset.
Safety first when soldering multiple wires
Soldering can pose burn risks, hot surfaces, and flux fumes. A well-ventilated workspace, safety glasses, and heat-resistant gloves are essential. Keep flammable materials away from the work area and never touch the hot tip with bare skin. Flux fumes can irritate eyes and lungs, so use a small fume extractor or work near an open window if possible. Secure the wires and tools with clamps or a helping hands tool to avoid sudden slips. A moment of care early on saves you from rework later. When you follow proper safety practices, you reduce the chance of accidental short circuits or damaged insulation. The SolderInfo team emphasizes that safety is the foundation of any reliable joint. Always unplug devices before starting and allow the joint to cool completely before handling.
Understanding wire preparation and insulation for a three-wire join
Preparation is critical for a clean, reliable splice. Start by selecting wires with compatible insulation ratings and conductor sizes (commonly 22-18 AWG for electronics). Inspect the wire ends for nicks or fraying and trim any damaged strands. Remove insulation evenly to expose bare copper, typically 6-8 mm for small-diameter wires. If you’re joining wires with different gauges, plan for the heaviest insulation to protect the joint. After stripping, twist strands gently to reduce the risk of stray strands splaying out during tinning. Maintaining neat, parallel conductors helps the heat to flow evenly and prevents accidental bridging to neighboring wires. The goal is a predictable, manufacturable surface that will accept solder quickly and evenly when heat is applied.
Flux, tinning, and the first contact: preparing the wires for joining
Flux helps prevent oxidation and improves solder flow. Apply a thin layer to each stripped wire end; rosin-core solder already contains flux, but an additional flux can be advantageous when working in challenging environments or with oxidized conductors. Lightly tin each wire by heating and applying a small amount of solder until a shiny, smooth coat forms on the copper. Tinning reduces the time required to form the final joint and improves heat transfer from the iron to the copper. For a three-wire joint, tinning each conductor first allows you to bring the wires together with minimal delay, reducing the chance of cold joints. Keep the iron tip tinned as well to maximize heat transfer efficiency and avoid contaminating the joint with dirt or oxidation.
Forming the joint and applying solder: the three-wire technique
There are several viable approaches to joining three wires. A common method is to align all three stripped ends in a compact bundle, then apply heat to the bundle while feeding solder to the joint until all strands are evenly coated. Another approach is to form a small pigtail: twist the wires together tightly, then reflow the joined area with solder. Whichever method you choose, ensure that all strands are fully wetted and that solder flows smoothly across the entire surface without creating blobs on the insulation. Avoid overheating the insulation, which can char or soften, and monitor the joint for uniform solder coverage. Consistency is key for low-resistance connections and reliable performance over time.
Inspecting, insulating, and testing the three-wire joint
After soldering, inspect the joint for cold joints, gaps, or uneven solder. A glossy, smooth surface that fully encases all strands indicates a good bond. If you notice dull or cracked areas, reflow the joint with a touch more heat and solder. Slide heat-shrink tubing over the joint to provide mechanical support and electrical insulation. Position the tubing so it covers both the bare joint and a short length of the stripped wire to prevent fraying. Use a heat source to shrink the tubing evenly, taking care not to overheat nearby components. Finally, test the connection with a multimeter to confirm continuity between the conductors and ensure there is no short circuit between any pair of wires.
Troubleshooting common problems and preventing future failures
Cold joints, scorching insulation, and accidental bridges are the most common failure modes in three-wire soldering. Cold joints appear dull and may feel gritty under a probe; rework by reheating the joint and applying fresh solder. Bridges occur when solder connects two conductors unintentionally; adjust the tip angle, remove excess solder, and reflow with more precise control. If insulation is damaged, cut back and re-strip the wires before re-joining. Flexing the joint during service can reveal weak connections; if the joint is in a high-stress area, consider adding strain relief or relocating the joint to a less stressed position. Solder joint quality improves with practice, consistent technique, and careful inspection.
Practical applications and advanced tips
Soldering three wires together is not limited to electronics. In jewelry-making, small copper wires can be joined to create decorative components; in plumbing, you might encounter copper-coated wires in sensor assemblies or corrosion protection schemes. For best results, always work in a well-lit, ventilated space, keep a clean, organized workspace, and maintain your tools. A well-executed three-wire joint can withstand daily handling, occasional pulls, and environmental changes. If you’re working with delicate components or high-vibration environments, consider alternatives like crimp connectors or terminal blocks for mechanical reliability while preserving electrical performance.
Tools & Materials
- Soldering iron (60W or adjustable)(Sturdy stand, clean tip, dry environment)
- Lead-free rosin-core solder(Diameter around 0.8-1.0 mm; flux core aids flow)
- Flux (rosin-based or rosin-core on solder)(Thin application to each stripped end)
- Wire strippers(For 22-18 AWG wires; remove insulation cleanly)
- Heat shrink tubing(Choose a size that fits the three-wire bundle with margin)
- Heat gun or lighter(Optional for shrinking tubing; avoid open flame near components)
- Helping hands/third-hand tool(Helpful for stable positioning during soldering)
- Multimeter(Used to test continuity and check for shorts)
- Safety gear (gloves, safety glasses)(Protect eyes and hands from hot surfaces and flux)
- Desoldering braid (solder wick)(Use if you need to remove excess solder)
Steps
Estimated time: 20-30 minutes
- 1
Plan and secure wires
Identify the three conductors to be joined. Align the wires side by side so each strand sits neatly and won’t tangle during heating. Clamp or tape them softly to prevent shifting while you work.
Tip: Work at a comfortable height and keep your hands steady; a stable stance reduces misalignment. - 2
Strip insulation to the correct length
Using wire strippers, remove insulation from each end to expose bare copper. Aim for about 6-8 mm of exposed conductor for small wires, longer if you’re using thicker insulation. Clean edges prevent fraying and ensure even heat transfer.
Tip: Avoid nicking copper strands; damaged strands can create high-resistance points. - 3
Apply flux and tin each conductor
Lightly apply flux to each stripped end. Heat each wire with the iron and apply a small amount of solder until a shiny coat forms. Tinning reduces the amount of time needed for the final joint and improves flow.
Tip: Keep the iron tip clean and tinned for consistent heat transfer. - 4
Form the three-wire junction
Arrange the tinned ends in a compact bundle. You can twist the ends together gently or place them side by side so the solder will fuse all three safely when you reflow.
Tip: Limit movement; a stable bundle minimizes motion-induced gaps. - 5
Apply solder to complete the joint
With the iron touching the bundle, feed solder into the joint until all wires are coated and the surface is smooth. Avoid creating a large blob; the joint should be neat and flush with all strands wet.
Tip: If you see blobs, reflow with a small amount of flux and re-solder. - 6
Inspect the joint and clean up
Look for a bright, uniform surface. If any dull areas appear, reheat and apply a touch more solder. Clean flux residue to prevent corrosion and bridge formation over time.
Tip: A good joint should be flexible enough to absorb minor movement without cracking. - 7
Insulate the joint
slide a piece of heat shrink tubing over the joint and center it. Use a heat gun or lighter to shrink the tubing evenly, covering the bare conductor and a small portion of each stripped wire.
Tip: Ensure tubing length provides strain relief; excess exposure can lead to fraying. - 8
Test the connection
Use a multimeter to verify continuity between the intended conductors and to confirm there is no short between any pair. If the test passes, your three-wire solder joint is ready for use in assembly or testing.
Tip: Document the test reading for future maintenance or troubleshooting.
Quick Answers
Can I solder three wires at once, or should I join two first?
Both methods work; joining all three in a compact bundle is common, but ensure even heat distribution to avoid cold joints. If in doubt, join two wires first, then add the third once the joint is stable.
You can join all three at once, but make sure heat is distributed evenly. If you’re unsure, join two first, then add the third after the first joint sets.
What gauge wires work best?
Common electronics use 22-18 AWG. Thicker wires require more heat and larger joints; adjust technique and iron power accordingly.
Typically 22 to 18 AWG wires are used. If you go thicker, use more heat and a bigger joint.
Is flux required for this task?
Flux improves wetting and reduces oxidation. Rosin-core solder contains flux, but additional flux can help with difficult wires or oxidized surfaces.
Flux helps the solder flow and protects against oxidation. If needed, add a little flux.
How do I test the joint after soldering?
Use a multimeter to check continuity between the joints and confirm there’s no short between any pair of wires. If readings are inconsistent, rework the joint.
Test with a multimeter to confirm continuity and no short circuits.
What safety precautions are essential?
Work in a ventilated area, wear eye protection, and keep flammables away. Let hot components cool before handling and never leave a live soldering iron unattended.
Ventilate the workspace and wear eye protection. Don’t leave the iron unattended while hot.
Watch Video
Top Takeaways
- Prepare ends and plan wire layout before soldering.
- Tin each conductor to improve joint reliability.
- Keep heat under control to avoid insulation damage.
- Insulate the joint thoroughly to prevent shorts.
- Test continuity and insulation after finishing.